This article was co-authored by wikiHow staff writer, Amy Bobinger. Amy Bobinger has been a writer and editor at wikiHow since 2017. She especially enjoys writing articles that help people overcome interpersonal hurdles but frequently covers a variety of subjects, including health and wellness, spirituality, gardening, and more. Amy graduated with a B.A. in English Lit from Mississippi College in 2011 and now lives in her hometown with her husband and two young sons.
This article has been viewed 67,779 times.
Learn more...
If you have a Dr. Brown’s bottle warmer, it may seem difficult to clean at first. However, the reservoir and warming basket are removable, and the basket is even dishwasher-safe, as long as you put it on the top rack. You can clean the rest with soapy water and a sponge or cloth. Then, every 4 weeks, run diluted vinegar through the reservoir to remove limescale deposits, which can prevent the warmer from working properly.
Steps
Performing Routine Cleaning
-
1Unplug the appliance and allow it to cool before you clean it. Don’t try to clean your Dr. Brown’s bottle warmer or remove the reservoir while the warmer is still plugged in. Also, if you’ve recently used the warmer, wait about 30 minutes after you unplug it to allow the water to cool to a safe temperature.[1]
- As with any electrical appliance, make sure you follow all safety precautions.
- Since the warmer uses steam to heat the bottles, the water inside may be extremely hot right after you use it.
-
2Remove the water reservoir and fill it with soapy water. Look at the right side of the bottle warmer and find the translucent water reservoir on the side. Pull up on it to remove it, then pour out any water that’s inside. Fill the reservoir with warm, soapy water, and set it aside to soak for about 5 minutes.
- Lay the reservoir on a towel or prop it in your sink to keep the water from spilling.
- Use a mild soap for cleaning the bottle warmer. Do not use any harsh solvents on the appliance, as you may damage it.
- For convenience, let the reservoir soak while you wipe down the appliance and wash the basket. That way, they can start drying while you finish rinsing the reservoir after it soaks.
Advertisement -
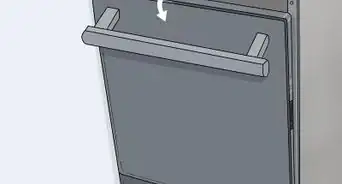
3Tilt the warmer to the side to empty the heating chamber. Hold the bottle warmer over your sink and open the cover, then tip the warmer sideways so the reservoir chamber is facing upward. If there’s any water in the heating chamber, it should drain into your sink.[2]
-
4Place the basket on the top rack of the dishwasher or wash it by hand. The plastic piece that holds the bottle or baby food container in place is machine washable, so if you’d like, you can place it on the top rack and wash it along with the rest of your dishes. If you’d prefer, however, you can wash it by hand with soapy water instead.[3]
- If you place the basket on the bottom rack in a dishwasher, the force from the sprayer could cause the basket to become dislodged or damaged.
- Place the basket on a thick towel and allow it to air dry.
-
5Wipe down the bottle warmer with a cloth or sponge dipped in soapy water. Dip a soft cleaning cloth or a non-abrasive sponge in warm water mixed with a few drops of mild dish soap and squeeze out any excess water. Then, gently wipe down the outside of your Dr. Brown’s bottle warmer, as well as the inside of the heating chamber.[4]
- Do not place the appliance underwater.
-
6Empty the reservoir, then add a small amount of uncooked rice and water. After the reservoir has soaked for about 5 minutes, pour out all of the soapy water. Then, pour in about 2 tbsp (24 g) of uncooked, non-instant rice, along with 1 US tbsp (15 mL) of water.
- The measurements of the rice and water don’t have to be exact.
- The fill hole on the reservoir is small, so you may need to use a funnel, or you can make one yourself by rolling a piece of paper into a cone.
- Do not use cooked rice for this. It will get mushy and become stuck in the reservoir, which could lead to bacteria and mold.
-
7Shake the reservoir vigorously for about 15-30 seconds. Place one finger over the fill hole on the reservoir and shake the container back and forth firmly. Tilt the reservoir different ways as you shake to ensure the rice comes in contact with every part of the inside surface.
- The agitation from the rice and the water will help break up and remove any soapy residue on the inside of the reservoir.
- Although the water in the reservoir isn’t used to make the bottle, if you don’t clean the reservoir out thoroughly, the steam could leave soapy residue on outside of the bottle, including the nipple.
-
8Pour out the rice and rinse the reservoir well, repeating if you need to. Pour out and discard the rice and water that are inside the reservoir, then flush the container out with running water several times. If you’d like, you can fill the reservoir about halfway with water, then shake the container the same way you did when it was filled with the rice.
- If you notice a lot of suds remaining in the reservoir, add more rice and water and shake the container more vigorously before rinsing again.
- Shake as much water out of the reservoir as you can.
-
9Air dry all of the parts, the//n put the warmer back together. Place the reservoir on the towel with the basket and let them both dry for at least an hour. The inside of the reservoir doesn’t have to be completely dry, since you’ll add more water to it anyway, but make sure the outside components are completely dry before you reassemble the warmer.[5]
- Push the reservoir back into its slot on the right side of the warmer to reattach it. You can leave the basket out until you’re ready to use it, or you can place it inside the chamber of the warmer, if you’d like.
- Clean your Dr. Brown's bottle warmer about once a week or any time you notice an odor coming from the reservoir.


Descaling the Warmer
-
1Descale your bottle warmer every 4 weeks or if it isn’t working. Over time, hard water can cause limescale buildup on the inside of your appliance. Running vinegar through the warmer will help break up that buildup, ensuring it can continue to work properly.
- Often, if the warmer stops working properly, it needs to be descaled.
-
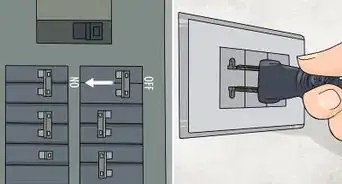
2Unplug the appliance and allow it to cool off. Do not attempt to clean the warmer while the power is on, as it could increase your risk of electrical shock. Also, wait at least 30 minutes after using the warmer before you attempt to clean it to ensure it’s not too hot.
-
3Empty the heating chamber and reservoir. Remove the reservoir from the right side of the Dr. Brown’s bottle warmer and empty it. Then, tilt the warmer to the side so the reservoir chamber is facing up, and let all of the water drain out of the heating chamber.
-
4Pour 2 oz (50 ml) of white vinegar and 4 oz (100 ml) of cold water into the reservoir. Vinegar is a safe and all-natural cleaner, and its high acidity makes it very effective at removing scale. Measure out about 2 oz (50 ml) of vinegar and pour it into the reservoir, then add 4 oz of cold water. Shake the reservoir gently to combine the water and vinegar.
- If you don’t have a spoon or a cup that measures in fl oz or ml, you can use a shot glass, which holds about 2 oz, to measure the vinegar. Fill the shot glass twice for the water.
- You can also mix the vinegar and water together ahead of time, if you’d prefer.
-
5Plug in the warmer and run the mixture through until the reservoir is empty. Replace the reservoir, then plug in the bottle warmer. Run it on a normal heating cycle as many times as it takes to empty the reservoir.[6]
- You may want to run it on whatever cycle you normally use so you don’t have to reprogram your settings. However, if you’d prefer to turn it to a higher temperature to shorten the descaling process, that’s fine.
-
6Unplug the warmer again, remove the reservoir, and rinse it thoroughly. Rinse the reservoir several times to ensure there is no vinegar residue left inside. Allow the reservoir to air dry for about an hour before you return it to the warmer.
- You can also pat the outside with a paper towel, then let it air dry for about 15 minutes.
-
7Fill the water reservoir and put it into place, checking for air bubbles. When your Dr. Brown’s bottle warmer is working correctly, you should see 2-3 air bubbles coming from the bottom of the reservoir after you place it into the compartment. This happens when some of the water is released into the warmer, so that’s a sign that all of the scale has been removed.
- If you don’t see the bubbles, repeat the descaling process until you do.


Warnings
- Do not use anything abrasive or any harsh solvents to clean the Dr. Brown’s bottle warmer.[8]⧼thumbs_response⧽
- Unplug the warmer before you clean it.⧼thumbs_response⧽
Things You’ll Need
Performing Routine Cleaning
- Mild dish soap
- Soft cleaning cloth or sponge
- Towel
- 2 tbsp (24 g) rice
- Water
- Funnel (optional)
Descaling the Warmer
- Measuring cup or spoon (or shot glass)
- Vinegar
- Water
- Paper towel (optional)


References
- ↑ https://images-na.ssl-images-amazon.com/images/G/01/00/00/26/31/36/36/2631363610.pdf
- ↑ https://images-na.ssl-images-amazon.com/images/G/01/00/00/26/31/36/36/2631363610.pdf
- ↑ https://images-na.ssl-images-amazon.com/images/G/01/00/00/26/31/36/36/2631363610.pdf
- ↑ https://images-na.ssl-images-amazon.com/images/G/01/00/00/26/31/36/36/2631363610.pdf
- ↑ https://images-na.ssl-images-amazon.com/images/G/01/00/00/26/31/36/36/2631363610.pdf
- ↑ https://images-na.ssl-images-amazon.com/images/G/01/00/00/26/31/36/36/2631363610.pdf
- ↑ https://images-na.ssl-images-amazon.com/images/G/01/00/00/26/31/36/36/2631363610.pdf
- ↑ https://images-na.ssl-images-amazon.com/images/G/01/00/00/26/31/36/36/2631363610.pdf
About This Article

To clean a Dr. Brown's bottle warmer, start by removing the reservoir and filling it with soapy water. Set the reservoir aside and let it soak for 5 minutes. While that's soaking, tilt the warmer to the side over a sink to drain any water inside of it. Once all the water is out, wash the basket by hand or place it in the dishwasher. Then, use a damp, soapy cloth to wipe down the outside of the warmer. When the reservoir is done soaking, dump out the water and add 2 tablespoons of uncooked rice and 1 tablespoon of water. Shake the reservoir vigorously for 30 seconds, then empty it and rinse it thoroughly. Finally, let all of the parts air-dry, then reassemble the bottle warmer. To learn how to descale your Dr. Brown's bottle warmer, keep reading!