This article was co-authored by wikiHow Staff. Our trained team of editors and researchers validate articles for accuracy and comprehensiveness. wikiHow's Content Management Team carefully monitors the work from our editorial staff to ensure that each article is backed by trusted research and meets our high quality standards.
There are 8 references cited in this article, which can be found at the bottom of the page.
This article has been viewed 12,277 times.
Learn more...
If you’ve chosen to play a silver flute as your instrument of choice, learn how to clean your flute to keep it in good shape. Clean the inside of your flute out after each playing session to dry it out and prevent moisture damage. Polish the outside of your flute using nothing more than a silver polishing cloth to clean it up. Never use silver polish or any other type of polish to clean the outside of your flute. Store your flute whenever you aren’t using it and place an anti-tarnish strip in the flute’s case to prevent tarnish and keep it shiny.
Steps
Removing Moisture from Inside
-
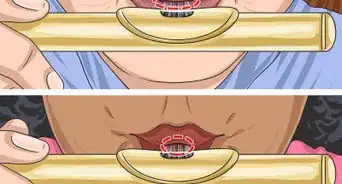
1Clean your flute out after each use to absorb moisture. Moisture builds up in your flute as you play because of the contact between your hot breath and the cold metal of the flute. Clean the inside of your flute out after each time you play it to prevent the buildup of moisture.[1]
- The colder the temperature is where you are playing your flute, the more moisture there will be inside your flute. This is because the difference in temperature between your breath and the metal is bigger.
- If you allow moisture to sit inside your silver flute, it can corrode the metal over time and cause it to stop playing well.
-
2Disassemble the flute into its 3 parts. Hold the body of the flute just above the keys in your non-dominant hand and gently unscrew the foot joint from the body, then set the joint piece down on a flat surface or in the flute’s case. Unscrew the head joint from the body next and set the body and the head joint down carefully.[2]
- The foot joint is the piece of the flute at the end furthest from where you put your mouth. The head joint is the piece that you put your mouth on. The body is the middle piece that has most of the keys.
Warning: Never hold your flute by the keys while you disassemble it. They are delicate and could easily get damaged.
Advertisement -
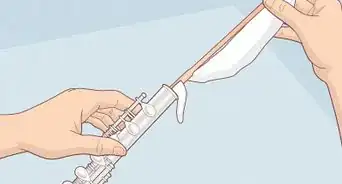
3Wrap a flute cleaning cloth around a flute cleaning rod. Thread a corner of the cleaning cloth through the eye at the end of the cleaning rod to hold it in place. Twist the rest of the cleaning cloth tightly around the rod in a spiral.[3]
- Most new flutes come with a cleaning cloth and a cleaning rod. If you do not have these, you can buy them at a music supply shop or online.
- If you have a cleaning rod but no cleaning cloth, you can use any kind of clean, soft, lint-free cloth. For example, a microfiber cloth or a piece of Egyptian cotton works well.
-
4Swab out each piece of the flute with the cleaning rod and cloth. Hold the cleaning rod in one hand and pick up 1 piece of the flute, then push the rod all the way inside the piece to insert the cleaning cloth. Twist the head joint all the way around the rod and cloth 4-5 times so the cloth absorbs all the moisture inside the piece, then pull out the rod. Repeat this for the remaining 2 pieces of the flute.[4]
- It doesn’t matter which piece you start with. The process for cleaning each piece is the same.
- If your cleaning rod doesn’t fit all the way through the body of your flute, clean it from both sides to ensure you dry up all the moisture.


Polishing and Preventing Tarnish
-
1Take your flute apart. Hold the flute by the part of the body that doesn’t have the keys on it. Carefully unscrew the head joint by twisting and pulling it to separate it from the body, then set it down in the case or on a flat surface. Repeat this for the foot joint and gently place both the body and the foot joint in the case or on a flat surface.[5]
- Remember not to touch the keys when you are taking apart your flute and to be very careful when setting the pieces of your flute down so you don’t damage the moving parts of the instrument.
-
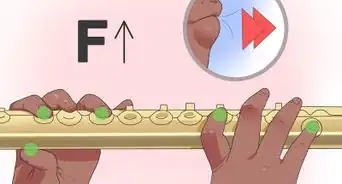
2Polish each piece of the flute with a silver polishing cloth. Pick up 1 piece of the flute and hold it in your non-dominant hand. Use your dominant hand to rub a silver polishing cloth back and forth over the piece using gentle, even strokes. Stop after your remove all fingerprints and smudges and the metal surfaces look evenly shiny. Repeat this for the other 2 pieces.[6]
- You can rub the cloth in 1 direction, rather than back and forth, if you find it easier to get a consistent shine this way.
Warning: Be very gently when you wipe the keys off and clean around them. Don’t force the cloth between or underneath the keys.[7]
-
3Clean the grooves of the tenons on the head and foot joints. The tenons are the parts of the joint pieces that screw into the body of the flute. Use your silver polishing cloth to wipe them clean, making sure to push it right up into the grooves of the tenons using a fingertip.[8]
- Since there is a hairline crack between the joint pieces and the body of the flute when it is all screwed together, grease, dirt, and oil from your hands can collect there.
-
4Avoid using silver polish or any other type of polish on your flute. Never use silver polish to try and shine up your flute because it can remove any silver plating on your flute or damage the keys. Don’t use any other type of polish or home remedies like toothpaste to clean the outside of your flute.[9]
- It’s normal for a silver flute or silver-plated flute to tarnish with use. You can use this method to remove fingerprints and make the outside surfaces of your flute shinier, but keep in mind that it will not remove all of the tarnish.
-
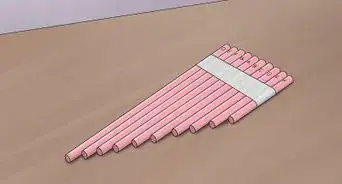
5Store your flute in its case whenever you aren’t using it. Disassemble, clean, and store your flute in its cases after each time you play it. Keep your silver flute enclosed in its case whenever you aren’t playing it to reduce its exposure to impurities in the air.[10]
- Tarnish does not affect how the flute plays, it is purely aesthetic.
Tip: This is especially important in areas where the air contains more sulfur content, such as areas with volcanic activity or geothermal activity. Air with higher sulfur content causes silver to tarnish much faster
-
6Place an anti-tarnish strip in your flute’s case. Anti-tarnish strips are special paper strips, also known as silver protector strips, and will prevent further tarnishing when your flute is stored in its case. Purchase an anti-tarnish strip and place it in the flute’s case, right on top of the pieces of the flute, whenever you store your instrument.[11]
- You can get anti-tarnish strips online or from a jewelry store or music supply shop.


Warnings
- Be very careful with the keys of your silver flute when cleaning it. Never hold the flute by the keys when you are cleaning the inside and don’t force the cloth between the keys or rub them roughly when you’re polishing your flute.[12]⧼thumbs_response⧽
Things You’ll Need
Removing Moisture from Inside
- Cleaning rod
- Cleaning cloth
Polishing and Preventing Tarnish
- Silver polishing cloth
- Anti-tarnish strip


References
- ↑ https://www.youtube.com/watch?v=7wJiDbcw3Zs&feature=youtu.be&t=18
- ↑ https://www.youtube.com/watch?v=f4_jEQrFlD4&feature=youtu.be&t=490
- ↑ https://www.youtube.com/watch?v=7wJiDbcw3Zs&feature=youtu.be&t=36
- ↑ https://www.youtube.com/watch?v=7wJiDbcw3Zs&feature=youtu.be&t=68
- ↑ https://www.youtube.com/watch?v=f4_jEQrFlD4&feature=youtu.be&t=490
- ↑ https://www.youtube.com/watch?v=3uNRRVw3iYk&feature=youtu.be&t=35
- ↑ https://www.youtube.com/watch?v=3uNRRVw3iYk&feature=youtu.be&t=59
- ↑ https://www.youtube.com/watch?v=Y-B_8qzyxtY&feature=youtu.be&t=147
- ↑ https://www.youtube.com/watch?v=3uNRRVw3iYk&feature=youtu.be&t=35
About This Article