wikiHow is a “wiki,” similar to Wikipedia, which means that many of our articles are co-written by multiple authors. To create this article, 9 people, some anonymous, worked to edit and improve it over time.
This article has been viewed 52,002 times.
Learn more...
Whether playing, singing, or listening, music is a creative process. Creating music can be fun and enjoyable, and doesn't need to be difficult. It can be just as easy to create musical instruments.
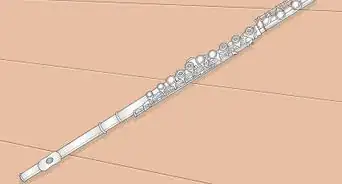
One of the simplest instruments to make is the flute. The family of flutes includes instruments such as whistles and recorders, where the player blows air directly into the instrument, and transverse flutes where the player blows across a hole in the mouthpiece to produce a sound. The standard flute found in bands and orchestras is a transverse flute.
Steps
Creating a Pan Flute With Drinking Straws

-
1Use straws for a simple pan flute. The pan flute, or pan pipe, is a type of flute consisting of a group of small pipes of graduated length to produce a melody. Pan flutes are usually made of wood, but many other materials can be used. A very basic pan flute can be built out of drinking straws.
-
2Gather several straws. Most people are comfortable making a pan flute with eight straws, but you can use more or fewer depending on how many you can manage on one instrument.Advertisement
-
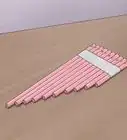
3Leave one straw uncut, then use a scissors to cut an inch off the second straw, so that each straw is an inch shorter than the previous one.
-
4Tear or cut a length of tape sufficient to wrap around the straws.
-
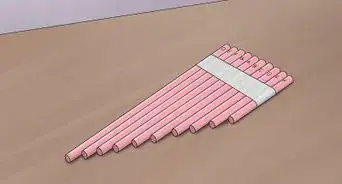
5Lay the straws side by side on the tape and fold the tape around the straws.
- If you wish, you can decorate the tape with markers or crayons either before or after you secure the straws.
-
6Play the pan flute by blowing across the top of the straws.
- Hold the straw you wish to play vertically under your lower lip.
- Gently blow across the top of the straw until you get a sound.


Creating a Pan Flute With Bottles
-
1Gather and wash the bottles you want to use. You can use as many bottles as you want, and any material, but at least six are recommended. Glass bottles are recommended, but you can also use plastic.[1]
-
2Blow a note on each bottle to determine their pitch.
- Raise the pitch by adding water to each bottle.
-
3Arrange the bottles according to pitch.
-
4Pick up a bottle and start playing.


Creating Flutes Out of Cardboard Tubes
-
1Make a cardboard tube kazoo.
- Gather your materials. You will need a cardboard tube like the ones from a roll of paper towels or toilet paper, a piece of waxed paper big enough to cover one end of the roll, and a rubber band.
- Decorate the tube, if desired. If you use crayons, be careful not to crush the tub. Or you can use paints. Be sure to let the paint dry overnight.
- Poke holes down the side of the tube. You can use a sharp pencil, or any instrument with a sharp point. Make sure children have adequate supervision when handling any kind of sharp instrument.
- Secure the waxed paper to one end of the tube with the rubber band.
- Play the kazoo by holding the open end to your mouth. Try to produce a kazoo sound by humming or singing syllables like "doo, doo, doo" into the tube.
- Vary the pitch of the notes by covering one or more holes with your fingers.
-
2Make a simple tube flute. You can create a simple flute using a small-diameter cardboard such as a paper towel or empty wrapping paper roll. Since making a cardboard flute requires the use of sharp objects like craft knives and scissors, young children should be supervised by an adult if they will be handling these tools.
-
3Cut the tube to the desired length. The Music Revitalization Project, an organization dedicated to keep concert band music alive, recommends a length of no more than two feet. [2]
-
4Using scissors or a craft knife, cut an oval hole approximately two inches from the end of the tube about one-half to one inch to create a sound hole (embouchure).
-
5Plug the end closest to the sound hole using modeling clay or any other medium that closes the end completely.
-
6Cut six holes down the length of the tube at even intervals. Make sure the holes are not bigger than your fingertips.
-
7Decorate the flute with crayons, markers, or any other medium. If you use paint, allow it to dry at least overnight.
-
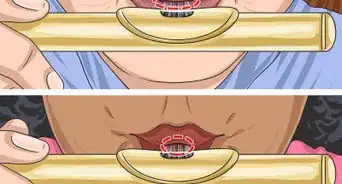
8Play the flute by holding it parallel to the ground and blowing across the sound hole. Create notes by covering and uncovering the finger holes in various combinations.
- Keep practicing until you get a sound.


Creating a Flute using PVC Pipe
-
1Use PVC for a more durable DIY flute. Polyvinyl Chloride (PVC) pipe is inexpensive and readily available. It can be cut like wood, and produces a durable flute that you can carry in a backpack without worrying about breakage. The following method is inspired by the instructions for the Native American-like PVC Flute featured on the Physics of Music site.[3]
-
2Gather these materials and tools. Please note that the use of drills, files, and other tools should only be used by persons who are proficient with using them.
- 3/4" PVC (Hot/cold water) pipe
- 1/2" PVC pipe (short length, optional)
- 3/4" to 3/4" PVC coupler
- 3/4" to 1/2" PVC reducer
- Wood dowel, cork or other plug material.
- Drill with 1/8", 1/4" and 3/16" bits
- Small file (jeweler's file) or equivalent
- Sandpaper
- Ruler
-
3Cut 3/4" PVC pipe to length.
-
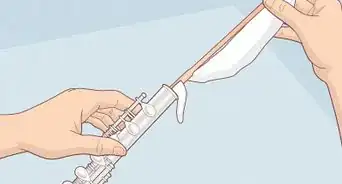
4Flatten approx 1.5" at one end with file, sandpaper, (or use a router or end mill).
-
5Drill 1/4" hole at very end of tube.
-
6Drill two 1/8" holes side by side for rectangular hole
-
7Use a small file to make the hole approximately 3/16" x 5/16" wide with (optional) undercutting as in the diagram on the website.
-
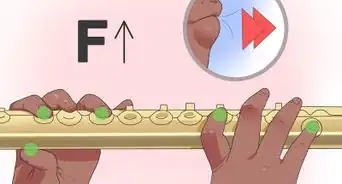
8Drill finger holes.
-
9Make and install the plug.
- Use cork, modeling clay, doweling, or a rubber stopper to make the plug.
-
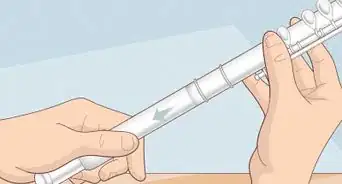
10Assemble the adapters as shown on the website.
- Insert pipe reducer into pipe coupler.
- Slide pipe coupler assembly onto closed end of flute.


Providing a Fun Learning Experience
-
1Focus on fun, especially for children. Music education enhances skills in other area of learning.[4] Kids can learn social skills, language skills, and building skills while having fun.
-
2Have a maker party. Small children can have fun making and decorating straw and cardboard tubes for flutes, while older children and adults can learn to handle sharp implements and power tools.
-
3Organize a band. Make flutes and other instruments of different sizes and shapes and let the children (and adults) make their own music.
- Host a virtual jam session. During times when it is not possible to get together, organize a concert online with a video conferencing service like Zoom. Using the meeting function of Zoom, make sure "Share Screen" and "Multiple participants can share simultaneously" are enabled.[5] There may be some false starts and stops while jamming, but that's all part of the fun.
-
4Have the kids write their own music to go with the instruments.
- Teach the kids to read music. Memorizing notes and scales are a necessary part of learning to read music. Make it more fun by letting children play the notes as they learn them.
-
5Create a presentation for a science or maker fair.
- Demonstrate principles of science and art by having the band play their homemade instruments and original music,


Things You’ll Need
-
For a Pan Flute:
- Straws. Wide straws for milkshakes or bubble tea work best, but regular straws also work.
- Tape. This can be any kind of tape, either masking tape, cellophane tape, or duct tape.
- Ruler.
- Scissors.
- Bottles of various sizes and shapes.
-
For a Cardboard Tube Flute:
- Empty paper towel or wrapping paper tubes.
- Scissors or craft knife.
- Crayons or other materials for decorating
-
For a PVC Flute:
- 3/4" PVC (Hot/cold water) pipe
- 1/2" PVC pipe (short length, optional)
- 3/4" to 3/4" PVC coupler
- 3/4" to 1/2" PVC reducer
- Wood dowel, cork or other plug material.
- Drill with 1/8", 1/4" and 3/16" bits.
- Small file (jeweler's file) or equivalent
- Sandpaper
- Ruler
Warnings
- When instructions call for the use of sharp tools, always be sure to take the proper precautions.⧼thumbs_response⧽
- Always make sure children are supervised when they are using potentially harmful material like PVC.⧼thumbs_response⧽
- Always make sure children are supervised when they are using potentially harmful tools like scissors or knives.⧼thumbs_response⧽
- There is some concern about the safety of using PVC.[6] If you are at all uncomfortable about using PVC, use an alternative such as bamboo.⧼thumbs_response⧽
- When drilling PVC, be sure to wear a face mask to avoid inhaling any toxic fume.⧼thumbs_response⧽


References
- ↑ http://www.bluebearwood.co.uk/bottle-blowing-music/
- ↑ http://www.musicrevitalizationproject.org/about.html
- ↑ B. H. Suits, Physics Department, Michigan Technological University, (copyright 1998-2015). Retrieved from http://www.phy.mtu.edu/~suits/naflute.html
- ↑ http://www.pbs.org/parents/education/music-arts/the-benefits-of-music-education
- ↑ https://www.ludwig-van.com/toronto/2020/03/25/guide-live-streaming-tips-musicians/
- ↑ http://www.motherearthnews.com/green-homes/the-vinyl-debate.