X
wikiHow is a “wiki,” similar to Wikipedia, which means that many of our articles are co-written by multiple authors. To create this article, 13 people, some anonymous, worked to edit and improve it over time.
This article has been viewed 67,350 times.
Learn more...
In an effort to save water and utilize the environment, a rain barrel is an easy and excellent tool for collecting recyclable water. However, proper cleaning and maintenance are necessary in order to keep the rain barrel in prime condition, keeping your water clear and clean, as well as preventing pests from residing in the barrel and your yard. Knowing how to sanitize and patch the barrel will allow it to survive for several years to come.
Steps
-
1Open valve of barrel. Let stagnant water stream from the barrel. After most of the water has escaped, the barrel should be light enough to safely move. If the barrel is found to still be too heavy, acquire further assistance in moving the barrel throughout the remaining steps.
-
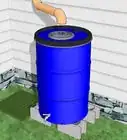
2Disconnect rain barrel from water collection system. Separate the barrel from its original location, removing any gutters or funnels used to direct water. If any obstructions are present in any of the barrel’s openings, clear them away.Advertisement
-
3Flip barrel over. Drain any remaining stagnant water from the barrel. Decaying material (such as leaves and dirt) will also flow out with the water. At this time, identifying if any animals are present in the barrel would be advised.
-
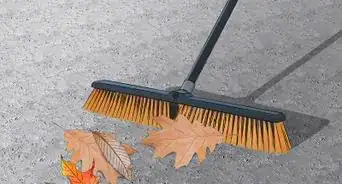
4Remove any sediment or foreign materials from the barrel. Keeping the barrel on the ground, rinse the inside with water and remove decaying materials. Use a hooked coat hanger to pull out and dislodge sludge from the barrel openings. Upon finishing the removal of foreign material, dispose of the material into a designated yard waste receptacle.
-
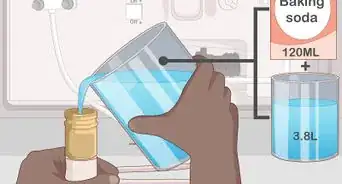
5Make cleaning solution. Within the five-gallon bucket, mix dish soap and water until suds are clearly visible. Fill bucket two-thirds of the way.
-
6Clean the outside of the barrel. Keeping the bottom end of the barrel up, sponge and clean off the outside of the container.
-
7Inspect the inside of the barrel. Flip the barrel to its upright position. Using a flashlight, investigate the insides of the container. It will most likely still be very dirty with sludge and hardened sediment.
-
8Put broom head into the barrel. Insert the broom head through one of the openings of the barrel. Allow it to fall to the bottom. If your barrel does not have an opening large enough for a broom head, instead stuff a sponge or mop head into the barrel and move it around with the broomstick.
-
9Attach broomstick to the broom head and clean the inside of the barrel. Screw the broomstick into the broom head inside of the barrel. Add the remaining cleaning solution into the barrel and scrub the inside thoroughly.
-
10Empty cleaning products from the barrel. Unscrew the broomstick from the broom head and remove the shaft. Dump the cleaning and dirt solution back into the five-gallon bucket. If the barrel is too heavy, acquire assistance to avoid self-harm. Once empty, feed the broom head out through one of the openings of the barrel. Dispose of the contents of the five-gallon bucket into a sink or proper wastewater manageable receptacle.
-
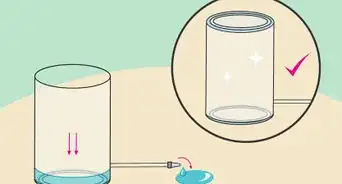
11Inspect the inside of the barrel. If the barrel appears to be satisfactorily clean, leave it to dry.
-
12Once dry, identify if the barrel has a hole or crack. Inspect the outside of the barrel for holes or any damage that would allow leaks to occur. If found, prepare to patch the area.
-
13Sand the area around the damage. Using sandpaper (coarse grade preferred) roughen the area around the hole or crack. The scratches will create a greater surface area in which the patch and sealant will cure.
-
14Patch the area. Place the thin plastic sheet over the damaged area, and secure it with the adhesive drywall patch. Using a waterproofing sealant and plastic spatula, pad sealant around the patch.
-
15Cure the patch. Store the barrel in a cool, dry place and allow sealant to cure (depending on the type of sealant used, this process will take between 6 and 24 hours).
-
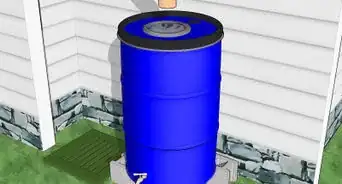
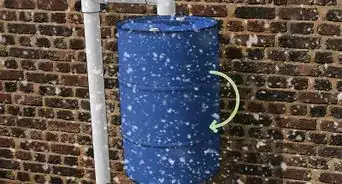
16Return the barrel to the water collection system. After cleaning and sealing of damage has completed, replace the barrel to its original location so that normal water collection may continue.


Advertisement
Community Q&A
-
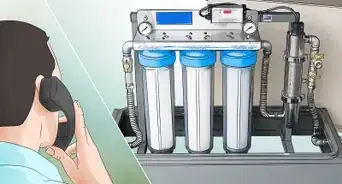
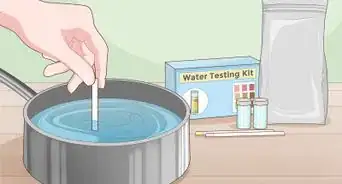
QuestionIs it possible to use a rain barrel for off-grid living? And what is a good way to filter the water?
 Community AnswerThis depends on your location, your average rainfall, and how much water you use. The average person uses over 25,000 gallons of household water per year, not including agriculture or industry. You will have to calculate your water needs and compare it to your local rainfall levels. You will probably need a cistern to store the rainwater, not barrels. You can use a charcoal/sand filter for non-drinking uses. Drinking needs will require additional treatment with heat, chemical purifiers, ozone, or other methods to kill bacteria.
 -
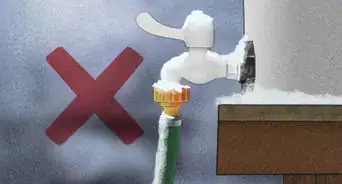
QuestionDo I have to bring in or drain a plastic rain barrel?Community AnswerDrain your rain barrel before winter so that the water does not freeze and crack the barrel. If you don't use the water from your barrel frequently, then drain it regularly to avoid stagnant water. Stagnant water contains all kinds of nasty things that you really don't want.
-
QuestionWhat can I do to keep mosquitoes from laying eggs in rain barrel?
 DonaganTop AnswererKeep the barrel covered, allowing only enough space for the inflow pipe.
Advertisement
Warnings
- Be aware that decaying leafs and organic material may reside inside of the barrel. Offensive odors may be present while cleaning occurs.⧼thumbs_response⧽
- If you infrequently clean your rain barrel, be cautious of possible animals or insects possibly occupying the inside of it.⧼thumbs_response⧽
- Do not attempt to move a full rain barrel on your own. It will be incredibly heavy.⧼thumbs_response⧽
Advertisement
Things You'll Need
- Rain barrel
- Five-gallon bucket
- Sponge
- Dish soap
- Hose and nozzle
- Coat hanger
- Broomstick and removable broom head
- Flashlight
- Sandpaper
- Thin plastic sheet
- Drywall patching
- Waterproofing sealant
- Plastic Spatula


About This Article
Advertisement