This article was co-authored by Chiara Corsaro and by wikiHow staff writer, Megaera Lorenz, PhD. Chiara Corsaro is the General Manager and Apple Certified Mac & iOS Technician for macVolks, Inc., an Apple Authorized Service Provider located in the San Francisco Bay Area. macVolks, Inc. was founded in 1990, is accredited by the Better Business Bureau (BBB) with an A+ rating, and is part of the Apple Consultants Network (ACN).
There are 8 references cited in this article, which can be found at the bottom of the page.
This article has been viewed 1,626 times.
It’s easy to capture and edit videos on an iPhone, but combining your videos into a longer movie can be a bit trickier. Fortunately, Apple provides a couple of free apps that make it easier to do more complex edits with multiple videos on your iOS device. In this article, we’ll describe how to merge videos together on your iPhone using iMovie and Clips.
Steps
iMovie
-
1Download iMovie from the App Store. If you don’t already have iMovie on your iPhone, you can get it for free from the App Store. Open the app and search for iMovie, then install it on your phone.
- iMovie is a video editing app developed by Apple. You can also use it on an iPad or a Mac computer. It’s not usually part of the software that comes with your phone, so you’ll need to install it.
-
2Tap the Create Project button. Open the iMovie app on your phone. The app will open to the Projects screen. Tap the square with a + inside to begin a new movie project.[1]Advertisement
-
3Select Movie. In the New Project popup window, you’ll see the option to create a movie or a trailer. Tap Movie to start editing your videos together.[2]
-
4Choose the clips you’d like to add to your movie. Selecting Movie will take you to your Moments album, which displays your photos and videos in groups sorted by the date they were taken. You can either select clips from Moments, or tap Media on the top left side of the screen to browse through other categories (such as Video, Photos, Albums, and Backgrounds).[3]
- To choose videos or images to add to your movie, just tap on them. When a video or image is selected, a blue circle will appear on the thumbnail with a checkmark inside.
- You can choose multiple videos at once, but don’t worry if you don’t find all the clips you want to add right away. You can add more videos during the editing process.
-
5Tap Create Movie. When you’ve chosen all the videos you want to add to your movie, go to the bottom of the screen and tap Create Movie. Underneath the Create Movie button, you’ll be able to see how many items you have selected and how long the resulting movie will be.[4]
-
6Scroll to the spot in the timeline where you want to add a new clip. If you’re not finished adding new videos to your movie, you can do so now. Drag the timeline under your movie preview screen to the spot where you want to insert a new clip.[5]
- The new clip will appear at the position of the playhead, which is the white vertical line that crosses the timeline.
-
7Tap the + Add button. The Add button is located under the movie preview screen on the left-hand side. Tap this button to browse your videos and photos for a new clip.[6]
-
8Select Video from the list of media. The Add button will open a list of your albums as well as other media you can add, such as audio or voiceover. Select Video from near the top of the list to start browsing your videos.[7]
-
9Choose a category from the Video menu. Tapping Video will open a list of video categories, including All, Recently Added, and special categories such as Slo-mo and Selfies. Tap the album you want to browse to find your clip.[8]
-
10Tap the clip you want to add to your movie. Each clip will be displayed as a timeline. When you tap a clip, a pop-up menu will appear. Tap the Add button (which looks like a circle with a + sign inside) to incorporate the clip into your movie.[9]
- You can also tap the Play button if you want to preview the clip before adding it.
- The … More button will give you additional options, such as adding the clip as a picture-in-a-picture or a split screen.
- Clips that are stored off your device will display a Download button when you tap on them. Select this button to download the clip to your phone so you can add it to your movie.
-
11Select any clip in the project to edit it. Once you’re back in the project screen, tap any clip in the timeline to make changes. A yellow outline will appear around the clip once you select it. After you’ve selected the clip, you can:[10]
- Trim the clip by dragging the yellow outline to your desired start and end points.
- Split the clip into shorter clips, detach it from the rest of your movie, duplicate it, or delete it.
- Adjust the speed of the clip.
- Raise or lower the volume of the clip.
- Add text or filters.
-
12Drag clips to change their position in the timeline. If you want to move a clip to an earlier or later point in the video, tap and hold it. Then, drag it to your preferred spot to change the order of the clips, and release the clip once you have it where you want it.[11]
- If you want to insert one clip into the middle of another one, you’ll have to split the first clip into separate sections.
-
13Tap the Transition buttons between clips to edit the transitions. When you combine clips in iMovie, the app will automatically add a Dissolve effect between the clips. Tap the Dissolve icon between the clips, which looks like a square with two triangles inside it, to open a menu of other transition options.[12]
- The None option removes the transition effect so that one clip abruptly starts after the other one ends.
- The Theme option varies depending on which theme you have selected for your movie project. The Simple theme is automatically applied to all new projects, but you can change this by opening Project Settings in the lower right corner of your project screen and selecting a new theme.
- Other transition options include Slide, Wipe, and Fade.
- Under the list of transition types, you can select how long you want the transition to last. The options are in increments of .5 seconds, with 2 seconds being the longest possible time for a transition.
-
14Touch Done to save your movie. When you’re satisfied with your project, tap Done. This will save your project with all the videos you selected. Once your movie is saved, you can edit, play, delete, or share it.


Clips
-
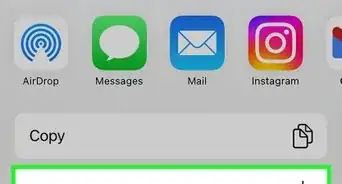
1Open the Clips app on your iPhone. Clips is a free movie editing app designed just for the iPhone and iPad. If you don’t already have Clips on your iPhone, download it from the App Store. Open the app to start a new project.
-
2Select the Projects button at top left. This button looks like a grey box with two narrow lines on top of it.[13]
-
3Choose New Project from the menu. In the Projects screen, tap the + New Project button to start making a new video. You can also select a pre-existing project to edit.[14]
-
4Tap the Images and Videos button in the lower left corner. When you start a new project, your front camera will automatically turn on so that you can record a video. To make a video from clips on your phone instead, tap the Images and Videos icon in the lower left corner of the screen. It looks like a simple drawing of a landscape.[15]
-
5Browse your photos and videos and select the clips you want. When you tap the button, a small menu will open up. Select the Photos option. This will open up a tiled gallery of all the photos and videos on your phone. Tap any videos or images you’d like to include in your movie to select them.[16]
- If you want to filter out everything but videos, tap the Albums tab to view different albums on your phone. From there, scroll down to Media Types and select Videos to view all your videos.
- You can select up to 20 video clips or images to include in your movie.
-
6Tap Add once you’ve selected your clips. When you’re satisfied with the videos you’ve selected, tap Add in the upper right corner to add them to your new project.[17]
-
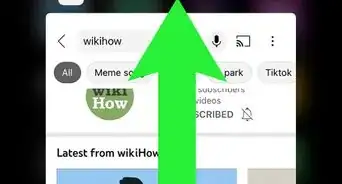
7Drag the clips in the timeline to reorder them. If you want to change where each clip appears in the video, tap and hold the clip you want to move. Drag the clip to a new position, then release the clip to drop it in place.[18]
-
8Select a clip in the timeline to edit it. After you’ve put your clips into an order you like, you can edit individual clips within the video. Tap a clip to select it, then use the menu at the bottom of the screen to make edits. Some of the editing options include:[19]
- Trimming or splitting a clip.
- Duplicating the clip.
- Adding special effects, such as filters, subtitles, text, or stickers.
-
9
-
10Tap the Share button to share or save your video. Your project will be automatically saved in Clips as you work, but you can also save it to your phone, share it to one of your contacts, or publish it using another app, such as Facebook or Instagram. To do this, tap in the lower right corner of the screen, then choose from one of the share or export options that appears in the Share screen.[20]


References
- ↑ https://support.apple.com/guide/imovie-iphone/create-a-movie-project-knae593d39ca/ios
- ↑ https://support.apple.com/guide/imovie-iphone/create-a-movie-project-knae593d39ca/ios
- ↑ https://support.apple.com/guide/imovie-iphone/create-a-movie-project-knae593d39ca/ios
- ↑ https://support.apple.com/guide/imovie-iphone/create-a-movie-project-knae593d39ca/ios
- ↑ https://support.apple.com/guide/imovie-iphone/add-video-clips-and-photos-knac787725/ios
- ↑ https://support.apple.com/guide/imovie-iphone/add-video-clips-and-photos-knac787725/ios
- ↑ https://support.apple.com/guide/imovie-iphone/add-video-clips-and-photos-knac787725/ios
- ↑ https://support.apple.com/guide/imovie-iphone/add-video-clips-and-photos-knac787725/ios
- ↑ https://support.apple.com/guide/imovie-iphone/add-video-clips-and-photos-knac787725/ios
- ↑ https://support.apple.com/guide/imovie-iphone/add-video-clips-and-photos-knac787725/ios
- ↑ https://support.apple.com/guide/imovie-iphone/arrange-video-clips-and-photos-knac788312/ios
- ↑ https://support.apple.com/guide/imovie-iphone/adjust-transitions-kna737b471f/2.3/ios/15.0
- ↑ https://support.apple.com/guide/clips/make-a-video-dev57f9eb69d/ios
- ↑ https://support.apple.com/guide/clips/make-a-video-dev57f9eb69d/ios
- ↑ https://support.apple.com/guide/clips/make-a-video-dev57f9eb69d/ios
- ↑ https://support.apple.com/guide/clips/make-a-video-dev57f9eb69d/ios
- ↑ https://support.apple.com/guide/clips/make-a-video-dev57f9eb69d/ios
- ↑ https://support.apple.com/guide/clips/move-clips-dev585014731/ios
- ↑ https://support.apple.com/guide/clips/edit-clips-devf7e94c16a/ios
- ↑ https://support.apple.com/guide/clips/share-your-video-devb27dec315/ios
About This Article