X
wikiHow is a “wiki,” similar to Wikipedia, which means that many of our articles are co-written by multiple authors. To create this article, volunteer authors worked to edit and improve it over time.
This article has been viewed 40,395 times.
Learn more...
In the event you lack access to a router, you can connect your Xbox 360 to your Mac so you can play games using your Mac’s wireless Internet connection. You can establish a connection between your Xbox 360 and Mac by modifying system preferences on both your computer and the Xbox 360.
Steps
-
1Connect a network cable to the back of your Xbox 360 console.
-
2Plug the other end of the network cable into an Ethernet port on your Mac computer.Advertisement
-
3Click on the Apple icon on your Mac computer, and select “System Preferences.”
-
4Click on “Sharing” and place a checkmark next to “Internet Sharing.”
-
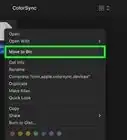
5Click on “AirPort” from the dropdown menu next to “Share your connection from.”
-
6Click on “Ethernet Adaptor (en2)” next to “To computers using.”
-
7Click on the “back” button at the top of the System Preferences window to return to the main menu.
-
8Click on “Network.”
-
9Select “WiFi” and click on the “DNS” tab.
-
10Write down the number displayed below “DNS servers.”
-
11Click on “OK,” then select “Ethernet.”
-
12Click on “TCP / IP,” and select “Off” next to “Configure IPv4.”
-
13Click on “Apply.” Your Mac will now be configured to work with your Xbox 360.
-
14Click on the “Guide” button on your Xbox 360 controller. The Guide button is the round button marked with an “X” in the middle of the controller.
-
15Navigate to “Settings” and select “System Settings.”
-
16Select “Network Settings,” followed by “Wired Network” if prompted to do so by your Xbox 360.
-
17Select “Configure Network,” and select “IP Settings” from the Basic Settings tab.
-
18Select “Manual,” then select “IP Address.”
-
19Enter the following IP address, then select “Done:” 192.168.2.2.
-
20Select “Subnet Mask” and enter 255.255.255.0.
-
21Select “Done,” then select “Gateway.”
-
22Enter the following IP address, then select “Done:” 192.168.2.1.
-
23Navigate to the tab labeled “Basic Settings” and select “DNS Settings.”
-
24Select “Manual,” followed by “Primary DNS Server.”
-
25Enter the DNS Servers numbers you wrote down previously in step #10 of this article.
-
26Select “Done,” then select “Done” once again.
-
27Press the “B” button on your Xbox 360 controller.
-
28Select “Test Xbox Live Connection” to verify that your Xbox 360 has been successfully connected to your Mac computer. You will now be able to connect to Xbox Live and play games on your Xbox 360 using your Mac’s Internet connection.[1]


Advertisement
Community Q&A
-
QuestionI don't have AirPort in my Apple menu. What can I do?
 Zzzsleepy0987Community AnswerTry do a spotlight search. To do a spotlight search, hit command + space. Then, type AirPort into the search bar.
Advertisement
Things You’ll Need
- Network cable


-Step-6.webp)
About This Article
Advertisement