This article was co-authored by wikiHow Staff. Our trained team of editors and researchers validate articles for accuracy and comprehensiveness. wikiHow's Content Management Team carefully monitors the work from our editorial staff to ensure that each article is backed by trusted research and meets our high quality standards.
There are 11 references cited in this article, which can be found at the bottom of the page.
The wikiHow Video Team also followed the article's instructions and verified that they work.
This article has been viewed 61,897 times.
Learn more...
Chard is an extremely healthy green vegetable that closely resembles spinach in form and function but comes from the same family as the beet.[1] Unlike beets, chard bulbs are inedible. Instead, the leaves and stems of chard are meant to be consumed.[2] Raw chard has a stronger and more bitter flavor than spinach, but cooking the chard neutralizes the bitterness. Cooked chard is common ingredient in ethnic Mediterranean dishes, but has many different applications and cooking methods.
Steps
Steaming Chard
-
1Boil water. Steaming is one of the most common methods of cooking chard and other leafy green vegetables. Start by bringing a pot of lightly salted water to a boil.[3] Salt raises the boiling temperature of the water, helping the chard to cook faster when you put it in.
- Placing a lid over your pot will help it boil faster.
-
2Put your chard in a steamer basket. Prepping the chard will depend on the type and age of the chard. Once it is ready, place the prepared chard in your steamer basket.[4] This basket will be fitting on top of your pot of boiling water.
- If you separated the leaves and stems of your chard because the stems were thick, only insert the stems for now.
- If this is the case, you'll lift the lid and insert the leaves after 1-2 minutes of the stems steaming.
Advertisement -
3Place your steamer basket. Remove the lid from your pot, place your steamer basket down in its place, and then place your lid on top of the steamer basket.[5] You need to make sure that the lid covers the steamer basket in order to keep the steam in.
-
4Steam the chard. Steam the chard for 3-5 minutes.[6] The exact cooking time varies. In most cases, thick, old chard is tougher and will take longer. Young and tender chard may take as little as three minutes to start to wilt and grow soft.
-
5Remove the steamer basket. Take the lid off of the steamer basket and place it to the side. Turn off the heat and withdraw the steamer basket from the pot. Allow any excess water to drain off. [7]
-
6Season the chard to taste. At this point the chard is cooked and ready. It can be used in a recipe or seasoned and served. There are many different ways to season chard. A popular and simple method involves lightly dashing with lemon and olive oil or salad dressing.[8]

Sauteing Chard
-
1Heat a pan. You'll start by heating a pan over medium heat.[9] Both nonstick pans and stainless steel pans work fine for this.
-
2Add oil. Add several tablespoons worth of olive oil to the pan.[10] If the oil gets super smoky, your pan is too hot. If you want a slightly tastier and less healthy variation, you can use butter instead of the oil.
- If you wish to add minced garlic or onion to the dish for flavor, now would be the time as well.[11]
-
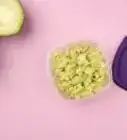
3Add the chard. Place your prepared chard in the pan. You can pile it up high, even into a mound. When the chard cooks it will lose a lot of volume and fit in the pan.[12] Add as much as you can fit without spilling.
-
4Sauté the chard. You will saute the chard for a total of 6-8 minutes.[15] Start by cooking the chard for about 2 to 3 minutes, then gently stir and rearrange the leaves so that the top leaves move to the bottom of the pan. As the leaves cook, they will start to wilt, soften, and darken.
-
5Finish cooking. As it cooks, the chard will turn dark green.[16] It will also lose a lot of volume. The chard is done when it is tender and soft but not mushy. Once your chard is done, remove it from heat and turn off the stove.
-
6Serve the chard or add it to a recipe.Chard can be added to soups, stews, salads, and many other recipes. However, if you wish to serve plain sauteed chard, you can add a squeeze of lemon, salt, pepper, or even red pepper flakes.[17] This is especially tasty if you sauteed using butter and garlic.
Boiling Chard
-
1
-
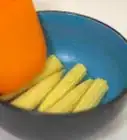
2Add the chard. Once the water has reached a rapid boil, add your prepared chard leaves.[20] Do not put a lid on top of the pot, you are boiling the chard rather than steaming it.
-
3Boil for three minutes. Cook the chard in boiling water for three minutes.[21] You can stir or press the chard down to make sure that it cooks evenly. It should cook down and turn dark green when it is about ready.
-
4Strain the chard. Use a colander to strain and press out excess water from the chard.[22] There should be a fair amount of excess water so be sure to do this thoroughly.
-
5Serve the chard or add it to a recipe. Chard has dozens of uses in various recipes, but if you are planning to serve the chard on its own, be sure to serve it quickly. It is best when warm and fresh. Toss it with butter, lemon, parmesan cheese, or whatever other spices you wanted to use and serve it while it is still hot.[23]
Picking and Preparing Chard
-
1Choose fresh, healthy chard. There are multiple varieties of chard, but unless you want it to be bitter and tough you want young chard. Look for firm, crinkly, smaller, deep red or green leaves with no brown spots or holes. Stems should be firm, but not too thick[24] . Smaller leaves provide a sweeter, less bitter taste.
- All chard is fairly similar, but ruby and rhubarb chard generally have a stronger flavor.[25]
-
2Wash the chard. Even if your chard is pre-washed you should wash it again. You may want to wash it multiple times if it came from a Farmer's Market. This is easiest when done in a sink or large bowl of water.[26]
-
3
-
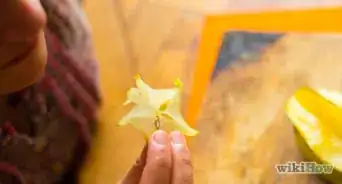
4Trim the chard. Unless you chard has especially narrow stems and ribs (the white or red vein running through the middle) you will need to trim your chard. You can easily cut the ribs out if you fold the chard in half.[29]
-
5Separate the leaves and the stems. While many people discard the stems and ribs, they can be used if you desire. You just need to start cooking them separately.[30] The stems and ribs take longer to cook as they are naturally tougher and more bitter.

Warnings
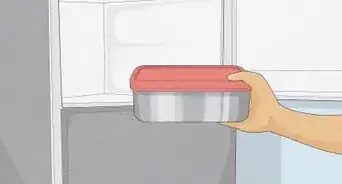
- Chard is best within 3 days of purchase. Store unwashed in your refrigerator's crisper drawer, preferably in a perforated vegetable storage bag.[33]⧼thumbs_response⧽
Things You'll Need
- Fresh chard
- Bowl of cold water
- Salad Spinner
- Kitchen knife or scissors
- Tongs or spoon
- Olive oil
- Minced garlic
- Salt
- Pepper

References
- ↑ http://www.whfoods.com/genpage.php?tname=foodspice&dbid=16
- ↑ http://blog.foodnetwork.com/healthyeats/2013/09/26/in-season-swiss-chard/
- ↑ http://www.whfoods.com/genpage.php?tname=preptip&dbid=149
- ↑ http://www.whfoods.com/genpage.php?tname=preptip&dbid=149
- ↑ http://www.whfoods.com/genpage.php?tname=preptip&dbid=149
- ↑ http://www.whfoods.com/genpage.php?tname=preptip&dbid=149
- ↑ http://www.whfoods.com/genpage.php?tname=preptip&dbid=149
- ↑ http://www.whfoods.com/genpage.php?tname=preptip&dbid=149
- ↑ http://penandfork.com/recipes/how-to-cook-swiss-chard/
- ↑ http://penandfork.com/recipes/how-to-cook-swiss-chard/
- ↑ http://penandfork.com/recipes/how-to-cook-swiss-chard/
- ↑ http://penandfork.com/recipes/how-to-cook-swiss-chard/
- ↑ http://penandfork.com/recipes/how-to-cook-swiss-chard/
- ↑ http://penandfork.com/recipes/how-to-cook-swiss-chard/
- ↑ http://penandfork.com/recipes/how-to-cook-swiss-chard/
- ↑ http://penandfork.com/recipes/how-to-cook-swiss-chard/
- ↑ http://penandfork.com/recipes/how-to-cook-swiss-chard/
- ↑ http://www.whfoods.com/genpage.php?tname=recipe&dbid=100
- ↑ http://www.whfoods.com/genpage.php?tname=recipe&dbid=100
- ↑ http://www.whfoods.com/genpage.php?tname=recipe&dbid=100
- ↑ http://www.whfoods.com/genpage.php?tname=recipe&dbid=100
- ↑ http://www.whfoods.com/genpage.php?tname=recipe&dbid=100
- ↑ http://www.whfoods.com/genpage.php?tname=recipe&dbid=100
- ↑ http://www.bbcgoodfood.com/glossary/swiss-chard
- ↑ http://www.bbcgoodfood.com/glossary/swiss-chard
- ↑ http://www.cookinglight.com/cooking-101/techniques/how-to-prepare-swiss-chard/swiss-chard-prep-wash
- ↑ http://www.cookinglight.com/cooking-101/techniques/how-to-prepare-swiss-chard/swiss-chard-prep-wash
- ↑ http://penandfork.com/recipes/how-to-cook-swiss-chard/
- ↑ http://www.cookinglight.com/cooking-101/techniques/how-to-prepare-swiss-chard/swiss-chard-prep-fold-leaf
- ↑ http://www.bbcgoodfood.com/glossary/swiss-chard
- ↑ http://www.bbcgoodfood.com/glossary/swiss-chard
- ↑ http://www.bbcgoodfood.com/glossary/swiss-chard
- ↑ https://extension.illinois.edu/veggies/chard.cfm
About This Article

To cook chard by sautéing, start by heating a pan over medium heat, then add olive oil, and minced garlic or onion, if desired. Next, add the chard and sauté for 2 to 3 minutes, then cook for 3 minutes or until the leaves are dark green and tender. Serve the chard plain, or seasoned with salt, black pepper, and a squeeze of lemon. Alternatively, use the chard in recipes for soups, stews, and salads. For instructions on how to cook chard by boiling and steaming, scroll down.