This article was co-authored by Garrison Hullinger. Garrison Hullinger is an Interior Designer and the President of Garrison Hullinger Interior Design (GHID). With more than 15 years of experience, he specializes in client-centered design that balances beauty and warmth with comfort and functionality. Garrison and GHID’s work has been featured in numerous publications such as The New York Times, The Wall Street Journal, and Interior Design Magazine. Garrison attended Oklahoma Christian University.
There are 14 references cited in this article, which can be found at the bottom of the page.
This article has been viewed 17,367 times.
Covering dining room chairs can be an impactful and cost-effective way to cover flaws in existing furniture, or liven up space with new colors, textures, and creative flair. Dining room chairs can be beautifully covered with fabric in the form of slipcovers, upholstery, or eye-catching textile accents. Alternatively, they can be covered with soft accessories or a fresh coat of paint. Whether you’re anticipating a ballroom full of seats for a celebration, plan to refurbish the tired set around your dinner table, or dream of upcycling a flea market treasure, there are plenty of ways to spruce up your seating.
Steps
Covering Chairs with Store-Bought Slipcovers
-
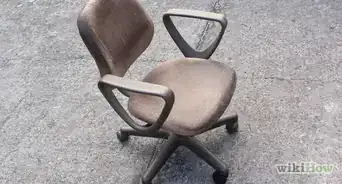
1Decide what parts of your chair you want to cover. Slipcovers come in many formats and are designed to cover different parts of a chair.[1] Some slipcovers will cover the top of the chair seat; others elegantly cover the chair backs, however, others cover the entire chair from the topmost point down to the floor with a pleated flounce. After some browsing, you’ll find a style that will be just right for your chairs, both practically and visually.
-
2Determine what shape and size slipcovers will fit your chair. Measure the dimensions of all parts of your chair, and cross-reference these numbers with the dimensions of the slipcovers you see online and in stores. Ensure that the shape of the slipcover will be compatible with the structure of your chair.
- Measurements to take include the height, length, and depth of the chair back and chair seat, as well as the distance from the top of the back and seat to the floor. If your chair has arms, measure their height and length. If your chair has a curved or tapered back, make note of the different widths.[2]
- Many slipcover designs are intended for rectangular-topped chair backs. If your chairs backs are rounded or scalloped, you’ll want to narrow your search based on this feature before falling in love with a slipcover style that won’t fit.
- Take a look at online customer reviews to see if slipcovers tend to run large or small.[3]
Advertisement -
3Decide which type of fabric you want. Think about what color, pattern, texture, and level of comfort you’d like your slipcover to provide. Also, consider the amount of time and energy you’re willing to dedicate to maintenance, and make sure to select the right type of fabric to suit your lifestyle and intended use for the chair.[4]
- If you are looking to protect your dining room chairs from messy spills, waterproof vinyl or stain-resistant microfiber may be the right choice. If you are seeking an airy, elegant design, you may look for a patterned slipcover whose fabric contains cotton or linen.[5]
- As for maintenance, some textiles wrinkle easily and may require ironing. Those that don’t stretch may appear misshapen without constant readjustments. Additionally, certain fabrics can be machine-washed, while others will have to be spot-cleaned or dry-cleaned.[6]
-
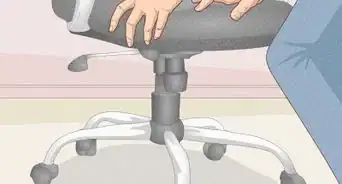
4Fasten the slipcover onto your chair. Pre-made slipcovers may simply stretch securely over your chairs. Or, they may have fastenings such as Velcro, buttons, snaps, or ties that you can loop around the chair bottom or back slats.[7]


Making Fabric Covers and Accessories
-
1Accessorize a chair with fabric sashes. This approach is especially popular for dining room chairs used for wedding receptions and other special events. It involves artfully weaving, draping, and tying lengths of fabric around the top, corners, and slats of a chair back. Lengths should be between 6 and 12 inches wide and approximately 3 yards long.[8]
- Lightweight, translucent materials like tulle and organza are perfect choices for adding ethereal hints of color. Satin, which has more body and shine, may be used to create sophisticated bows and swags.
- Embellish fabric sashes with flowers, signs, jeweled accessories, and narrower ribbons in contrasting colors.[9]
-
2Drape sheepskin rugs, woven rugs, or blankets over chairs. For warmth, coziness, and lots of texture place a rug or blanket across the chair seat or back.[10] Sheepskin and woven textiles can soften up dining room chairs in a number of ways.[11]
- The organic edges and natural fibers provide visual and tactile relief from the austere lines and cold, hard edges that some chairs may have. Plus, when seated, you can adjust the rug for customized comfort against a hard seat or chair back.
- You can take your favorite fabrics and create a slipcover that does not need a lot of sewing.
- For example, you can use sheepskin or sherpa, a type of faux hide.
- Drape it across the entire top of the chair. It can be like a layering piece that creates a boho textural impression.
-
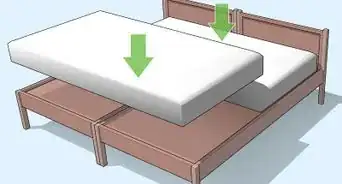
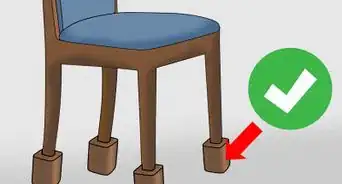
3Attach seat cushions to your dining room chairs. If your seats do not have any upholstery but you would like to add a plush surface, cushions will do the trick. Store-bought seat cushions can be fastened to your seat back with ties, Velcro, snaps, or button closures. Some are designed with non-slip bases.[12]
- Chair cushions are also referred to as chair pads.
- If you decide to use a throw pillow, check to see that it is the correct shape and size for your seat, and that you are not elevated to an uncomfortable height when seated at the dining room table. You may wish to attach ties or fasteners to the two back corners to keep your cushion in place.
-
4Cover a rectangular chair back with a pillowcase. Slide a pillowcase onto the chair back until it is snug. If the pillowcase is too long, seam-rip the side seams at the bottom until it lies smoothly. Fold the excess fabric to the inside, creating a crisp finish along the inside bottom edge.[13]
- Wrap a ribbon around the pillowcase at the base of the chair back to secure it and add a decorative finish.[14]
-
5Sew a slipcover out of fabric. Pin fabric around the sides of your dining room chair, beginning with the chair back. Pin the front fabric piece to the back, pulling it taught to ensure a snug fit. Then, pin around the chair seat and connect it to the fabric over the chair back. Machine-sew these pieces together. To cover the chair legs, you can attach a ruffle or pleated skirt with your desired length and fullness.[15]
- When pinning, make sure the right side of the fabric (i.e. the side you want to be visible) is facing in, and that any motifs or stripes are arranged as you want them in the finished slipcover.
- When sewing, be careful not to sew directly over the pins to avoid breaking your machine needle.
- Press the sewn seams open with iron to ensure crisp edges around your new slipcover.


Applying a Fresh Coat of Paint
-
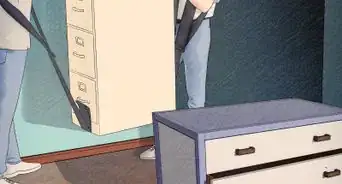
1Remove all fabric elements from your chair. Any upholstery and seat cushions should be taken off so that the surface you wish to paint will be entirely exposed.[16] You can flip your chair over to unscrew the seat cushions.[17] If you plan to restore these fabric elements once the chair has been painted, place them somewhere clean and dry where they will not be covered in paint or sawdust.
- You may wish to take the opportunity to incorporate new fabric elements to your chair refurbishment by reupholstering worn-out fabrics, if applicable.
- If you are unable to detach fabric elements from your chair, cover them completely with plastic and seal the edges tightly.[18]
-
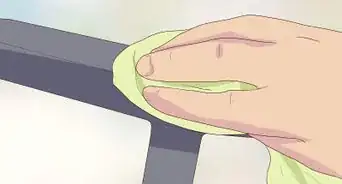
2Remove dirt and old varnish. If your chair is made of wood and features mostly smooth flat surfaces, you can sand it with medium-grit sandpaper, working in the direction of the wood grain. If your chair is made of wood but has lots of fine detail or difficult curved edges, a spray-on chemical stripper may be an easier solution.[19] If your chair is made of plastic or metal, you can simply wipe down the surfaces with a cleaning spray to remove any oils and dirt.
- Once your chair has been sanded, wipe it down with a damp cloth to remove sawdust.
- If using a chemical stripper, scrape away the residue 10 minutes or so after applying the product and wipe with a damp cloth.[20]
-
3Apply paint in thin layers and let dry completely. Layers should be thin and even to avoid drips and to build up a smooth, opaque finish. Continue adding thin coats of paint until the desired opacity is achieved.
- Paint can be applied to your chair with a brush, roller, or sprayer. Different methods require different setup and will yield different results and require a different setup.
- You’ll want to have a designated space and the rights supplies for spray and airbrush painting.
- A simple, good brush can be can create a beautiful finish on your dining room chairs.[21]


Re-Upholstering Your Chairs
-
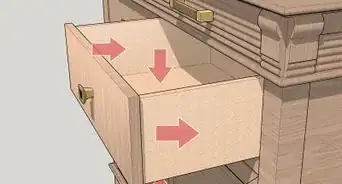
1Remove all upholstered elements from your chair. The seat of your chair can be removed by unscrewing it from the bottom.[22] Typically, dining room chairs feature upholstered seats, but if yours has an upholstered back or arms, the process will be the same.
-
2Take off the dust cover and upholstery fabric. The dust cover is the piece of fabric on the reverse side of the upholstered piece. Typically this can be detached by pulling out the staples, nails, tacks with a staple remover or tack puller tool. Once this has been removed, you will be able to pull out the fastenings attaching the old upholstery fabric to your chair seat frame. Remove all layers of fabric.[23]
-
3Dispose of the padding if it is old or worn. If your chair features foam padding that is discolored or sagging, dispose of it. If it is an older chair and has been padded with batting or straw, you can choose to replace these with new cushioning.[24]
-
4Secure a layer of cambric over the top of your chair seat frame. Add staples or upholstery tacks around the perimeter of the chair seat. This extra layer of supportive fabric will prevent new cushioning from sagging between the slats of your seat.[25]
-
5Cut out a layer of foam in the shape of your chair seat. The easiest way to do this is to trace the shape of your chair seat directly onto the foam you’ll be using. If you want to create a rounded edge, shave off the top corners and sides until the desired shape is achieved.[26]
-
6Arrange the frame and foam face-down on a layer of batting. Fold the edges of the padding around the fame and foam until they wrap around the bottom edge. With a permanent marker, mark the point where the batting is the right length on each side.
- For example, it may require 2 or 3 inches of batting to wrap around the seat frame and foam. Marking the line on each side will ensure you have the right amount.
-
7Cut out the batting and staple it around the seat frame. Staple or tack all 4 sides first. For the corners, pull the batting taught towards the center of the chair to distribute the volume. Secure it in the corner and then tack down the excess batting to the edges. Trim away the excess batting once all sides and corners are secure.[27]
- Place one staple into the center of each of the 4 sides first, to keep everything in place. Then, work your way toward the outside edges, pulling the batting taught along the way.[28]
-
8Arrange the seat face-down on top of your upholstery fabric. The right side of the upholstery fabric (i.e. the part you want to be visible) should also be face down.[29]
- If your fabric has a stripe or patterned motif, double-check that the stripe and motif are centered and that they’ll be facing in the desired direction.
-
9Cut out and staple your upholstery fabric to the padded seat frame. Following a similar process as with the batting, wrap the upholstery fabric around the padded frame and mark the length on each side before cutting. Then, staple the four sides to the frame, starting in the center of each. Next, pull in the corners and secure in the center before attaching the excess fabric.[30]
- When stapling or tacking the upholstery fabric, pay close attention to making the corners neat. After stapling in the center of the corner, keep the corners nice and neat by tugging the fabric as taut as possible to avoid any visible pleats or puckering.[31]
-
10Finish the bottom with a new cambric dust cover. Trace the old dust cover, if your seat had one, around a new piece of fabric and add 1 inch around the edges before cutting the new piece out. Fold over the edges neatly and place the rectangular piece onto the back of your upholstered seat frame. Staple around all edges.[32]
- Press the folded edges with an iron before attaching for a crisp finish.
-
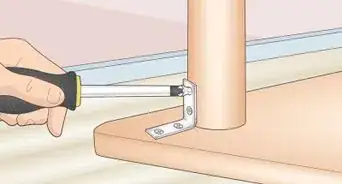
11Screw the newly upholstered seat base back into your chair. Re-use the original hardware if it’s still in good condition, or swap it out for new hardware in the same size and style.[33] You may need to punch holes through the dust cover to locate the screw channels.


References
- ↑ https://visualhunt.com/dining-chair-covers-types-inspirations-and-diy-tips
- ↑ https://visualhunt.com/dining-chair-covers-types-inspirations-and-diy-tips
- ↑ https://www.awebtoknow.com/reviews/best-dining-room-chair-covers/
- ↑ https://www.awebtoknow.com/reviews/best-dining-room-chair-covers/
- ↑ https://visualhunt.com/dining-chair-covers-types-inspirations-and-diy-tips
- ↑ https://www.awebtoknow.com/reviews/best-dining-room-chair-covers/
- ↑ https://www.awebtoknow.com/reviews/best-dining-room-chair-covers/
- ↑ https://homesteady.com/how-6691084-diy-chair-sashes.html
- ↑ https://www.elegantweddinginvites.com/wedding-blog/20-creative-diy-wedding-chair-ideas-with-satin-sash-s/
- ↑ https://www.onekingslane.com/live-love-home/decorating-with-rugs/
- ↑ https://www.theartofdoingstuff.com/5-ways-to-use-an-ikea-sheepskin/
- ↑ https://homeguides.sfgate.com/change-cushions-chairs-32273.html
- ↑ https://www.youtube.com/watch?v=mYT-z6a_SSY
- ↑ https://www.youtube.com/watch?v=mYT-z6a_SSY
- ↑ https://www.hgtv.com/design/make-and-celebrate/handmade/how-to-make-a-custom-dining-chair-slipcover
- ↑ https://www.hgtv.com/design/rooms/kitchens/painting-kitchen-chairs
- ↑ http://lovegrowswild.com/2013/10/dining-chair-makeover-how-to-strip-paint-and-recover-chairs/
- ↑ https://www.hgtv.com/design/rooms/kitchens/painting-kitchen-chairs
- ↑ http://lovegrowswild.com/2013/10/dining-chair-makeover-how-to-strip-paint-and-recover-chairs/
- ↑ http://lovegrowswild.com/2013/10/dining-chair-makeover-how-to-strip-paint-and-recover-chairs/
- ↑ https://www.hunker.com/13411401/painting-vs-spray-painting-furniture
- ↑ https://www.onlinefabricstore.net/makersmill/how-to-reupholster-dining-chairs/
- ↑ https://www.onlinefabricstore.net/makersmill/how-to-reupholster-dining-chairs/
- ↑ https://www.onlinefabricstore.net/makersmill/how-to-reupholster-dining-chairs/
- ↑ https://www.onlinefabricstore.net/makersmill/how-to-reupholster-dining-chairs/
- ↑ https://www.onlinefabricstore.net/makersmill/how-to-reupholster-dining-chairs/
- ↑ https://www.onlinefabricstore.net/makersmill/how-to-reupholster-dining-chairs/
- ↑ https://www.onlinefabricstore.net/makersmill/how-to-reupholster-dining-chairs/
- ↑ https://www.onlinefabricstore.net/makersmill/how-to-reupholster-dining-chairs/
- ↑ https://www.onlinefabricstore.net/makersmill/how-to-reupholster-dining-chairs/
- ↑ https://www.hgtv.com/design/rooms/living-and-dining-rooms/how-to-re-cover-a-dining-room-chair
- ↑ https://www.onlinefabricstore.net/makersmill/how-to-reupholster-dining-chairs/
- ↑ https://www.hgtv.com/design/rooms/living-and-dining-rooms/how-to-re-cover-a-dining-room-chair
About This Article