This article was co-authored by wikiHow Staff. Our trained team of editors and researchers validate articles for accuracy and comprehensiveness. wikiHow's Content Management Team carefully monitors the work from our editorial staff to ensure that each article is backed by trusted research and meets our high quality standards.
There are 12 references cited in this article, which can be found at the bottom of the page.
The wikiHow Video Team also followed the article's instructions and verified that they work.
This article has been viewed 19,037 times.
Learn more...
If you've lost the lid to your frying pan or if it didn’t come with one, it can be tricky to figure out how to cover it. However, lots of items that you already have in your kitchen can double as a lid! Keep in mind that covering a frying pan for the entire cooking time isn't the best idea if you're trying to achieve a crispy, fried texture. Think of it as a special trick to cook the inside while keeping the outside nice and brown—perfect for cooking meats, veggies, eggs, and potatoes. It’s important to use certain safety precautions when you’re pan-frying foods because oil splatters can cause a mess and, if you’re not careful, leave you with some nasty burns.
Steps
Improvising a Lid
-
1Place a baking sheet over the pan. If you have a clean baking sheet, lay it on top of the pan to retain the steam and, subsequently, the moisture. Make sure the ingredients in the pan don't pile up higher than the sides so no food comes in contact with the baking sheet.[1]
- Once you're ready to take the baking sheet off, use an oven mitt because the entire thing might get hot from sitting on top of the pan.
-
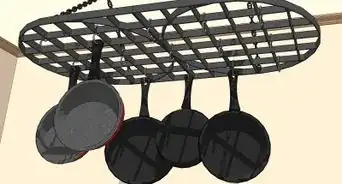
2Put another frying pan on top. If you have a pan that's roughly the same size as the pan you're using (or a little larger), flip it upside down and place it on top of the pan. Turn the handle to the side so it covers more surface area instead of letting steam out due to a larger gap caused by the 2 handles on top of one another.[2]
- If you're cooking a small amount of food in the frying pan, it's okay to use a smaller pan—just bunch the food up into a small pile near the side of the pan and lay the smaller pan over it.
Advertisement -
3Use a lid from another pan or a universal-sized lid. Search your cupboards for a lid that's roughly the same diameter as the frying pan. If you have one of those nifty one-size-fits-all lids, use that![3]
- A universal lid has grooves on it that grip to the sides of the pan or pot so you don't have to worry about it sliding off midway through cooking.
-
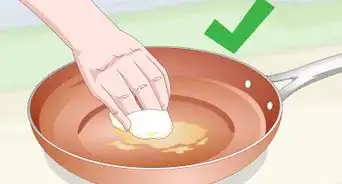
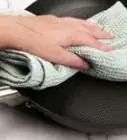
4Wrap 2 sheets of foil around the edges of the pan. Tear off 2 sheets of aluminum foil large enough to completely cover the top opening of the pan. Place them over the hot pan after you've added your veggies or meats and lightly scrunch the foil around the sides. It's best to do this when the pan isn't too hot so you don't burn your fingers.[4]
- If the sides of the pan are hot to the touch, wear oven mitts or layer your hands with thin towels to protect your fingers from the heat.
- Don’t scrunch the foil onto the sides so much that it’s hard to lift up without tearing. The idea is that you can lift it up gently to check on the food and then lay it back down.
- This is a good option if you know exactly how long you need to cook the meat or veggies because once you take the foil off, it'll be a little harder to put back on because it (and the steam) will be hot.
Warning: Aluminum can leech into the food you're cooking, but it's not a worrisome amount. However, if you are cooking for children or someone with renal disease, it's best to avoid cooking with aluminum foil.[5]
-
5Use a splatter shield or screen to minimize oil jumping out of the pan. Invest in a splatter shield that fits over your pan so you’re protected from specks of hot oil. Grab it at the end of the long handle and place it over the pan, letting it rest on the outer rim. If it’s a wonky size and won’t stay on the pan, hold it in place by the end of the handle.[6]
- As an alternative, use a fine-mesh strainer. Just be sure it has a long hand or heat-proof grips so you can pick it up easily without burning your hand.
- You can buy them online or from most superstores that have a cooking tools section.

Pan-Frying Foods with a Lid
-
1Cover the pan for the first half of cooking chicken or fish. After heating the oil in the pan at medium heat, add the chicken or fish and put a lid on the pan so the inside gets a head start on cooking. Once it's halfway done, remove the lid and crank up the heat a little to get the outside crispy and brown.[7]
- This is also a great method for pan-frying tender cuts of beef and game meats.
- If you like soft, white varieties of fish, this is a great way to achieve that moist, savory texture of Dover sole or sea bass.
Tip: Add the food to the pan slowly so it doesn’t cause the oil to splash. If you’re using lots of oil, use tongs to transfer the meats into the pan to lessen the chance of burning your fingers.[8]
-
2Use a lid to cook the insides of the veggies during the first half of cooking. If you're cooking veggies, heat the pan to medium heat and add your oil once it's hot. Rinse and dry your veggies and add them to the pan. Put a lid on it for 2 minutes and leave it alone. Remove the lid, redistribute the veggies and let them brown for 2-3 minutes with the pan uncovered.[9]
- Make sure the pan is large enough so the veggies sit in a single layer. This will ensure even cooking and help minimize splatters.
- If you have a non-stick pan, you can use water instead of oil to keep the veggies from sticking. When the water is sizzling and jumping around, the pan’s hot and ready to go.
-
3Fry a perfect egg by covering the pan after the white part starts to firm. Once the egg is halfway cooked (that is, the bottom of the whites is solid and the edges are browning), put a lid over part of the pan for 2 minutes. Be sure to leave a little gap for steam and moisture to escape. Check on the egg every 15-30 seconds after the 2-minute mark until it's cooked to your liking.[10]
- The steam will cook the top of the egg without you having to flip it over and risk busting the yolk.
- The whites should firm up a little faster when the pan is slightly covered.
- Poke the egg with your finger or the side of a fork to see if it’s just the way you like it.
-
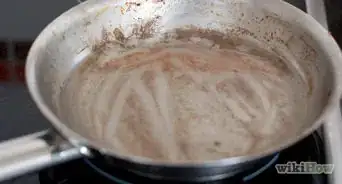
4Finish off soft, pan-fried potatoes by covering them for 15 minutes. Heat your pan to medium-high heat, add your preferred oil, and toss the sliced potatoes in. Once they're browned on the outside, flip them over, turn the heat down to low, and cover the pan, leaving a little slit so steam can escape. Leave them alone for 15 to 20 minutes. Poke them with a fork every 2 minutes after that to see if they're tender and ready to eat.[11]
- The cover will trap moisture and steam the inside of the potato, giving you that deliciously soft inside and crunchy outside.
- If you're not eating yet, turn the heat off and keep them completely covered (that is, don’t leave a slit for steam to escape). They'll stay warm for about 30 minutes.
Tip: Choose an oil with a high smoke point to avoid breaking down the fat into steam. Safflower, light/refined olive, peanut, vegetable, and canola oil all have smoke points above 400°F (205°C). Grapeseed, sesame, coconut, and extra-virgin olive oil are best if you’re frying foods between 325°F (165°C) and 390°F (195°C).
-
5Make the perfect grilled cheese by covering it for the first half of cooking. After you’ve heated and greased the pan, place the bottom layer of bread and cheese into the pan—don’t add the top piece of bread yet. Cover the pan with a baking sheet or other makeshift lid and let it cook over medium-high heat for 1-2 minutes. Once the cheese is melted, add the top piece of bread and then flip it to get it nice and brown.[12]
- If you’re adding any extras to your grilled cheese (like apples, pears, broccoli, sliced tomatoes, or cooked bacon strips) put them on top of the cheese once it’s nearly melted. That way, they won’t shift or fall off when the cheese is in the process of melting.
- If you’re using butter to grease the pan, add it to the pan before you heat it up. When you notice that the butter is fully melted and bubbling a little, it’s ready for your sandwich!


Warnings
References
- ↑ https://www.latimes.com/food/la-xpm-2013-mar-01-la-dd-test-kitchen-tips-makeshift-lids-for-pots-and-pans-20130228-story.html
- ↑ https://www.myrecipes.com/cooking-method/what-to-substitute-pot-lid
- ↑ https://www.bonappetit.com/story/universal-lid
- ↑ https://www.myrecipes.com/cooking-method/what-to-substitute-pot-lid
- ↑ https://www.ncbi.nlm.nih.gov/pmc/articles/PMC6804775/
- ↑ https://foodandnutrition.org/may-june-2017/kitchen-kersplat-tips-reduce-splatter/
- ↑ https://www.charlotteobserver.com/living/food-drink/article9239174.html
- ↑ https://foodandnutrition.org/may-june-2017/kitchen-kersplat-tips-reduce-splatter/
- ↑ https://www.thekitchn.com/how-to-pan-sear-any-vegetable-for-a-quick-weeknight-side-dish-cooking-lessons-from-the-kitchn-183091
- ↑ https://www.thekitchn.com/how-to-fry-an-egg-cooking-lessons-from-the-kitchn-93632
- ↑ https://food52.com/recipes/25036-the-best-pan-roasted-potatoes
- ↑ https://www.thekitchn.com/how-to-make-a-grilled-cheese-sandwich-cooking-lessons-from-the-kitchn-200972
- ↑ https://www.escoffier.edu/blog/culinary-arts/4-tips-for-cooking-with-oil/
- ↑ https://foodandnutrition.org/may-june-2017/kitchen-kersplat-tips-reduce-splatter/
- ↑ https://publicsafety.tufts.edu/firesafety/cooking-safety/
- ↑ https://publicsafety.tufts.edu/firesafety/cooking-safety/
About This Article


-Step-12-Version-2.webp)