This article was co-authored by JoAnna Minneci. JoAnna Minneci is a Professional Chef based in the Nashville, Tennessee area. With more than 18 years of experience, Chef JoAnna specializes in teaching others how to cook through private cooking lessons, team-building events, and wellness and nutrition classes. She has also appeared in numerous television shows on networks such as Bravo and Food Network. Chef JoAnna received Culinary Arts training from the Art Institute of California at Los Angeles. She is also certified in sanitation, nutrition, kitchen management, and cost control.
This article has been viewed 115,281 times.
Springform pans are a great item to have on hand in your kitchen, making it easy to bake cakes, cheesecakes, tarts, and even pies. This type of pan comes in two pieces and has a springlock to keep the two pieces together. To use a springform pan, start by choosing the light-colored pan with a non-stick finish. Then, prep the pan for baking and remove your cake, tart, or pie from the pan properly so you have a beautiful finished product, ready to serve.
Steps
Choosing a Springform Pan
-
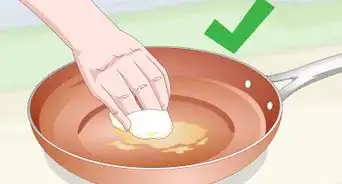
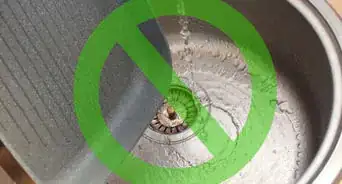
1Get a light-colored pan. Look for a springform pan that is light gray or white. Avoid pans that are dark gray or black, as the dark color can cause your baked goods to overcook in the oven.[1]
- If you do decide to use a dark-colored springform pan, you will need to get in the habit of knocking a few minutes off the recommended baking time to avoid burning or browning your baked goods.
- You can find springform pans at your local baking supply store or online.
-
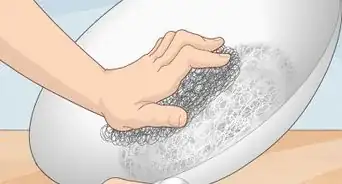
2Find a pan with a non-stick finish. Check the label on the pan to confirm it has a non-stick finish, as this will make removing your baked goods from the pan easier. Most springform pans will have a non-stick coating.[2]Advertisement
-
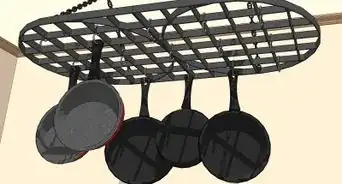
3Choose a pan based on size. You can buy a springform pan in a variety of sizes, from 8 inches (20 cm) to 9 inches (23 cm) to 12 inches (30 cm). Most recipes for cakes and pies call for a 9 inch (22.9 cm) pan, but you can pick a size based on your needs.
- Some stores sell springform pans in sets of three, ranging from 8 inches (20 cm) to 12 inches (30 cm) pans.
-
4Check that the spring locks properly. Before you buy the springform pan, try opening and closing the spring lock a few times. Pull the spring on the round part of the pan open and then close it to confirm it works properly.[3]
- You should hear a snapping sound when the spring locks. Only buy a springform pan that has a working lock.


Baking with the Springform Pan
-
1Lock the bottom and the band together. Put the band with the spring on a table or countertop. Make sure the spring is open on the band. Then, place the bottom in the band. Pull the spring closed to lock the two pieces together.[4]
- Hold up the pan to make sure the two pieces are locked together, as you do not want them to come apart during baking.
- Turn the bottom of the pan so the concave indentation is facing down.[5]
-
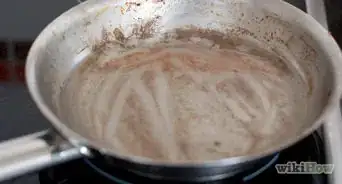
2Test the pan for leaks with water. Confirm the pan has no leaks by filling the springform pan with water. Hold the pan over the sink and notice if any water leaks out of the pan.[6]
- If any water leaks, wrap the pan with two layers of tin foil. This will ensure your cake or tart does not leak out during baking.
- If no water leaks, you have a leak-free springform pan. You can use it without wrapping it in tinfoil first.
- It's usually a good idea to put your springform pan onto a sheet pan just in case there are any leaks during baking.[7]
-
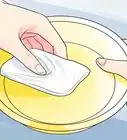
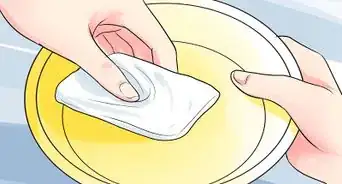
3Line the bottom of the pan with parchment paper. Use scissors to cut the parchment paper to fit the round bottom of the pan. This will make removing your cake or tart off the pan easier when you cut it for serving.[8]
-
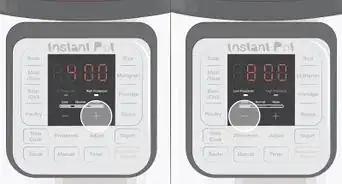
4Bake a cheesecake, a cake, or a tart in the pan. Springform pans are great for baking cheesecakes, cakes, and tarts, as they do not require you to flip over the baked good to remove the pan. Prepare the crust for the cake or tart in the springform pan and then pour in the batter. Bake the item based on the recipe instructions.[9]
- You can also prepare savory items like stuffed pizza, quiche, or dips in the springform pan.

Removing the Item from the Pan
-
1Let the item cool. Once you have finished baking an item like a cake or tart in the pan, take it out of the oven and place it on a cooling rack. Let it cool for at least 10-20 minutes. This will give the baked item a chance to set. It will also make handling the pan easier.[10]
-
2Place the pan on a raised surface. You can use a cake stand on a low table or countertop. In a pinch, you can also use a metal can or a mason jar with a lid to raise the pan off the table or counter.[11]
-
3Release the spring on the pan. Grip the round band with one hand. With the other hand, carefully release the spring on the band so it opens. The band should then separate from the bottom of the pan.[12]
-
4Lift the band off the bottom of the pan. Once the band has been released, use both hands to lift it off the bottom of the pan in an upward motion. It should come off cleanly and easily, leaving you with a beautiful baked good, ready to serve.[13]
- You can also lift the band off the pan in a downward motion, placing it on the table or countertop.
-
5Finished.


Community Q&A
-
QuestionDo I need to grease a springform pan for cheesecake?
 Community AnswerYes, you do.
 -
QuestionI have a cake mix, how long do I bake it in a springform pan?Community AnswerAbout 15-25 minutes at 350 degrees. Watch it during cooking to make sure it doesn't burn. After the 15-25 minutes, poke a tooth pick in the middle to make sure it is cooked all the way, if you pull it out and if there is batter on it it is not done.
-
QuestionHow do I remove the bottom of the pan to put the cheesecake on a serving plate?
 Rose1556Community AnswerPlace a dinner plate (face down) on top of the cheesecake, hold the plate against the cheesecake and flip them upside-down. Set them onto the counter. Gently lift the springform pan bottom off of the cheesecake. Now place your serving platter (face down) onto the cheesecake bottom, grasp both plates tightly and flip them over. Lift off the dinner plate. Now your cheesecake is on the serving platter.
References
- ↑ http://dish.allrecipes.com/springform-pan/
- ↑ http://dish.allrecipes.com/springform-pan/
- ↑ http://dish.allrecipes.com/springform-pan/
- ↑ http://dish.allrecipes.com/springform-pan/
- ↑ JoAnna Minneci. Professional Chef. Expert Interview. 23 December 2021.
- ↑ https://www.youtube.com/watch?v=wfkzXLg9glA
- ↑ JoAnna Minneci. Professional Chef. Expert Interview. 23 December 2021.
- ↑ http://dish.allrecipes.com/springform-pan/
- ↑ http://www.feelslikehomeblog.com/2010/08/10-things-to-make-in-a-springform-pan/
About This Article

Springform pans are great for baking cheesecakes, cakes, and tarts since they don’t require you to flip the pan over to remove it. Before you use a springform pan, lock the bottom and band together so they don’t separate during baking. To do this, simply fit the 2 pieces together and pull the spring closed until it clicks. Once they’re secure, cut out a circle of parchment paper and place it in the bottom of the pan. This will make removing your cake or tart much easier. After it’s done baking, let the item cool. Then, place the pan on a raised surface, like a cake stand. Release the spring on the pan and lift the band away from the bottom of the pan. To learn how to test your pan for leaks, read on!


-Step-12-Version-2.webp)