This article was co-authored by wikiHow Staff. Our trained team of editors and researchers validate articles for accuracy and comprehensiveness. wikiHow's Content Management Team carefully monitors the work from our editorial staff to ensure that each article is backed by trusted research and meets our high quality standards.
There are 15 references cited in this article, which can be found at the bottom of the page.
The wikiHow Video Team also followed the article's instructions and verified that they work.
This article has been viewed 13,910 times.
Learn more...
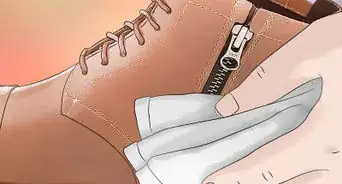
Covering a zipper is a fantastic way to make your sewing project look polished and professional. Covered zipper ends are a great option for things like fabric pouches or purses, while lapped zippers hide the zipper entirely on dresses and skirts. Zippers may seem intimidating, but with some patience and practice, you can master this skill and approach zippered projects with confidence!
Steps
Hiding Zipper Ends
-
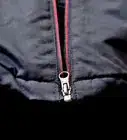
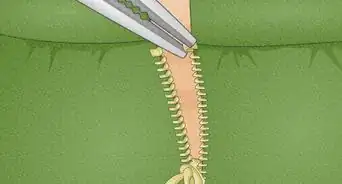
1Trim both ends of the zipper back to the metal stoppers. Take a pair of sharp scissors and cut back the fabric on either end of the zipper so that the metal edges are at the very end. On the bottom, the metal stopper keeps the two sides of the zipper from coming apart. On the top, the metal stopper is the top of the zipper tab.[1]
- These cuts don’t have to be perfectly straight; the most important thing is to get rid of the excess fabric on either end of the zipper.
-
2Cut out a 2 by 4 in (5.1 by 10.2 cm) piece of fabric. The fabric can match the rest of your project, or you could use contrasting colors or textures to make the project more visually complex. Use a ruler and pair of scissors to make the cuts as straight and even as possible.[2]
- This piece of fabric will get cut in two and create the covers for the zipper ends.
- If you’re making something like a fabric pouch or a purse, leather covers could look really professional.
Advertisement -
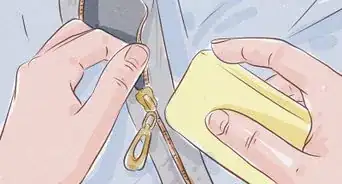
3Fold and iron the 2 by 4 in (5.1 by 10.2 cm) piece of fabric. Take the fabric and fold it in half lengthwise. Carefully use a hot iron to press the fabric and create a crease.[3]
- Always use caution when working with a hot iron! Keep your fingertips away from the bottom of it so you don’t accidentally burn yourself.
-
4Open the fabric and fold each side to the middle crease and press them down. Line up the outer edge of the material with the crease in the middle to create additional parallel folds. Use your iron and carefully press down each fold.[4]
- Making these folds separates the fabric into four equally-sized sections.
-
5Fold the fabric along the middle crease and cut it in half. With the sides still folded to the center crease, re-fold the fabric along the original crease. Take your scissors and carefully cut the piece of fabric in half to create two 1⁄2 by 2 in (1.3 by 5.1 cm) sections.[5]
- If the fabric isn’t staying folded, press it again with the iron.
-
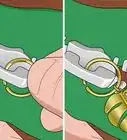
6Slide the ends of the zipper into the pieces of folded fabric. Just open the piece of fabric wide enough to place the end of the fabric securely inside the fold. The end of the zipper should lie flush against the middle crease of the fabric. For the end of the zipper with the actual zipper head, unzip it about a 1⁄4 to 1⁄2 in (0.64 to 1.27 cm) first.[6]
- This effectively covers the ends of the zipper to create a much more polished look.
-
7Stitch the fabric and zipper together. Use your sewing machine and stitch a parallel line along the top and the bottom of the zipper. Make sure to slowly sew over the zipper so you don’t break your sewing needle.[7]
- You could use adhesive tape to attach the fabric to the zipper instead of sewing it if you prefer.[8]
-
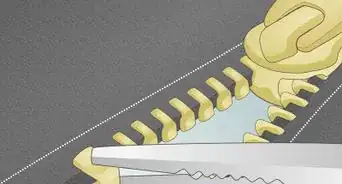
8Cut off the excess fabric on either side of the zipper. Use your scissors to carefully trim away the extra fabric so that the edge of the zipper is flush with the zipper cover.[9]
- It may seem like a lot of work, but once you get the hang of the process, creating covers for your zipper ends should only take a few minutes!
-
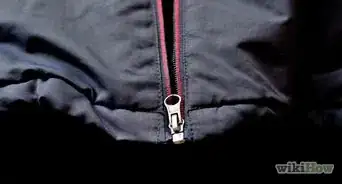
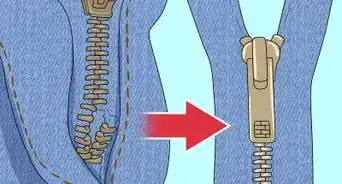
9Use the modified zipper in your project just like you usually would. Once the zipper ends are in place, you’re good to go and finish the rest of your project without any other modifications.[10]
- You should now have beautifully covered zippered ends that hide the edges of the zipper.


Sewing a Lapped Zipper
-
1Position your fabric so that the wrong side is facing up. The wrong side means the backside or inside of a piece, not the side that faces outward. If you’re working on a piece, like a shirt or dress, that is mostly complete, turn it inside out so you can access the backside of the fabric.[11]
- If you’re new to sewing lapped zippers, practice first on two pieces of scrap fabric. You can get a feel for what you’re doing without any risk to your sewing project.
- When you’re looking at the fabric from this position, the lapped side is on the right. When the fabric is right side out, the lapped side is on the left.
-
2Mark a 3⁄4 in (1.9 cm) seam allowance on each side of the fabric. Lay the zipper next to the fabric and line up its top with the edge of the material. Stop drawing the seam allowance once you’ve marked the length of the zipper. [12]
- The seam allowance helps you position and secure the zipper to the fabric.
- A 3⁄4 in (1.9 cm) seam allowance is relatively standard, but if your pattern specifies a different-sized seam allowance, measure to than length.
-
3Sew the seam to where the bottom of the zipper will lie. If you’re following a pattern, this may already be done. To check, line up the top of the zipper with the edge of the fabric. If the zipper ends before the seam does, there will be a gap of open material beneath the zipper. Sew that gap shut on your sewing machine if that’s the case.[13]
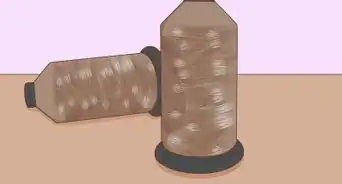
- When choosing a zipper, pick one that matches the primary color of the fabric.
- Most zippers are somewhere between 7 and 22 in (18 and 56 cm). If you’re using a pattern, it most likely specified a specific length for your particular project.
-
4Measure 1⁄8 in (0.32 cm) from the 3⁄4 in (1.9 cm) seam allowance on the left side. Use your ruler to measure an 1⁄8 in (0.32 cm) in from the original seam allowance and mark the new line with fabric chalk.[14]
- The left side seam will be slightly slimmer than the lapped side so that the lapped side can fully cover the zipper.
-
5Fold the fabric back at the new seam allowance and iron it down. At this stage, let your zipper hang out off to the side, as it’ll just get in the way. Set the fabric on an ironing board or something similar. Slowly and carefully iron the folded seam down so that you have a neat, flat edge.[15]
- Always be careful when using a hot iron and keep the tips of your fingers away from it!
- That 1⁄8 in (0.32 cm) of space between the fold and the 3⁄4 in (1.9 cm) seam allowance is the part that will fully hide the zipper.
-
6Iron the lapped side of the seam at the original 3⁄4 in (1.9 cm) seam allowance. Fold the fabric back at the seam allowance and use your iron to flatten it.[16]
- Remember, the lapped side is on the right when the fabric is inside out.
-
7Turn the fabric right side out and place the zipper underneath the seam. Place the fabric in front of you so that you can see the seam. Position the zipper so that it is zipper-side up with its top in line with the edges of the fabric. Go ahead and zip up the zipper at this stage.[17]
- This will give you a great idea of what the zipper will look like once it’s entirely in place.
-
8Pin the righthand side of the seam to the righthand side of the zipper. Line up the edge of the fabric with the righthand groove of the zipper. Take several sewing pins, and carefully push them through the fabric and zipper horizontally every 2 to 3 in (5.1 to 7.6 cm) down the seam until you reach the end of the zipper.[18]
- The pins hold the materials together as you sew, creating a much straighter, neater line.
-
9Sew the zipper to the fabric on the righthand side with your sewing machine. Stitch as close to the edge of the zipper as you can, leaving just about 1⁄8 in (0.32 cm) of space. Remember to backstitch at the beginning to keep the seam from coming undone. Remove the pins as you go.[19]
- If you have a special zipper foot, line up the coil of the zipper in the foot groove rather than sewing alongside it.[20]
-
10Pin the lapped side 1⁄2 in (1.3 cm) from the edge. Remove the fabric from your sewing machine and place it down right side out in front of you again. Position the lapped side over the zipper, then measure 1⁄2 in (1.3 cm) in from the lefthand edge. Place horizontal pins every 2 to 3 in (5.1 to 7.6 cm) down the seam.[21]
- The lapped side is on the left now that the fabric is right side out.
- This 1⁄2 in (1.3 cm) allowance enables you to sew the zipper to the fabric while creating the small swatch of fabric that completely covers the zipper when it’s done up.
-
11Sew the lapped side to the zipper along the 1⁄2 in (1.3 cm) seam allowance. Use your sewing machine and stitch as straight of a line as you can. Backstitch at the very beginning to make the stitches as secure as possible. Remember to remove the pins as you go.[22]
- If you mess up, you can always use a seam ripper to undo the stitches and begin again.
-
12Rotate the fabric and sew horizontally across the zipper end to fix it in place. The zipper end is the small section of material that hangs down below the bottom of the zipper. Once you get past the bottom of the zipper, turn the fabric and stitch back and forth over that small section of cloth 2-3 times.[23]
- If you don’t sew this section down, it could easily flip up and create a bulge in the fabric or make it more likely that your zipper might rip.
-
13Iron the fabric over the zipper to make sure it looks smooth and neat. Remove the material from your sewing machine, snipping the ends of the thread to release it. Lay the fabric over an ironing board and gently run a hot iron over the zipper several times.[24]
- Sometimes, the lapped side of the zipper might stick up slightly, depending on what kind of fabric you’re working with. Ironing it down will make your project look much more professional.
- You could add a hook and eye enclosure to hold the top of the fabric together.[25]


Warnings
- Be careful when working with a hot iron. Try to keep your bare fingers away from it and remember to turn it off when you’re done using it.⧼thumbs_response⧽
Things You’ll Need
Hiding Zipper Ends
- Scissors
- Zipper
- Ruler
- Iron and ironing board
- Sewing machine
- Thread
Sewing a Lapped Zipper
- Sewing pins
- Scissors
- Thread
- Zipper
- Sewing machine
- Zipper foot (optional)
- Fabric chalk
- Iron and ironing board
- Ruler

References
- ↑ https://www.mybluprint.com/project/a-zippy-way-to-cover-your-zipper-ends
- ↑ https://www.mybluprint.com/project/a-zippy-way-to-cover-your-zipper-ends
- ↑ https://youtu.be/h_DgW6ugOsM?t=19
- ↑ https://youtu.be/h_DgW6ugOsM?t=29
- ↑ https://www.mybluprint.com/project/a-zippy-way-to-cover-your-zipper-ends
- ↑ https://www.mybluprint.com/project/a-zippy-way-to-cover-your-zipper-ends
- ↑ https://www.mybluprint.com/project/a-zippy-way-to-cover-your-zipper-ends
- ↑ https://youtu.be/h_DgW6ugOsM?t=81
- ↑ https://www.mybluprint.com/project/a-zippy-way-to-cover-your-zipper-ends
- ↑ https://www.mybluprint.com/project/a-zippy-way-to-cover-your-zipper-ends
- ↑ https://youtu.be/rP4Yq_xyIuo?t=115
- ↑ https://youtu.be/rP4Yq_xyIuo?t=119
- ↑ https://youtu.be/rP4Yq_xyIuo?t=153
- ↑ http://www2.ca.uky.edu/agcomm/pubs/fcs2/fcs2842/fcs2842.pdf
- ↑ https://sewguide.com/lapped-zippers/
- ↑ https://youtu.be/rP4Yq_xyIuo?t=201
- ↑ https://youtu.be/rP4Yq_xyIuo?t=207
- ↑ https://youtu.be/rP4Yq_xyIuo?t=219
- ↑ https://sewguide.com/how-to-sew-invisible-zipper/
- ↑ https://sewguide.com/how-to-sew-invisible-zipper/
- ↑ https://youtu.be/rP4Yq_xyIuo?t=317
- ↑ https://sewguide.com/lapped-zippers/
- ↑ https://sewguide.com/lapped-zippers/
- ↑ https://youtu.be/rP4Yq_xyIuo?t=395
- ↑ https://sewguide.com/how-to-sew-invisible-zipper/
- ↑ http://www2.ca.uky.edu/agcomm/pubs/fcs2/fcs2842/fcs2842.pdf
About This Article