wikiHow is a “wiki,” similar to Wikipedia, which means that many of our articles are co-written by multiple authors. To create this article, volunteer authors worked to edit and improve it over time.
This article has been viewed 58,861 times.
Learn more...
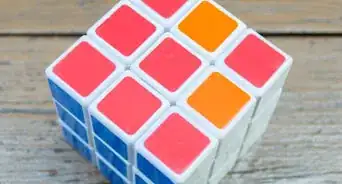
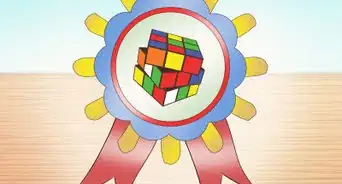
Do you want to impress your friends by going a step above simply solving a Rubik's Cube? In this article, we’ll walk you through the precise steps you should take to create a neat square pattern on each side of your cube. It may seem complicated at first, but it’s actually quite easy once you’ve done it a few times. Read on to learn how to do it yourself!
Steps
Completing the First Cube
-
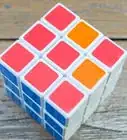
1Start with a Solved Rubik's Cube. Make sure all faces have the right color, and then hold the cube with the RED side facing you and the GREEN side on top.
-
2Move the front side once clockwise (left to right). The front side is the RED side facing you.Advertisement
-
3Move the left side once clockwise (towards you). The left side is the YELLOW side with the BLUE vertical line.
- The color of the center piece on each side indicates the color of that whole face.
-
4Move the front side once clockwise (left to right). This step is exactly like step two.
- At this point, you should have formed a 2 by 2 by 3 cube in the back right corner of the cube.
-
5Move the top side once counterclockwise (left to right). The top side is the GREEN side, with the GREEN center piece.
-
6Move the right side once clockwise (away form you). The right side is the WHITE side with the white center piece.
- Make sure you're still holding the cube with the RED side facing you and the GREEN side on top.
-
7Move the top side once clockwise (right to left). This motion is the opposite of that done in step 5.
-
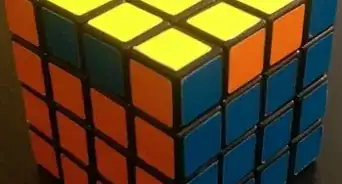
8Move the front side twice clockwise (left to right). Make sure you move the front side twice in order to end up with a red, green, and white 2 by 2 by 2 cube in the right corner that's facing you.
-
9Move the left side twice clockwise (towards you).
- At this point, you should have created the first cube, and you should have the two vertical green lines on the top and a red vertical line in the left column of the top face.


Finishing the Full Design
-
1Hold the cube with the ORANGE side facing you and the YELLOW side on top. Keep the cube in this position throughout Part 2.
-
2Move the left side once counterclockwise (away from you). The left side is now the GREEN side because you are holding the cube differently.
-
3Move the top side once counterclockwise (left to right). Remember to keep holding the cube with the orange side facing you and the yellow side on top as you perform each step.
-
4Move the front side once clockwise (left to right).
- You might feel like you are messing up the order, but it will all start coming together in the next few steps.
-
5Move the right side once counterclockwise (towards you). The motion you perform for the right side is basically the opposite of what you do for the left side.
-
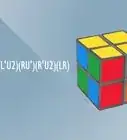
6Move the front side once counterclockwise (right to left). Double check your work by comparing your cube's orientation with the one in the images.
-
7Move the top side twice clockwise (right to left). Make sure you perform this motion twice.
- At this point, you could see that the 2 by 2 by 2 cube yellow, blue, and orange forming in the front right corner.
-
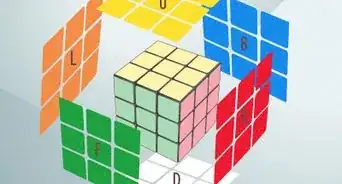
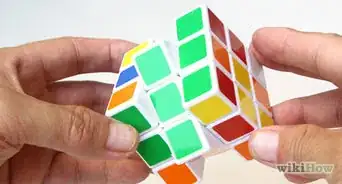
8Move the left side once clockwise (towards you). You should now see two 2 by 2 by 2 cubes in two corners.
-
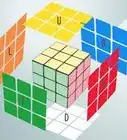
9Enjoy your pattern.


Community Q&A
-
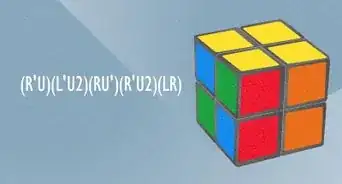
QuestionHow do I create an algorithm for solving Rubik's Cube quickly?
 Community AnswerIf you want to have your own special algorithms, then base them off CFOP and modify them.
 -
QuestionHow do I solve a cube within 30 seconds?
 Evan Dicks 89 (STUDENT)Community AnswerThere are many ways to improve your times, one of which is improving your method. If you use beginner's method, it is important to learn CFOP or another speed-cubing method. If you already know CFOP but use 4 look last layer, then it is important to learn full PLL. Regular practice is also very important, so set aside some time every day to practice.
 -
QuestionWhat is the best method? I use Petrus and ZZ and sometimes CFOP.
 LilyCommunity AnswerMany will say CFOP, however, it depends on what you think is easiest. It really depends on what you think is easiest. There are many ways out there, so learn some and find your favorite!
-Step-9.webp)
References
About This Article
By rotating the rows in the proper sequence, you can form a cube within your Rubik’s cube. Start with a solved cube and hold it so the red side is facing you and the yellow side is on the left side. Move the front-facing side clockwise once, the left side clockwise once, and then the front side clockwise once again. Turn the top side once counterclockwise, move the right side away from you once, then move the top side once clockwise. After that, move the front side clockwise twice and then the left side clockwise twice. Rotate the cube so the orange side is facing you and the yellow is on top and move the left side away from you once. Take the top side and turn it counterclockwise once and the front side clockwise one time. Move the right side counterclockwise once, then move the front side counterclockwise once. Finally, move the top side clockwise twice and the left side towards you once to finish the pattern. For tips about how to impress your friends with your skills, keep reading!