wikiHow is a “wiki,” similar to Wikipedia, which means that many of our articles are co-written by multiple authors. To create this article, volunteer authors worked to edit and improve it over time.
This article has been viewed 67,557 times.
Learn more...
Facebook is one of the most popular social sites in the Internet. People use it to connect with friends and family; companies use it to promote their products. If you have a business and want to promote it on Facebook, just create a Facebook page. A Facebook page is a public profile that cannot make friends but can have fans who like the page or the purpose of the page. If you’re unable to make a Facebook page from the website, you can make one using the Facebook app on your Android device anytime, anywhere!
Steps
Creating the Facebook Page
-
1Log into your Facebook account. Launch Facebook on your mobile device and log in using your registered email address and password.
-
2Open the menu. Do this by tapping the three horizontal bars at the top right of the screen.Advertisement
-
3Tap “Create Page” from the options. Another menu will open where you can name the Facebook page and indicate its category.
-
4Name your Facebook page. Tap the name field and enter the name you want for the Facebook page.
-
5Add a category. Below the name field, select “Category.” This defines whether your page is a Business page, a personal Blog, a Brand or Product, etc.
-
6Select a subcategory. As soon as you select a category for your page, you will then be asked for a subcategory in the same pop-up window. Subcategories are shown below the name of your Facebook page. Type in keywords to get related subcategory options.
- In example, if the Facebook page is for an IT company, you may select some software solution as a subcategory. If it’s for a restaurant, you can have the cuisines it offers as a subcategory.
-
7Tap “Get started” at the bottom. This will create the Facebook page, but you will still need to add a description to it.
-
8Add a description. A new pop-up will appear where “Step 1” and “Step 2” are written at the top. Since “Step 1” is blue in color, that means you are on “Step 1.”
- In first block, write a little about the person, business, or product you have created the Facebook page for.
- In the next block, enter the website URL of the business/person/product. This will link fans directly to the website from the Facebook page.
-
9Click “Save Info” at the bottom. You will then be taken to Step 2.
-
10Complete “Step 2.” The “Step 2” heading at the top will now be in blue. Here you can generate a unique web address for your page so that people can directly access it on Facebook.
- Once you are done, tap on “Set Address” at the bottom.
- You also have the option to skip this step by clicking the “Skip” button, but it is advisable to have a Facebook web address.
- Once you’ve set the address, you will be taken to your new Facebook page.


Making Your Page Attractive
-
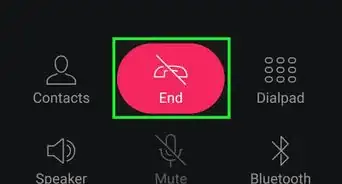
1Add a profile picture. You can add a profile picture to your page by tapping on “Add Profile Picture.” Your device’s camera roll will open where you can select the photo. Tap it to upload it as a profile picture.
- A Facebook page with a catchy profile picture can attract fans; if the Facebook page is of a business or product, it can attract new customers. A good profile picture will ensure that people visit your page often.
- The profile picture can be the business logo or symbol representing the business or it can be any image showing brand loyalty.
-
2Add a cover picture. Do this tapping the option “Add Cover Photo” below the “Add Profile Picture” option. Your device’s camera roll will open where you can select the photo. Tap it to upload it as a cover photo.
- The cover photo adds beauty to your page. It is a constant reminder of how extraordinary and exceptional your business is.
- It is recommended to upload cover photos that are high resolution and will not become pixelated. The size specification is 850px × 315px.
- Try to upload an image related to the Facebook page you have just created.
-
3Invite friends. Now that your new Facebook page is created, it’s time to let your friends know about it!
- Tap “Invite friends to like this Page,” and a list of your Facebook friends will appear. Scroll through the list, and tap the “Invite” button next to the friends’ names you’d like to invite.
- Inviting friends increases the page’s visibility. The more people see your page, the more audience/customers you will most likely get. You will eventually get more exposure, and you can tell more people about your business.


-Step-34.webp)