This article was co-authored by wikiHow staff writer, Jack Lloyd. Jack Lloyd is a Technology Writer and Editor for wikiHow. He has over two years of experience writing and editing technology-related articles. He is technology enthusiast and an English teacher.
wikiHow marks an article as reader-approved once it receives enough positive feedback. In this case, 100% of readers who voted found the article helpful, earning it our reader-approved status.
This article has been viewed 329,792 times.
Learn more...
Thanks to Google Drive's "Forms" feature and the relative intuition with which one can use it, you can easily create a Google Form! Google Forms can be useful for a wide variety of applications, from data-gathering to event planning.
Steps
Accessing Google Forms
-
1Open your preferred browser. Google Forms are accessible through Google Drive; any created Google Forms will stay in Google Drive.
-
2Navigate to your Gmail account. For best results, do this on a computer.
- You will need to enter your email address and password if you aren't already logged in.
Advertisement -
3Click the Google apps menu. This is the nine-dot grid in the top right corner of your screen, to the left of your Gmail account picture.
-
4Click the "Drive" option. This will open your Google Drive account.
- Depending on your frequently-used apps, you may see the "Forms" option here. If so, click it to open Google Forms.
-
5Click the "New" button. This is on the top left side of your Drive page, right above the "My Drive" option.
-
6Hover over "More", then click "Google Forms". This will open a new, untitled Google Form!
- If you need to open a new form from the Google Forms home page, click the "+" button on the left side of the form templates.


Designing Your Form
-
1Decide on a purpose for your Google Form. Knowing what information you need to gather and the purpose it will serve will help you when deciding on formatting, step style, and so on.[1]
-
2Change your form's color. You can do this by clicking the paintbrush palette icon to the left of the "Send" button, then selecting a color from the drop-down menu. Or, click the image icon next to the colors for a nice theme to use instead of a color.
-
3Give your form a title. This option is at the top of the screen; you'll need to click the "Untitled Form" or "Form Title" text to type in this field.
-
4Add a description to your form. Your respondents will be able to see this below the form title.
- Enter this information directly below the title field.
-
5Add a question to your form. Questions are the basis of your data-gathering; users will answer these in whichever style you present the questions. To add a question:
- Click the "+" icon in the right-hand menu.
- Type your question text into the "Question" field.
- Replace the "Option 1" text with an answer.
- Tap the "Required" switch in the bottom-right corner for mandatory questions.
-
6Select your questions type. You have several ways in which you can display your questions. To change your type of question:
- Click anywhere on a question card.
- Click the drop-down menu to the right of the question text.
- Select "Multiple Choice", "Checkboxes", or "Drop-Down". You can also choose longer answers like "Short answer" or "Paragraph".
-
7Re-order your question cards if need be. You can do this by clicking the grid of six dots at the top of a card, then dragging it up or down and releasing it in its new location.
-
8Review your other question card options. You can perform a couple of different actions on your question cards:
- Click the "Duplicate" button (two overlapping cards) to duplicate your current question card.
- Click the trash can icon to delete your current question card.
- Click the portrait icon next to an answer. This will allow you to add a photo; you'll need to hover over the question for this option to appear.
-
9Review the additional options menu. You can do this by clicking the three vertical dots in the bottom right corner of your current question card:
- "Description" - Add a clarifying description to your question card.
- "Go to section based on answer" - Link different question cards to different answers. You'll do this from drop-down menus next to each answer on a card.
- "Shuffle option order" - Shuffle the answers for your current card.
-
10Click the "Preview" option to proofread your Form. This is the eye-shaped icon in the top right screen toolbar. When you're done reading through your Form and making sure all of the formatting is correct, you'll be ready to distribute your Form!


Sending Your Google Form
-
1Review your basic form settings. You can do this by clicking on the gear icon in the top right corner of the screen. Your form settings menu includes the following criteria:
- "Requires Sign-In" - Require respondents to sign into Google rather than being anonymous. Click the "Limit to 1 response" to enable this feature.
- "Respondents can..." - "Edit after submit" and "see summary charts and text responses" are your options here. These let respondents change their answers and view form results after submitting.
-
2Review your presentation settings. These are also in the settings menu; switch from "General" to "Presentation" by clicking the pertinent option at the top of the settings window.
- "Show progress bar" - Displays a metric that tells respondents how close they are to completing the form.
- "Shuffle question order" - Varies the question order from user to user.
- "Show link to submit another response" - Creates a link to re-complete the form. This is ideal for invoicing forms.
- "Confirmation message" - Customize your form's completion message by typing your preferred message into the field below this text.
-
3Click the "Send" button. This is in the top right corner of your screen; clicking "Send" will bring up a "Send form" menu with several different sharing options through which you can cycle from the top of the window.
-
4Review your sharing options. Depending on your form's purpose, your preferred option will vary:
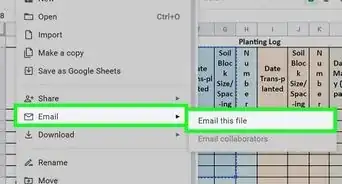
- Email - Choose this option to send an email to your contacts directly from the Forms site.
- Link - Choose this option to get a link to copy-and-paste.
- Embed HTML - Only use this option if you're placing this form directly on your website.
- Google+, Facebook, or Twitter - These are quick-share options in the top right corner of your "Send form" menu.
-
5Send your form using your selected service. Since you have a few different options for doing so, your process will vary:
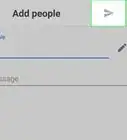
- Email - Add a contact to the "To" field, a subject to the "Subject" field, and a brief message to the "Message" field. Click the "Include form in email" option to embed your form directly into the email.
- Link - Right-click (or two-finger click) the link field and select "Copy". You can then paste this link in an email or on your preferred social media site.
- Embed - Right-click (or two-finger click) the HTML field and select "Copy". You can then paste this text into your website's HTML processor. Note that you can edit the width and height values of the form from here.
-
6Click "Send" if you're using email. This will distribute your form to everyone in the form contact list!
- To distribute the form via link, you'll need to manually post the link on a social media site or into an email.


Community Q&A
-
QuestionHow do I include a non-optional answer?
 Community AnswerThere are two types of questions for text (open) answers: singe text or paragraph text. Just select those types of questions.
 -
QuestionCan I add arrays and data charts to Google Forms?
 Community AnswerIf they are in photograph format, you can add them to question cards as pictures.
 -
QuestionHow can I set up a two-part answer in Google Forms?Community AnswerYou'll need to link an answer to a specific question card. You can do this from the "Go to section based on answer" option in the lower right corner question card menu.
wikiHow Video: How to Create a Form Using Google Drive
Warnings
- Be wary of asking for personal information in a Google Form. Since you are directly responsible for keeping the data private, you can be held liable for any damage caused if your data results fall into the wrong hands.⧼thumbs_response⧽
- Always sign out of your Google account when using any non-private computer.⧼thumbs_response⧽


About This Article
Anyone with a Google account can create a fillable form using Google Forms. To get started, go to Forms.Google.com and sign into your Google account. You can start with a template from the template gallery, which includes some basic form types like Event Registration and RSVP, or click "Blank" to create a form from scratch. Let's create one from scratch. Type a title, and a brief description if you want, into the labeled fields. Google Forms creates the first form field for you, but don't worry, you can tailor it to your needs. Click the drop-down menu to select an option for how you want users to be able to answer this first question, whether it be with a short answer, paragraph, a multiple choice option, or by clicking checkboxes. If you want to provide a list of choices for the user and have them only be able to select one choice, choose Multiple Choice, which allows you to list choices as radio buttons, or Dropdown, which requires a user to choose their selection from a menu. If you want to allow a user to choose multiple answers, use "Checkboxes." Creating a Multiple Choice, Dropdown, or Checkbox question is pretty straightforward—type the question you want to ask, such as "What's your favorite color?" into the "Untitled question" field, and then list possible answers. Click "Option 1" and type your first choice, such as blue, and then click "Add option" to add another choice, such as red. If you want to include an "Other" option, which would allow the user to enter an alternative answer, click "add Other." You can make any question mandatory by toggling the "Required" switch at its bottom-right corner to the On position. After you're finished with the first question, click the plus sign to insert another question. If you want to create a question that asks users to enter their name, city, or other short answer, select "Short answer" as the field type. For longer responses, use the "Paragraph" field type. You can also create questions that ask for the time, date, and even file uploads. Click the eyeball icon in the upper-right corner at any time to see a preview of your form—if it's looking a little bland, click the paint palette icon to choose a color scheme, change the font, and add a custom header. You can also insert photos and videos into questions or answers by clicking the photo icon. Click the gear icon for more settings, including the option to require an email address, show a progress bar, and make the form a graded quiz. When you're finished creating your form, type a name for it in the upper-left corner, and then click "Send" to send it to the desired recipients. If you don't want to send the form through email right now, click the link icon at the top of the Send Form window to generate a link, click "Copy," and then paste that link into any email, direct message, or post. To monitor responses to your form, just open Google Drive, or head back to Forms.Google.com, click your form, and then click the "Responses" tab at the top.