X
wikiHow is a “wiki,” similar to Wikipedia, which means that many of our articles are co-written by multiple authors. To create this article, 16 people, some anonymous, worked to edit and improve it over time.
This article has been viewed 321,386 times.
Learn more...
Eclipse is one of the most popular development environments for Java, as it contains everything you need to build a Java project from scratch. Before you can start working on your new project, you'll need to create it first. Creating a new Java project in Eclipse is fairly straightforward, but can be confusing if you've already installed Eclipse for a different programming language.
Steps
-
1Install the Eclipse IDE for Java Developers. When you install Eclipse for the first time, you're given the option to choose your IDE (integrated development environment). Choose "Eclipse IDE for Java Developers". This will install the necessary files and tools to create Java projects.
- If you installed Eclipse for a different programming language, you can add Java support from within Eclipse. Click the "Help" menu and select "Install New Software". Select "All Available Sites" from the top drop-down menu, and then type "java" into the Filter field. Check the "Eclipse Java Development Tools" box and click "Next". Follow the prompts to download and install the Java tools. Eclipse will restart once the installation is complete.
-
2Click "File" → "New" → "Java Project". This will open the "New Java Project" window.[1]
- If you don't see the "Java Project" option but have the Java Development Tools installed, select "Project..." from the "New" menu. Expand the "Java" folder and select "Java Project".
Advertisement -
3Give the project a name. This doesn't have to be the final name for your program, but should help you and others identify the project.
-
4Select the location for the project files. The files are saved to the Eclipse directory by default. You can set a custom location if you prefer.
-
5Select Java Runtime Environment (JRE) you want to use. If you are creating a program for a specific JRE, select it from the drop-down menu. By default, the newest JRE will be selected.
-
6Select your project layout. You can choose to either use the project folder, or create separate folders for sources and class files. The default option is "Create separate folders...", though you may need to change depending on the needs of your project.[2]
-
7Click "Next" to open the "Java Settings" window. This is where you'll define additional sources as well as add libraries to your project.
-
8Use the Source tab to define your build path. The build path is what the compiler uses to build the program. You can create additional source folders, link external sources, and add or remove folders from the build path. The compiler uses the build path to determine which sources to compile.
-
9Use the Libraries tab to add libraries to the project. This tab will allow you to add JAR files to include in your project, as well as select built-in libraries to use. Importing JAR files allows you to use libraries from other projects.
-
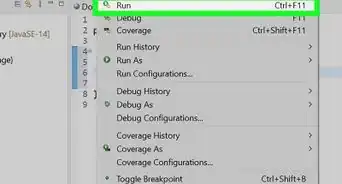
10Click "Finish" to start working on your new project. You'll be taken to your Java workspace. If you were working in a different programming language before starting the project, you'll be prompted to switch to the Java perspective. This is recommended to get the most out of the IDE.
- Your project will be displayed in the "Package Explorer" frame on the left side of the window. If you just see the Eclipse Welcome tab, click the small Java button on the left side of the window.[3]
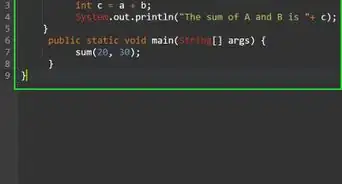
- See How to Write Your First Program in Java for a detailed guide on creating your first Java program.


Advertisement
Community Q&A
-
QuestionHow useful is Eclipse for a java developer?
 Community AnswerEclipse is useful as it streamlines certain activities that are done regularly in Java programming. These activities include running, debugging, and compiling. Eclipse also checks the syntax of your code and makes sure the classes you use actually exist. It can also help you add libraries.
 -
QuestionHow do I run my project on a server?
 Community AnswerAssuming the server is running Linux, you'll want to export the project into an executable jar by right-clicking and selecting Export, then going through the wizard. After this, you can use something like WinSCP to transfer the file to your server. Then you can log into your server (make sure Java is installed) on putty, create a new tmux session (by typing tmux) and run the program (sudo java -jar *name*.jar).
 -
QuestionWhere can I get the Eclipse software?Community AnswerYou can download Eclipse at their website (www.eclipse.org).
Advertisement

-Step-42.webp)

References
About This Article
Advertisement


-Step-42.webp)