This article was co-authored by Alessio Iadicicco. Alessio Iadicicco is an Apparel Manufacturing Specialist and the CEO and Co-Founder of MarkersValley, an online apparel and manufacturer sourcing platform that connects luxury fashion brands to a network of highly-vetted, truly Italian manufacturers. He holds a Bachelor's degree in Economy and Management of Financial Enterprises from The University of Naples Federico II. MarkersValley has connected fashion brands in over 100 countries and has a network of over 100 independent Italian factories and artisans. MarkersValley has been featured in Forbes, EQ, St. Louis Business Journal, Il Mattino, and Corriere Della Sera.
There are 21 references cited in this article, which can be found at the bottom of the page.
This article has been viewed 19,203 times.
A granny square blanket is a classic crochet project. Although this type of blanket might seem complicated to make, it is easier than you might think! Start by making a single square, and then expand the square by working multiple rounds. Make many squares in the same size as the first square and sew them together. This is a great project whether you are a beginner or an expert!
Steps
Starting the First Square
-
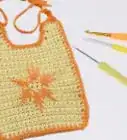
1Choose your yarn and crochet hook. Use any type of yarn you like to create granny squares. Select a crochet hook that will work with the yarn you choose to ensure that the stitches are not too loose or too tight. Check the yarn label for crochet hook size recommendations.[1]
- For example, if you opt for a medium-weight yarn, then use a US size I-9 (5.5 mm) crochet hook.
How to Choose Your Blanket’s Color Scheme
Create a bold color scheme with a mixture of black, white, yellow, red, blue, green, orange, and purple yarn.
Make a light, bright blanket with pastel-colored yarn, such as baby blue, light pink, lavender, pale yellow, mint green, and white.
Go for an ombre effect with yarn in different shades of the same color, such as navy blue, royal blue, periwinkle, and baby blue.
-
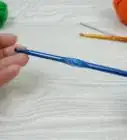
2Make a magic ring. Wrap the tail of the yarn around your index and middle fingers 2 times. Then, insert the crochet hook into the center of the hook and yarn over. Pull this loop through the center of the ring, yarn over again, and pull through to secure the ring.[2]Advertisement
-
3
-
4Work 2 double crochet stitches into the center of the ring.[4] Loop the yarn over the end of the crochet hook and then insert the hook into the center of the ring. Yarn over again and pull through the first loop to lock the stitch around the edge of the ring. Yarn over again and pull through 2 to complete the stitch.[5]
- Repeat this 1 more time.
-
5Repeat the stitch sequence 3 more times. Chain 3 again and work another 2 double crochet stitches into the center of the ring. Do this until you have a total of 4 clusters of chain 3 plus 2 double crochet stitches extending from the ring.[6]
-
6Make a final chain of 3. Finish the last cluster in the round with another chain of 3. This counts as a double crochet stitch.[7]
-
7Pull the tail of the magic ring to close the circle. Locate the free end of the yarn (not attached to the skein). Pull on this tail to close the ring and bring the stitches together. They will form a square when you do this.[8]
- Only do this for the first round of the square.
-
8Slipstitch into the top of the first chain of 3. This should be located right next to where you made the last chain of 3. Insert the hook into the top chain in the chain of 3, yarn over, and pull through to secure the first and last chains in the round.[9]


Working the Second Round
-
1Leave a 6 in (15 cm) tail if you want to switch colors. Cut the yarn 6 in (15 cm) from the last stitch. Pull the end of the yarn through the stitch. Then, tie a knot through the last stitch using this tail. Do not cut the tail.[10]
- Switch colors before starting each additional round for a colorful square.
- Do not switch yarn colors at all to make solid color granny squares. Just keep working the next round using the same strand of yarn.
-
2Make a slipknot with the new yarn if you are switching yarn. Wrap the yarn around your middle and index fingers 2 times. Then, pull the first loop through the second loop to create a slipknot.[11] Slip the loop onto your crochet hook and pull the tail to tighten it.[12]
- Only do this if you have switched yarn colors. If you are continuing to crochet your hexagon using the same color you started with, skip this.
-
3Insert the hook through 1 of the chain 3 spaces and slipstitch. Choose a chain 3 space in 1 of the corners of the square. Slipstitch to connect the new yarn to a chain 3 space.[13]
- Ideally, you should not choose the last space you created in the last round since this is the smallest chain 3 space in the round.
-
4Chain 3 and double crochet 3 times into the chain 3 space. Make a chain of 2 and then double crochet into the chain 3 space 3 times to create your first cluster.[14]
- Repeat this sequence into the same space to complete the cluster.
-
5Chain 1 and repeat the stitch sequence for the next chain 3 space. After you complete the first cluster, make a chain of 1 for slack to access the next chain 3 space. Chain 3 and work 3 double crochet stitches into this corner, then chain 3 and double crochet again.[15]
- Continue to work a cluster like this into each of the chain 3 spaces around the outside of the first square.
-
6Slipstitch to complete the round. Once you have finished working a cluster into each of the chain 3 spaces, insert the crochet hook into the top chain of your first chain of 3. Then, yarn over and pull this yarn through stitch.[16]
- You have 2 completed rounds of your granny square.
- Repeat the process to make another square of this size, or work an additional round to make the square larger.


Expanding the Square
-
1Attach the new yarn to the corner of the square. To expand the size of your granny square, start a new round. Tie off and cut the old yarn, make a slipknot with the new yarn, and attach the yarn to a corner of the square just as you did the first time.[17]
-
2Chain 3 and double crochet 3 times into the corner space and repeat. Work the same stitch sequence into each of the corners as you did for the last round. Make a chain of 3, double crochet 3, and then repeat this sequence to complete the first cluster.[18]
- Work this stitch sequence into each of the corners of the granny square.
-
3Chain 1 and double crochet 3 times into the edge space. Work into the chain 3 space on the flat edge of your granny square. Chain 1 to provide yourself enough slack to get to the space. Then, double crochet into this space 3 times. Chain 1 again to provide enough slack to get to the next chain 3 space.[19]
- Work this sequence into each of the chain 3 spaces on the sides of the granny square.
- Repeat the sequence all the way around the square.
- Finish the square in the same way you finished the previous rounds with a slipstitch to connect the first and last stitches.


Finishing the Blanket
-
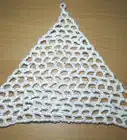
1Make additional squares for a multi-square blanket. Create as many squares as needed for the desired dimensions of your blanket. Measure the first square to find the dimensions and use this information to help you determine how many granny squares to make.[20]
- For example, if you want your blanket to measure 45 by 60 in (110 by 150 cm), and each square measures 5 by 5 in (13 by 13 cm), then you will need 9 rows of 12 squares each, which is a total of 108 squares.
-
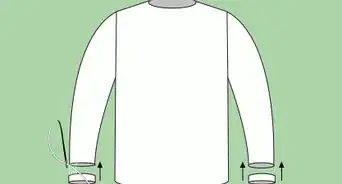
2Sew the granny squares together. Thread a yarn needle. Then, tie the end of the yarn to the corner of 1 of the squares. Hold 2 squares together so that their flat edges are aligned on 1 side. Insert the needle through the corner stitches to connect the 2 squares together, then pull the thread taut. Repeat for the next stitch along this edge. Sew to the end of the edge of the 2 squares, and then repeat to sew another square onto the row.[21]
- After you have all of the granny square rows completed, sew down the edges of 2 rows to connect them. Keep attaching rows until your blanket is all in 1 piece.
- Make sure the squares are all facing in the same direction when you sew them together.
- Use the same color yarn as the outer round of the squares or a contrasting color yarn, if you prefer.
-
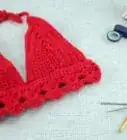
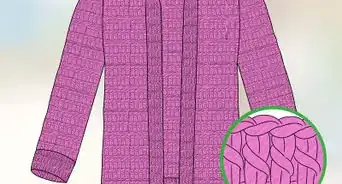
3Add a border to the outside of the blanket if desired. Once your granny square blanket is complete, you can crochet a border around the outer edges for an extra decorative touch. This will also prevent the edges from curling up.
- Try single crocheting around the edges of the blanket for a simple, narrow border.
- Work a decorative stitch into the edge of the blanket, such as shell stitch for a fancier touch.


Things You’ll Need
- 6 to 8 balls of medium-weight yarn in the colors of your choice
- US size I-9 (5.5 mm) crochet hook
- Scissors
- Yarn needle
References
- ↑ https://www.craftyarncouncil.com/standards/yarn-weight-system
- ↑ https://www.youtube.com/watch?v=hsVrg71Jgbs&feature=youtu.be&t=41
- ↑ https://www.youtube.com/watch?v=hsVrg71Jgbs&feature=youtu.be&t=70
- ↑ https://www.youtube.com/watch?v=hsVrg71Jgbs&feature=youtu.be&t=85
- ↑ https://www.craftyarncouncil.com/mar06_dc.html
- ↑ https://www.youtube.com/watch?v=hsVrg71Jgbs&feature=youtu.be&t=135
- ↑ https://www.youtube.com/watch?v=hsVrg71Jgbs&feature=youtu.be&t=181
- ↑ https://www.youtube.com/watch?v=hsVrg71Jgbs&feature=youtu.be&t=195
- ↑ https://www.youtube.com/watch?v=hsVrg71Jgbs&feature=youtu.be&t=210
- ↑ https://www.youtube.com/watch?v=hsVrg71Jgbs&feature=youtu.be&t=233
- ↑ https://www.bhg.com/crafts/knitting/basics/making-a-slipknot/
- ↑ https://www.youtube.com/watch?v=hsVrg71Jgbs&feature=youtu.be&t=255
- ↑ https://www.youtube.com/watch?v=hsVrg71Jgbs&feature=youtu.be&t=291
- ↑ https://www.youtube.com/watch?v=hsVrg71Jgbs&feature=youtu.be&t=353
- ↑ https://www.youtube.com/watch?v=hsVrg71Jgbs&feature=youtu.be&t=459
- ↑ https://www.youtube.com/watch?v=hsVrg71Jgbs&feature=youtu.be&t=527
- ↑ https://www.youtube.com/watch?v=hsVrg71Jgbs&feature=youtu.be&t=584
- ↑ https://www.youtube.com/watch?v=hsVrg71Jgbs&feature=youtu.be&t=584
- ↑ https://www.youtube.com/watch?v=hsVrg71Jgbs&feature=youtu.be&t=737
- ↑ https://www.youtube.com/watch?v=hsVrg71Jgbs&feature=youtu.be&t=15
- ↑ https://www.youtube.com/watch?v=IPQAGneb2kI&feature=youtu.be&t=36
- ↑ https://www.youtube.com/watch?v=hsVrg71Jgbs&feature=youtu.be&t=1270
About This Article