This article was co-authored by wikiHow staff writer, Eric McClure. Eric McClure is an editing fellow at wikiHow where he has been editing, researching, and creating content since 2019. A former educator and poet, his work has appeared in Carcinogenic Poetry, Shot Glass Journal, Prairie Margins, and The Rusty Nail. His digital chapbook, The Internet, was also published in TL;DR Magazine. He was the winner of the Paul Carroll award for outstanding achievement in creative writing in 2014, and he was a featured reader at the Poetry Foundation’s Open Door Reading Series in 2015. Eric holds a BA in English from the University of Illinois at Chicago, and an MEd in secondary education from DePaul University.
There are 12 references cited in this article, which can be found at the bottom of the page.
The wikiHow Video Team also followed the article's instructions and verified that they work.
This article has been viewed 14,522 times.
Learn more...
Your drumsticks are an extension of you—your style, music, and personality. While there’s nothing wrong with leaving your drumsticks blank, you may want to customize your set to give them a little edge. This can be a little tricky since adding too much paint or tape to the sticks can modify the sound or make your sticks more likely to break. You also can’t modify the tip unless you’re willing to leave marks all over your drum kit. However, there are two simple ways to modify your sticks. You can paint your sticks or use layers of electrical tape to give them some new color.
Steps
Using Electrical Tape
-
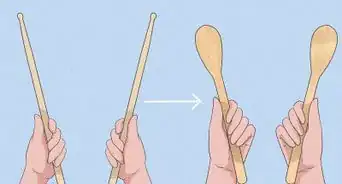
1Pick up a few rolls of electrical tape in colors you like. You can use multiple rolls to give your drumsticks a colorful pattern, or just use a single color to change the overall color of the stick. Grab a few rolls of electrical tape and pull out some non-serrated scissors to cut the tape.[1]
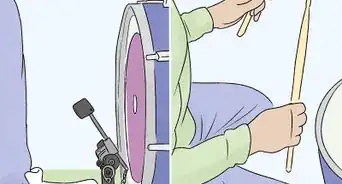
- Taping your sticks will change the sound of Rimshots and make them muffled and soft. This is why taping the sticks is popular with people that play marching drums or buckets, but you don’t see a lot of rock band drummers taping their sticks for this reason.
- If you use white tape, it will get extremely dirty really fast—you can absolutely use white tape, but you may have to replace it regularly.
- This will also make your stick heavier, which may slow your reaction time down a little. Some drummers practice with taped sticks so that they’re quicker when they’re playing live shows.
-
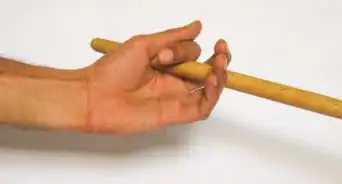
2Cut a straight edge at the end of the tape and line it up under the tip. If the tape isn’t brand new, peel an edge out and cut a straight line in the end of the tape. Then, hold the tape horizontally along the tapered section under the tip of the stick and press the edge into the wood. Keep the tape oriented so that the long edge of the tape rests at a 90-degree angle to the tip.[2]Advertisement
-
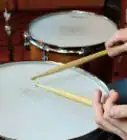
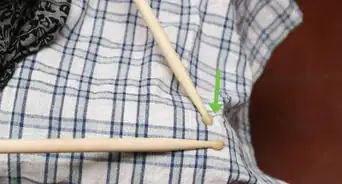
3Pull the tape tight and roll it down around the stick towards the other end. Hold the first piece you taped in place with your thumb. Wrap the tape around the wood under the tip so that you have a single layer of electrical tape. Then, gently pull the roll down 20- to 30-degrees from the tip and rotate your drumstick in your other hand. Slowly add layers of tape to the stick by working away from the tip.[3]
- Try to line the middle of each layer of tape with the lower edge on the previous layer. This way, every layer of tape will be equally thick. If the tape overlaps too much or too little, there will be uneven wrinkles.
-
4Wrap the remaining half of your stick with the electrical tape. Continue angling your layers of tape down towards the base of the handle. As you get to the last 1–2 inches (2.5–5.1 cm) of the stick, pull the roll of tape upwards a little as you apply it to slowly transition into a straight wrap where tape is parallel with the butt of the stick. [4]
-
5Wrap the bottom 2-3 times with your tape before cutting the tape. Once you get to the last horizontal section of the drumstick, pull the tape taut while wrapping the base 2-3 times to straighten the tape out and keep it from unravelling. Then, cut the tape at a 90-degree angle to the length of the tape and press it firmly into the drumstick.[5]
Tip: You can stop right here if you only want to change the color of the stick. You don’t have to add any additional patterns if you don’t want to.
-
6Use your second color to wrap the stick in a second spiral layer. Grab your second roll of tape and repeat the wrapping process at the top by curling the tape under the tip of the stick. Then, add another spiral with your second color but leave a 1 in (2.5 cm) gap between each layer you wrap to create a candy cane appearance.[6]
- You can also use 1-2 vertical pieces of tape to create a set of parallel lines on either side of the sticks to give them a sleeker, thinner look.
- Repeat this entire process on the other drumstick. You can even use a different set of colors or add different accents to give each stick a unique look.
-
7Add smaller accents with the second color, if desired. You can add 2-3 accents by wrapping a single layer of another color on either side of the area where you grip the stick, or add a little streak of color by wrapping the top 1/5 of the drumstick. It’s really up to you when it comes to the design and colors of the accents.[7]
- You can also cut the second roll of tape in half lengthwise as you add thinner loops around the stick to make them look like rings.
- Alternatively, you can wrap each section of the stick in a different color of tape to create a rainbow look.


Spray-Painting Your Drumsticks
-
1Sand the surface of the drumsticks without sanding the tip. Drumsticks are usually coated in a protective lacquer that won’t hold paint very well. To remove this layer, sand the surface of the drumsticks using 120-grit sandpaper. Use back-and-forth strokes to erode the lacquer and open the wood grain while rotating the sticks to sand each side. Do this for both drumsticks. Wipe the sawdust off with a dry cloth.[8]
- You can sand the sticks a second time with 300-grit sandpaper to erode a thicker layer of lacquer. This is probably unnecessary, though.
- If your drumsticks are plastic, you don’t need to sand the surface. The paint may not stick very well to these sticks, so it’s probably not your best option to begin with, though.
-
2Tape the tips off to protect them from paint and keep your drums safe. If you paint the tips of the drumsticks, the paint will rub off on your drums and cymbals whenever you hit them. To prevent this, take a few pieces of masking tape and wrap them around the surface of each tip. Cover each tip entirely to protect it from your paint.
-
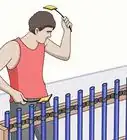
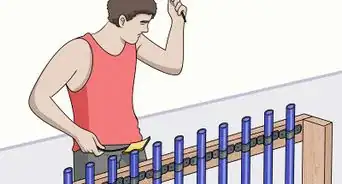
3Hang the drumsticks from a clothesline to paint them. Grab a piece of string and wrap it under the tip of your drumstick. Tie the string off with a tight knot and hang it from a clothesline or some other object outside. This way you can paint the drumsticks from each side without worrying about touching the stick. Repeat this process with your second drumstick and hang it at least 12 inches (3.0×10¹⁴ fm) away from the other stick.[9]
- You can hang the drumsticks from a hanger and hold them up to paint them if you don’t have a clothesline.
-
4Prime the drumsticks if you want the paint to last longer. Grab a can of white spray primer designed specifically for wood or furniture. Spray each side of the drumstick with your spray primer. Coat the wood in a smooth, even coat and wait 2 hours to let the drumstick dry.[10]
- You can sand the primed layer after doing this if you want a cleaner paint job, but this will remove another layer of wood. You don’t want to remove too much wood or the drums may not sound right when you use them. They may also be more likely to break.
-
5Choose a darker color of latex spray paint to paint your sticks. Any spray paint other than latex will add an odd texture to the drumsticks that may make them difficult to use. Choose a color that you like and will match your vibe and energy when you’re playing the drums. However, avoid using white, yellow, or pink. Lighter colors will soak up dirt and sweat from your hands while you’re playing.[11]
- You can use a different color of spray paint to make each drumstick a different color if you’d like.
-
6Coat the drumsticks in an even layer of spray paint. Hold the nozzle 8–12 inches (20–30 cm) away from your first stick and press down on the nozzle to release your paint. Move the can up and down while painting the first side of the drumstick. Walk around the drumstick while painting to cover each side. Stop once you’ve covered the stick in a nice, even layer of paint.[12]
- Repeat this process on the other stick.
-
7Wait at least 1 hour for the paint to cure to the wood. Spray paint typically dries pretty quickly but you’re better off waiting for a full hour before touching your sticks. You can add a second layer of paint if you want a darker layer of paint.
- If you add more than 2 layers of paint, the sticks may feel really thick in your hand. You can add more layers if you’d like, but it’s probably not ideal.
-
8Coat your sticks in a lacquer to protect the paint if you’d like. Pick up an aerosol can of spray lacquer and hold the nozzle 8–10 inches (20–25 cm) away from the stick. Hold the nozzle down and move the can back and forth over the wood to coat the drumstick in a protective layer of lacquer. Repeat the process on the other stick. Wait at least 2 hours to give the lacquer enough time to cure.[13]
Tip: Since you can’t recreate the super-thin layer of lacquer that the original manufacturer put on the stick, this may dramatically change the way your drumsticks sound. The paint will wear away over time anyway, so feel free to skip this step if you’d like.


Things You’ll Need
Using Electrical Tape
- Electrical tape
- Scissors
Painting Your Drumsticks
- Sandpaper
- Masking tape
- Spray primer
- Spray paint
- Acrylic paint
- Paint brush
- Lacquer spray (optional)
References
- ↑ https://youtu.be/S4G4ndD5kEA?t=46
- ↑ https://youtu.be/S4G4ndD5kEA?t=118
- ↑ https://youtu.be/S4G4ndD5kEA?t=173
- ↑ https://youtu.be/S4G4ndD5kEA?t=423
- ↑ https://youtu.be/S4G4ndD5kEA?t=423
- ↑ https://youtu.be/S4G4ndD5kEA?t=583
- ↑ https://youtu.be/S4G4ndD5kEA?t=698
- ↑ https://youtu.be/XCO5XqTk0ps?t=63
- ↑ https://youtu.be/mCFDxNR1LCs?t=63
About This Article