This article was co-authored by wikiHow Staff. Our trained team of editors and researchers validate articles for accuracy and comprehensiveness. wikiHow's Content Management Team carefully monitors the work from our editorial staff to ensure that each article is backed by trusted research and meets our high quality standards.
There are 8 references cited in this article, which can be found at the bottom of the page.
The wikiHow Video Team also followed the article's instructions and verified that they work.
This article has been viewed 27,458 times.
Learn more...
Decorating golf balls is an activity that can be fun for adults and children alike. Whether you're making a gift for the golfer in your life or accenting your home décor, you can use golf balls for original artwork by adding designs with permanent marker or with paint. You can also use red, black, and white paint to enhance your garden with golf ball ladybugs.
Steps
Decorating Golf Balls with Permanent Marker
-
1Choose a design. There are a lot of designs to choose from. Floral patterns are an easy, fun, and cute pattern to draw if you're new to decorating golf balls. You could also recreate the solar system or make minions and popular characters. You have endless options, so come up with a plan for how you will want your golf balls to look.
- Some creative ideas include fruit, bugs and animals, holiday themes, and other types of sports balls like soccer and basket balls.[1]
-
2Gather golf balls and markers. Use quality permanent markers that won't easily rub or wash off and won't fade over time. Choose an array of colors. For color that stands out brightest on turf, look for reds and yellows.[2]
- Gather a lot of golf balls. As you work, you may want to discard some that you don't like, or you may come up with new designs that you want to try along the way. Try as many different designs and illustrations as you like.
- Place all materials in a cardboard box or other flat surface where the balls will not roll away.
Advertisement -
3Wash the golf balls thoroughly with dish soap. Place them in a sink and scrub them with hot, soapy water to remove dirt or other elements from the surface. Dry them off with a dish towel before drawing on them with permanent marker.
-
4Draw lines around the golf ball. Set the golf ball on a flat surface and hold the marker steady with the tip touching the ball. Slowly roll the golf ball for a straight line going all the way around the ball. Then move the marker to the next point on the ball where you want to draw another line.[3]
- Lines can be decorative by themselves or they can be used as stems for flowers in a floral pattern.
- Use different colors for a specific theme. For example, use red and green for a Christmas themed design or black and yellow to make the golf ball look like a bumblebee.
-
5Make a floral pattern on the ball. Color in the ridges on the ball with the tip of the marker. You can make a flower pattern by coloring in one ridge with one color, and each of the surrounding ridges with a brighter color.
- This process also works well for paw prints if you use neutral colors like black and brown.
-
6Color in the ridges. Color every other ridge for a checkered pattern or color in ridges sparingly for a polka-dot pattern. You can use different colors or all one color depending on how you want your pattern to look. The technique is simple but the finished design will be fun to see. [4]
- You can create a great piece of home décor by coloring golf balls with simple designs and placing them in a vase or frame.[5]


Painting Golf Balls
-
1Choose how you want your golf balls to look. You can use acrylic paint and paint brushes, or spray paint for a more solid look of one color. Depending on the design, you may need to gather a lot of golf balls. It's better to have too many golf balls than not enough as you might want to change your design along the way. Use as many golf balls as you need.
- Knowing what type of design you want before you start can help you decide if you want spray paint or acrylic paint and what size brushes to use.
-
2Set up your workspace. Painting golf balls is best when done outdoors due to the mess and fumes. Place empty egg cartons upside down outside on a flat surface. Then place the golf balls on the egg carton to hold them firmly in place while you're working.[6]
-
3Sandpaper the golf balls. This will remove the gloss on the outer surface of the ball so that the paint will stick better. This will also help remove any dirt and grime.[7]
-
4Add primer to the golf balls. Keep them on the egg cartons and spray over the golf balls with paint primer spray. This will also ensure that the paint will stick and have a longer lasting hold. Hold away from your face as you spray, and then wait for the balls to dry.[8]
-
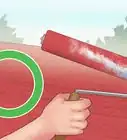
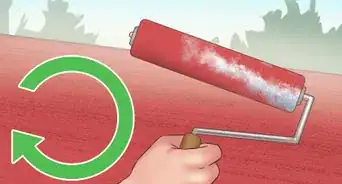
5Paint a solid color with spray paint. You can make a ball one solid color by placing it on the empty egg carton and spraying it with spray paint. Once it is dry, turn it over and spray the other side. If you don't have spray paint, you can also use a large brush to coat the balls with acrylic paint.
- Once you have a solid-colored golf ball that isn't white, you can continue to create designs with a more colorful background.
-
6Use stickers and paint to make a clean-cut design. Stickers of stars, letters, flowers, and other shapes will work well for designs, initials or names when you place the sticker on the ball and paint over it with either a brush or spray paint. Allow the paint to dry before you remove stickers.[9]
-
7Use a fine brush to draw smaller designs. Use the tip of a small brush to paint intricate designs or make a floral pattern by filling in the ridges with different colors. Do this by painting one ridge a dark neutral color and each surrounding ridge a bright color.


Making Golf Ball Ladybugs
-
1Set up a workspace where you can paint. Outdoors is usually the best place to work due to the mess and fumes. If you will be working indoors, lay down newspaper and open a window. Lay empty egg cartons on top of the newspaper or flat surface area where you will be painting.
- The empty egg cartons will be used to hold the golf balls while you work so that they remain steady and you can keep one hand free.
-
2Sandpaper the surface of each golf ball. This will remove the gloss from the ball and any residual dirt. Golf balls have a layer of gloss on the surface that can keep paint from sticking, so it's important to make sure all the gloss is removed. After sandpapering each ball, brush off any extra sand or dust.
-
3Spray a paint primer on the balls. This is easiest to do while the balls are sitting on the upside-down egg carton. This will help to give the paint a better hold and will also help the colors look more vibrant. Allow the primer to fully dry before moving on.[10]
-
4Coat the ball with red paint. Keep the balls on the egg carton while you paint. You can use a large brush, or for an easy and solid coating you can use spray paint. Allow the red paint to fully dry before adding any black. This will prevent the black paint from running into the red paint and making a mess on the ball.[11]
-
5Paint a large black circle for the head and fill it in with black paint. Continue to draw a line from the top of the head in a semi-circle around the ball. This is the line between the two wings. Continue to use the black paint to fill in ridges on the ball for spots.[12]
- You don't have to make a lot of black spots. Just a few will look great.
-
6Paint two small white rings inside the head of the ladybug. These will be the eyes, so put them towards the top half of the head close to the wings. At this point the design is complete, so wait for the ball to dry.[13]
-
7Add varnish to protect your new ladybug golf balls from rain and weathering. Apply the varnish with a clean brush and allow it to sit. Once the varnish is dry you can start putting them around your garden or in your flower beds.[14]
- Try to keep them in shaded areas to avoid the color from fading quickly in the sunlight.


Warnings
- Children should always be supervised while decorating golf balls. Paint can be toxic if ingested.[15]⧼thumbs_response⧽
Things You'll Need
- Golf balls
- Permanent markers in different colors
- Acrylic paint or spray paint of different colors
- A cardboard box
- Newspaper
- Empty egg cartons
- Sandpaper
- Primer
- Varnish
- Dish soap
References
- ↑ https://cutediyprojects.com/garden/this-woman-painted-on-old-golf-balls-the-end-result-is-brilliant/
- ↑ https://laughingkidslearn.com/decorating-golf-balls/
- ↑ https://laughingkidslearn.com/decorating-golf-balls/
- ↑ https://laughingkidslearn.com/decorating-golf-balls/
- ↑ https://www.huffingtonpost.com/chris-barnes/repurposing-ideas-new-uses-golf-balls_b_1952116.html
- ↑ https://www.hometalk.com/16259227/quick-easy-inexpensive-patriotic-holiday-decorating?expand_all_questions=1
- ↑ https://www.hometalk.com/16259227/quick-easy-inexpensive-patriotic-holiday-decorating?expand_all_questions=1
- ↑ https://cutediyprojects.com/garden/this-woman-painted-on-old-golf-balls-the-end-result-is-brilliant
- ↑ https://www.hometalk.com/16259227/quick-easy-inexpensive-patriotic-holiday-decorating?expand_all_questions=1
- ↑ https://www.1001gardens.org/2015/03/diy-golf-ball-upcycled-happy-ladybug/
- ↑ https://cutediyprojects.com/garden/this-woman-painted-on-old-golf-balls-the-end-result-is-brilliant
- ↑ http://diycozyhome.com/golf-ball-ladybugs/
- ↑ http://diycozyhome.com/golf-ball-ladybugs/
- ↑ https://www.1001gardens.org/2015/03/diy-golf-ball-upcycled-happy-ladybug/
- ↑ https://www.poison.org/articles/2008-oct/safe-use-of-art-products
About This Article