This article was co-authored by Patricia Penker and by wikiHow staff writer, Sophia Latorre. Patricia Penker is an Interior Designer and the Owner of Exclusively To Design, one of the top residential design companies in South Florida. With over 25 years of experience, Patricia specializes in interior design, interior decorating, and home staging. Patricia holds a Bachelor’s degree in Fashion Design from the University of Cincinnati and a Master’s Certificate in Digital Design and 3D Modeling from CADDTrain. Patricia’s interior designs have been featured on HGTV’s Rip and Renew and Save My Bath and in celebrity homes. Exclusively To Design has been recommended on Houzz, Expertise - Best Home Staging in Miami and Best Interior Designers in Miami, and Best of HomeGuide.
There are 9 references cited in this article, which can be found at the bottom of the page.
This article has been viewed 15,923 times.
If your cabinets have glass doors, you might be wondering how best to display your dishes in them. Luckily, there are a few simple steps you can follow to ensure your cabinets look nice and tidy. If you want to add glass panels to your existing cabinet doors to brighten up your space and showcase your dishware, you can easily do so with a few basic tools.
Steps
Displaying Dishware and Other Items
-
1Show off your best dishes, glassware, and China. Glass door cabinets are an excellent way to showcase beautiful plates, cups, and glasses that are too formal or fragile for everyday use.[1] Choose high-end items to display, such as champagne flutes, decorative plates, and other items you use for special occasions.[2]
-
2Avoid storing unsightly items in glass cabinets. Glass doors will showcase all of the contents of your kitchen cabinets, which may result in a cluttered look. Keep unsightly items like cereal boxes, canned goods, snack bars, and unattractive dishes in a closed cupboard where they won't be seen.[3]
- This may also apply to bulky kitchen items like small appliances, cutting boards, and mixing bowls.
Advertisement -
3Transfer food and small items to glass jars if you want to display them. You can make food look more presentable by putting dried goods, cereals, and other bulk items into tall glass jars. This will look much better than displaying the packaging the items came in. The same is true for small like straws and other gadgets.[4]
- For instance, arrange 3-4 jars of various sizes on the same shelf for a functional, but beautiful, display.
-
4Group similar items together for uniformity. Organize the contents of your cabinets so that the same types of dishware and glassware are stored together.[5] This will make things look neat and orderly.[6]
- For instance, store all of your coffee mugs together on 1 shelf or in 1 cabinet, depending on how many you have.
-
5Create symmetrical stacks. If you plan to stack things like plates and bowls, make each stack the same height. This makes for a more aesthetically-pleasing look that creating haphazard stacks.[7]
-
6Position small items in front of large ones. If your cabinets are deep, you may be able to add several rows of dishes. Put the smaller items closest to the doors and stick big pieces in the back.[8]
- For example, arrange a few teacups in front of a decorative teapot.
-
7Install LED lighting strips inside your cabinets to illuminate your items. To really show off your dishes or glassware, cast a soft glow on them by placing LED lighting inside the cabinets. Add small strips of LED lights so that they are hidden by the door frames when the cabinet doors are closed.[9]
- Purchase LED light strips in a hardware store or online.


Adding Glass Panels to Cabinet Doors
-
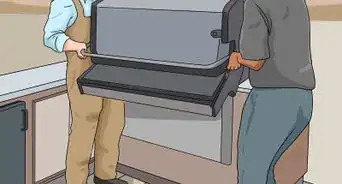
1Remove the cabinet doors and bring them to a safe work area. Use a screwdriver to remove the screws in each door's hinges. Gently lift away the doors and place them in a safe work area, like a garage or an outdoor space with a sturdy work table. [10]
- If your cabinet doors have concealed hinges, simply squeeze the clip on each hinge to release it.[11]
-
2Drill pilot holes into the corners about 0.25 inches (0.64 cm) from the frame. Use an electric drill to make small holes at the corners of each door frame, approximately 0.25 inches (0.64 cm) from the outside border. These holes will allow you to insert your jigsaw into the wood smoothly. Position your drill bit where you want to make the holes and apply steady pressure to drill through the wood cleanly.[12]
- Measure and mark each entry point with a pencil before making the holes.
- Wear safety goggles or glasses to protect your eyes from dust and other debris while drilling.
- Use any size of drill bit that will give you a large enough entryway for your jigsaw.
- To ensure that your cabinet doors don't move while you drill and cut them, secure them to your work table with large clamps.
-
3Cut out the inside of each cabinet door with a jigsaw. Insert your jigsaw into one of the corner holes. Turn it on and gently guide it along the inside of the door in a straight line. When you reach the next corner hole, stop the saw and reposition it. Do this for each of the 4 sides of the cabinet doors and remove the cut-out parts carefully.[13]
- Be sure to leave a 0.25 in (0.64 cm) lip around the edge of each cutout so you can adhere the glass panels to the frame.
- To ensure you cut straight lines, place painter’s tape along the edge of the frame between each of the drilled holes.
-
4Measure the empty spaces in each cabinet door. After removing the door panels, you’ll be left with just the frames. Use a tape measure to measure the empty space so you know what size glass panels to purchase.
-
5Purchase pre-cut glass panels from a local hardware store. Provide the measurements and the number of panels you need to an employee at the hardware store. You can choose from ribbed glass, frosted glass, clear glass, or colored glass, depending on your preference and personal style.[14]
- Plain, clear glass will usually cost about $3 per square foot.
- In case of accidents or damage, purchase at least 1 or 2 extra pieces of glass.
-
6Apply a bead of clear silicone along the back of the lip. Use a caulking gun to apply a thick bead of clear silicone caulk around the back lip of the doors. Press the release trigger gently to avoid over-applying the silicone. Slowly trace each side to create smooth, even lines.[15]
- Use clear silicone caulk as it will be less visible to the eye than white or gray.
-
7Lay the glass panels inside the door frames. Gently place your glass panels into the cut-out frames of each cabinet door on the back side. Make sure that the glass is lying completely flat. Press down gently so that the silicone along the inside lip of the frames adheres to the edge of the glass.[16]
- The silicone caulk alone is not enough to hold the glass in place, but it will keep it from coming loose or rattling when cabinet doors are opened and closed.
-
8Secure the glass with plastic glass clips every 12 inches (30 cm). Place glass clips around the back of each cabinet door frame so that the top sits on the wood part and the bottom holds the glass panel in place. Secure them by attaching the included screws into the holes in the clips.[17]
- Purchase plastic glass clips at a hardware store or online.


Expert Q&A
Did you know you can get expert answers for this article?
Unlock expert answers by supporting wikiHow
-
QuestionWhat should I put in kitchen cabinets with glass doors?
 Patricia PenkerPatricia Penker is an Interior Designer and the Owner of Exclusively To Design, one of the top residential design companies in South Florida. With over 25 years of experience, Patricia specializes in interior design, interior decorating, and home staging. Patricia holds a Bachelor’s degree in Fashion Design from the University of Cincinnati and a Master’s Certificate in Digital Design and 3D Modeling from CADDTrain. Patricia’s interior designs have been featured on HGTV’s Rip and Renew and Save My Bath and in celebrity homes. Exclusively To Design has been recommended on Houzz, Expertise - Best Home Staging in Miami and Best Interior Designers in Miami, and Best of HomeGuide.
Interior DesignerShow off your best dinnerware, such as crystal glasses or fine china that you don't use very frequently.
Support wikiHow by unlocking this expert answer.
-
QuestionHow should I arrange a cabinet display?Patricia PenkerPatricia Penker is an Interior Designer and the Owner of Exclusively To Design, one of the top residential design companies in South Florida. With over 25 years of experience, Patricia specializes in interior design, interior decorating, and home staging. Patricia holds a Bachelor’s degree in Fashion Design from the University of Cincinnati and a Master’s Certificate in Digital Design and 3D Modeling from CADDTrain. Patricia’s interior designs have been featured on HGTV’s Rip and Renew and Save My Bath and in celebrity homes. Exclusively To Design has been recommended on Houzz, Expertise - Best Home Staging in Miami and Best Interior Designers in Miami, and Best of HomeGuide.
Interior DesignerMake sure the colors of your items work together and with your other kitchen decor so it doesn't clash.Support wikiHow by unlocking this expert answer.
Things You’ll Need
Adding Glass Panels to Cabinet Doors
- Screwdriver
- Electric drill and drill bits
- Safety goggles
- Clamps
- Jigsaw
- Tape measure
- Pre-cut glass panels
- Clear silicone
- Caulking gun
- Plastic glass clips

References
- ↑ Patricia Penker. Interior Designer. Expert Interview. 7 October 2020.
- ↑ https://mykarmastream.com/how-to-style-your-glass-front-kitchen-cabinets-in-a-fabulous-way/
- ↑ https://www.hgtv.com/design/rooms/kitchens/glass-kitchen-cabinet-doors
- ↑ https://www.hgtv.com/design/rooms/kitchens/glass-kitchen-cabinet-doors
- ↑ Patricia Penker. Interior Designer. Expert Interview. 7 October 2020.
- ↑ http://www.athoughtfulplaceblog.com/5-tips-on-living-with-glass-cabinets/
- ↑ http://www.athoughtfulplaceblog.com/5-tips-on-living-with-glass-cabinets/
- ↑ https://mykarmastream.com/how-to-style-your-glass-front-kitchen-cabinets-in-a-fabulous-way/
- ↑ https://www.forbes.com/sites/houzz/2017/06/09/17-designer-details-to-use-in-your-kitchen/#733a19c377ec
- ↑ https://www.apartmenttherapy.com/rental-kitchen-style-solution-remove-cabinet-doors-247126
- ↑ https://www.youtube.com/watch?v=xl5ONKQ-KfM&feature=youtu.be&t=11
- ↑ https://www.bitterrootdiy.com/how-to-add-glass-to-kitchen-cabinet-doors/
- ↑ https://www.bitterrootdiy.com/how-to-add-glass-to-kitchen-cabinet-doors/
- ↑ https://www.familyhandyman.com/kitchen/diy-kitchen-cabinets/convert-wood-cabinet-doors-to-glass/view-all/
- ↑ https://www.bitterrootdiy.com/how-to-add-glass-to-kitchen-cabinet-doors/
- ↑ https://www.familyhandyman.com/kitchen/diy-kitchen-cabinets/convert-wood-cabinet-doors-to-glass/view-all/
- ↑ https://www.familyhandyman.com/kitchen/diy-kitchen-cabinets/convert-wood-cabinet-doors-to-glass/view-all/
About This Article