X
This article was co-authored by wikiHow staff writer, Jack Lloyd. Jack Lloyd is a Technology Writer and Editor for wikiHow. He has over two years of experience writing and editing technology-related articles. He is technology enthusiast and an English teacher.
The wikiHow Tech Team also followed the article's instructions and verified that they work.
This article has been viewed 342,758 times.
Learn more...
This wikiHow teaches you how to delete a locked or otherwise restricted file on your Windows or Mac computer. You can use Safe Mode or an app called Process Explorer on Windows, while Mac users can either use the Get Info window to unlock the file or force-delete the file from the Trash with Terminal.
Steps
Method 1
Method 1 of 4:
Using Safe Mode on Windows
-
1
-
2Advertisement
-
3
-
4Click the Recovery tab. You'll find it on the left side of the window.
-
5Click Restart now. It's near the middle of the page. Doing so will restart your computer into the Advanced Options menu.
-
6Click Troubleshoot. This option is near the top of the screen.
-
7Click Advanced options. You'll find this in the middle of the screen.
-
8Click Startup settings. It's on the right side of the screen.
-
9Click Restart. This button is near the bottom of the screen.
-
10Select the "Enable Safe Mode" option. Press 4 or F4 on the "Startup Settings" window.
-
11Wait for Windows to finish restarting. If you use a password on your account, you'll need to select your account and enter the password before proceeding.
-
12
-
13Delete the file. Click the previously locked file, click the Home tab, and click Delete in the toolbar that appears.
- Alternatively, you can click the file to select it and then press the Delete key.
-
14Empty the Recycle Bin. Double-click the Recycle Bin icon on your desktop, then click the Manage tab and click Empty Recycle Bin in the toolbar. Your file should be deleted.
- Once you've deleted your file, you can restart your computer to exit Safe Mode.


Advertisement
Method 2
Method 2 of 4:
Using Process Explorer on Windows
-
1Open the locked file. In order for the file to show up in Process Explorer later, you'll need to have the locked file open.
- Simply double-clicking the file will be enough to place it in the "Running" category of your computer's Task Manager.
-
2Open the Process Explorer page. Go to https://docs.microsoft.com/en-us/sysinternals/downloads/process-explorer/ in your browser.[1]
- Process Explorer is an official Microsoft app.
-
3Click Download Process Explorer. This link is near the top of the page. Doing so will prompt the Process Explorer ZIP folder to download onto your computer.
-
4Open the ZIP folder. In your computer's download folder (e.g., the desktop or the Downloads folder), double-click the "ProcessExplorer.zip" folder to open it.
-
5Click the Extract tab. It's at the top of the window. A toolbar will appear at the top of the window.
-
6Click Extract all. You'll find this option in the Extract toolbar. Clicking it prompts a new window to open.
-
7Click Extract. It's in the bottom-right corner of the window. This will install the Process Explorer app and open its installation folder.
- By default, this will install the Process Explorer in its current download location.
- If you want to change the installation location, first click Browse... and select a new folder.
-
8Open Process Explorer. Double-click the procexp64 item in the folder if your computer uses a 64-bit processor.
- If your computer uses a 32-bit processor, you'll double-click procexp here instead.
-
9Click Agree when prompted. This will open the Process Explorer main window.
-
10Click File. It's in the top-left corner of the window. A drop-down menu will appear.
-
11Click Show Details for All Processes. This option is in the middle of the File drop-down menu.
-
12Click Yes when prompted. The Process Explorer window will close and re-open.
-
13Click Find. It's a tab at the top of the window.
-
14Click Find Handle or DLL…. You'll find this option in the Find drop-down menu. A search box will pop up.
-
15Enter the locked file's name. Type the name of the locked file into the text box, then click Search to the right of the text box.
-
16Select the locked file. Click the name of the locked file in the search window.
-
17Find the highlighted file name in Process Explorer. In the Process Explorer window (not the search window), you should see the file's name highlighted near the bottom of the window.
-
18Right-click the file name. A pop-up menu will appear.
- If your mouse doesn't have a right-click button, click the right side of the mouse, or use two fingers to click the mouse.
- If your computer uses a trackpad instead of a mouse, use two fingers to tap the trackpad or press the right side of the trackpad's mouse.
-
19Click Close Handle. It's in the right-click pop-up menu. Doing so unlocks the file, making it possible to delete the file.
-
20
-
21Delete the file. Click the previously locked file, click the Home tab, and click Delete in the toolbar that appears.
- Alternatively, you can click the file to select it and then press the Delete key.
-
22Empty the Recycle Bin. Double-click the Recycle Bin icon on your desktop, then click the Manage tab and click Empty Recycle Bin in the toolbar. Your file should be deleted.


Advertisement
Method 3
Method 3 of 4:
Using the Info Menu on Mac
-
1Open Finder. It's the blue, face-like app icon in your Mac's Dock.
-
2Find the file that you want to delete. On the left side of the Finder window, click the folder in which your locked file is stored.
-
3Select the file. Click the file that you want to delete.
-
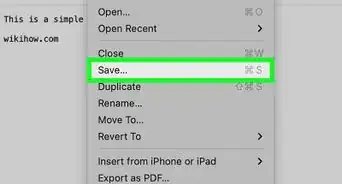
4Click File. It's a menu item in the upper-left side of the screen. A drop-down menu will appear.
-
5Click Get Info. This option is in the File drop-down menu. Doing so opens a window with the locked file's information.
-
6Unlock the Get Info menu. If the lock icon in the bottom-right corner of the window is closed, click it, then enter your administrator password.
-
7Uncheck the "Locked" box. In the middle of the "Get Info" window, there will be a checkbox with the word "Locked" next to it; uncheck this box to unlock the file.
-
8Close the "Get Info" window. Click the red circle in the upper-left corner of the window.
-
9Move the file to the Trash. Select the file, click the Edit menu item at the top of the screen, and click Move to Trash. The locked file will be sent to the Trash.
-
10Empty the Trash. Click and hold the Trash icon in your Mac's Dock, then click Empty Trash when prompted. Doing so will delete anything in the Trash, including your locked file.


Advertisement
Method 4
Method 4 of 4:
Using Terminal on Mac
-
1Move the locked file to the Trash. Click the locked file to select it, then click the Edit menu item at the top of the screen and click Move to Trash in the resulting drop-down menu.
-
2
-
3Type in terminal. This will search your computer for the Terminal app.
-
4
-
5Type in the force-empty command. Type sudo rm -R into Terminal, making sure to place a space after "R". Don't hit ⏎ Return just yet.[2]
-
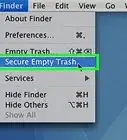
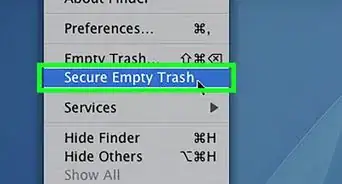
6Open the Trash. Hold down Ctrl while clicking the Trash icon to do so.
-
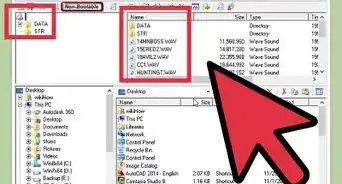
7Find the locked file. If there are multiple files in the Trash, find the locked one that you just deleted.
- In instances where your Trash won't empty even though you've unlocked the files, select all files in the Trash by clicking one file and then pressing ⌘ Command+A instead.
-
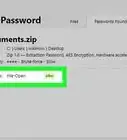
8Copy the file into the Terminal window. Click and drag the locked file onto the Terminal window, then release the mouse.
- If you selected all of the files in the Trash, clicking and dragging one file into Terminal will prompt all of the files to copy into Terminal.
-
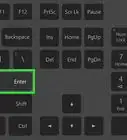
9Press ⏎ Return. Once the files have copied into Terminal, pressing ⏎ Return will request permission to run your force-delete command.
-
10Type in your Administrator password. This is the password that you use to log into your Mac.
- You won't see letters or characters appear as you type your password in Terminal.
-
11Press ⏎ Return again. Doing so runs the force-delete command and empties the Trash. You should no longer have any locked or persistent files in the Trash.


Advertisement
Warnings
- Do not delete locked files on other people's accounts or machines without their explicit permission.⧼thumbs_response⧽
Advertisement


References
About This Article
Jack Lloyd
wikiHow Technology Writer
This article was co-authored by wikiHow staff writer, Jack Lloyd. Jack Lloyd is a Technology Writer and Editor for wikiHow. He has over two years of experience writing and editing technology-related articles. He is technology enthusiast and an English teacher. This article has been viewed 342,758 times.
How helpful is this?
Co-authors: 16
Updated: March 29, 2019
Views: 342,758
Categories: File Manipulation
Advertisement