This article was co-authored by Luigi Oppido and by wikiHow staff writer, Cory Stillman. Luigi Oppido is the Owner and Operator of Pleasure Point Computers in Santa Cruz, California. Luigi has over 25 years of experience in general computer repair, data recovery, virus removal, and upgrades. He is also the host of the Computer Man Show! broadcasted on KSQD covering central California for over two years.
This article has been viewed 71,760 times.
This wikiHow will show you how to use your laptop as an external display. Even as more recent iterations of PCs phase out HDMI ports, displaying images and videos on your laptop remains simple and effective. Using a wireless connection and your computer's built-in projection software, you can display content on your laptop with ease.
Steps
Using A PC Laptop as a Display
-
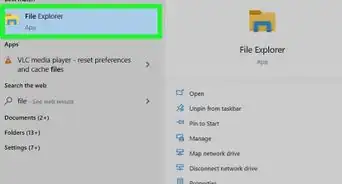
1Open Projection Settings. Use the search field in the lower left-hand corner of your Windows taskbar. You may also access it by holding down ⊞ Win+K simultaneously, and clicking "Projection Settings" on the pop-up page. [1]
- The software for your PC's projection settings is called "Miracast" and the settings may be named accordingly on older editions of Windows. From Windows 8 onwards, however, the section will be labeled with the aforementioned "Projection Settings."
-
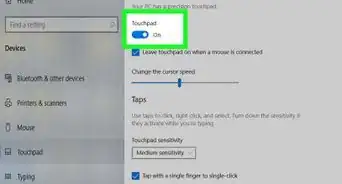
2Activate Wireless Display. In order to use any of your projection settings, you must first add "Wireless Display" as a feature. The "Projection Settings" homepage will prompt you to do so, allowing you to return back to the page immediately after. [2]
- If Windows does not prompt you to activate "Wireless Display," you can do so manually by visiting the "Add or remove programs" section of your computer's settings, clicking on Optional features, then Add a feature, and searching for "Wireless Display." To complete the feature's installation, simply click on it and select Install.
- If you have already used your PC's projection settings in the past, you likely already have "Wireless Display" activated. If you are unsure, simply look and see whether or not you can interact with any of the options on the "Projection Settings" page. A PC without "Wireless Display" activated will gray out everything on the page.
Advertisement -
3Set your PC as Available for projection from other devices. You can do this from the first drop-down menu on the "Projection Settings" page. Choose from one of two options:
- Available everywhere. This setting allows you to project to your PC from any location, on any network.
- Available everywhere on secure networks. This setting allows you to project to your PC only when you are connected to a secure/trusted network, such as your home network.
-
4Adjust other settings as needed. The "Projection Settings" page includes you a few different options. Tinkering with these settings is not necessary, but you may want to change a few things depending upon your needs:
- Ask to project to this PC. In the second drop-down menu on the page, you can either choose to be asked for your approval every time you try to project to your PC, or to be asked only the first time you try to project to your PC.
- Require PIN for pairing. For added security, you may opt to require a PIN every time a device tries to project onto your PC. Because you have to confirm your willingness to project from your second device anyway, we recommend turning this setting off. [3]
- Towards the bottom of the page, you may also decide whether or not you can project to your PC when it is not plugged into a power source. You may also rename your PC if you want to make it easier to discover on other devices.
-
5Open the Connect app. Atop the "Projection Settings" page, Windows will offer you a reminder to use the "Connect" app when trying to project to your PC. Click on this message, and the app will load.
- In the future, you can load the app from anywhere on your PC by holding ⊞ Win+P simultaneously.
-
6Prepare your second device (laptop/phone) for projection. Projecting to your laptop is slightly different depending on whether you are trying to send content from a PC or a phone:
- On a PC, right-click the Notifications Center in the bottom right corner of your screen. Then, select Connect from the notifications menu on the bottom of the pull-out page.
- On an Android or Windows device, simply select Cast from your notifications panel, and look for your laptop amongst the available options. You may also search your Android's settings for "Cast." [4]
-
7Connect to your laptop's display. Select your laptop from the available options on either the projection panel on your PC or the "Cast" section of your mobile phone.
- If your laptop does not appear, it may be an older model, or may not include an Intel HD graphics card. You should still be able to connect to it from a PC by navigating to your PC's Display Settings and clicking Detect to make your PC manually search for another wireless display.
-
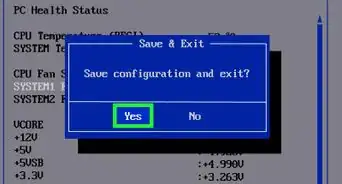
8Confirm the connection. On the laptop you intend to use as a second display, approve the attempt to connect from the PC/smartphone.
- Depending on which settings you chose, you may be able to skip this step.
-
9Right-click on your desktop for your PC's Display Settings. Be sure to do this on the PC whose content you are projecting to your laptop.
-
10Choose Extend desktop to this display under Multiple Displays. The "Multiple Displays" section of your display settings includes several options that only appear when you are actively connected to another display. While connected, be sure to extend your desktop to the second display, so that you can perfectly match the two displays. You should now be ready to use your second display as if it was connected via HDMI.


Expert Q&A
-
QuestionWhat is the difference between VGA and HDMI?
 Luigi OppidoLuigi Oppido is the Owner and Operator of Pleasure Point Computers in Santa Cruz, California. Luigi has over 25 years of experience in general computer repair, data recovery, virus removal, and upgrades. He is also the host of the Computer Man Show! broadcasted on KSQD covering central California for over two years.
Computer & Tech SpecialistBoth VGA and HDMI ports help connect your computer to an external monitor, but they use different processes to do so. VGA ports use a passive analog connection, so the port has to be enabled beforehand. HDMI ports create an instant digital connection—nothing needs to be enabled first.


References
- ↑ https://support.microsoft.com/en-us/windows/connect-to-a-projector-or-pc-7e170c39-58dc-c866-7d55-be2372632892
- ↑ https://www.onmsft.com/how-to/how-to-use-a-surface-pro-or-laptop-as-a-second-monitor
- ↑ https://techguided.com/how-to-use-a-laptop-as-a-monitor/
- ↑ https://developerinsider.co/how-to-cast-project-your-android-windows-phone-screen-to-a-windows-10-pc/
About This Article