This article was co-authored by Steven Waldman. Steven Waldman is a Professional Hair Stylist and the Director of Technical Training at Hair Cuttery. Steven uses his creative insight and extensive experience to drive educational programming and motivates facilitators and learners to communicate effectively, create and execute strategies to maximize potential, and achieve success. He uses unexpected sources such as art genres, architecture, and cooking to inspire shape, color, and cuts.
This article has been viewed 31,642 times.
Beachy waves are quick and easy to do. Best of all, they are meant to look somewhat messy and carefree, as though the person just came back from the beach. Most methods are meant for those with longer hair, but that does not mean you cannot have beachy waves if you have short hair. You can even use some of the same methods, with some tweaks.
Steps
Using Buns
-
1Apply a styling cream to damp hair. You can use any cream you want, as long as it adds moisture, smoothness, and shine. You can even use a small amount of conditioner, if you want. Apply the product all over you hair, but focus it on the ends.[1]
- You're hair should be damp enough so that it is still wet but no longer dripping.
-
2Part your hair as desired. A side part would look especially cute with beach waves, but you can do a center part too. Use the handle of a rat-tail comb to make the part even and clean.Advertisement
-
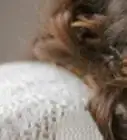
3Divide your hair into four sections. You will need vertical two sections on each side of your hair. If you have longer hair, you might be able to get away with just two sections, one on each side of your head.
-
4Twist each section into a mini bun. Secure the buns with small hair ties or bobby pins. Make sure that they are secure and won't come out. For tighter waves, twist each section into a rope braid first, then twist it into a bun.
- If you created a side part, consider leaving a small wisp of hair at your hairline out of the buns.[2]
-
5Mist your hair with a lightweight hairspray, if needed. This depends on how well your hair holds a curl. It also depends on how tight your want the waves to be. If you want really loose or relaxed waves, you can skip this step.
-
6Allow your hair to dry completely. How long this takes depends on how thick and porous your hair is. It could take an hour or it could take overnight. You can speed things up by using a hair dryer, but you need to be sure that your hair is dry inside too.
- Keep in mind that using a hair dryer will not ensure that the inside of the bun is dry. If you want to speed up the process, it's best to sit under a hooded dryer.
- If you left a wisp of hair out of the buns, twist it into a delicate rope, then drape it behind your ear.[3]
-
7Undo the buns once they are dry. Your hair should have taken on a loose, wavy shape. Again, your buns must be completely dry before you take them out, otherwise the waves won't hold.
- If you coiled the wisp of hair behind your ear, you can uncoil it now.
-
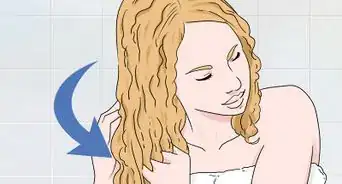
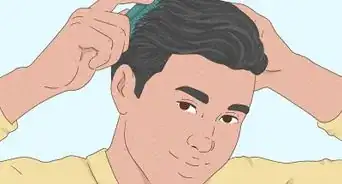
8Gently break up the waves. Your hair is likely clumped into two big waves (or four if you did four buns). Run your fingers through your hair, shaking them a bit. This will help break the waves up into smaller waves. It will also help add volume and a messy, beachy texture.[4]
-
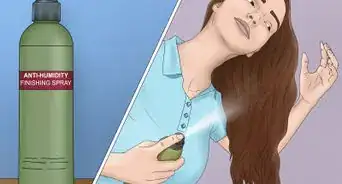
9Set the style with hairspray, if desired. This really depends on how well your hair holds a curl. If you have thick or curly hair, you may not need any hairspray; if you have straight or fine hair, a light misting may help the style hold longer. Here are some other finishing tips, depending on the look you want:[5]
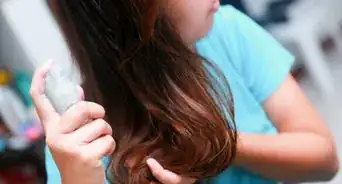
- Spray your hairbrush with sea salt spray, then comb it through your hair for volume. This will make your hair appear fuller.
- Apply some dry shampoo to the roots for more texture.
- Tease your hair at the crown for even more volume.
- Tame flyaways with a styling cream, serum, hairspray, or a little bit of conditioner.


Using a Hair Straightener
-
1Apply a heat protectant to clean, dry hair. Never straighten your hair while it is wet or without a heat protectant, or you will risk damaging it.[6]
-
2Clip the top half of your hair out of the way. If you have very thick, you may want to clip the top two-thirds out of the way instead.[7]
-
3Take a thin, vertical section of hair from your hairline. The section should be between 1 and 1½ inches (2.54 and 3.81 centimeters) wide. It does not matter on which side of your face you start on.
-
4Clamp a hair straightener over the section. Choose a 1-inch (2.54-centimeter) wide hair straightener, with curved or rounded edges. Set it to 300°F (149°C) if you have fine to medium hair, or 350°F (177°C) if you have medium to coarse hair. Clamp it over the hair section, close to your roots.
-
5Angle the straightener downwards, then twist it away from your face. Angle the straightener downwards enough so that it covers the top three-quarters of the hair section; don't extend it all the way down to the ends. Twist the straightener away from your face, towards the side of your head. Hold it for a few seconds, then unclamp it.[8]
-
6Curl the next section, but in the opposite direction. Take another vertical, 1 to 1½-inch (2.54 to 3.81-centimeter) section of hair, right behind the first one. Curl it in the same way as you did the first section, but twist the straightener towards your face.
- This will make your hair appear fuller. Your waves will also look more natural.
-
7Continue curling your hair until the first layer is complete. Work your way towards the back-center of your head, then repeat the process on the other side. Once you finish the first layer, let down the top layer of your hair, and curl it as well.[9]
- Always curl the first hair sections away from your. Continue curling them in altering directions afterwards.
- If you pulled the top two-thirds of your hair, you will need to let down the next third, curl it, then let down and curl the final third.
-
8Tousle your hair with your fingers. Do this just enough so that you break up the curls, but not so much that they come out. When you are done, set the style with a light misting of hairspray.[10]


Using a Curling Iron
-
1Apply a heat protectant to clean, dry hair. If you have straight hair that doesn't hold a curl well, consider applying a styling/holding mousse or curl enhancer.[11]
-
2Gather up the top half of your hair, then clip it out of the way. If you have very thick hair, you may want to gather up the top two-thirds instead.[12]
-
3Curl vertical sections of hair, altering directions as you go. Begin curling your hair at the front of your face. Work your way towards the back, then repeat the process on the other side. Use a 1-inch (2.54-centimeter) curling iron, and work in ½ to 1-inch (1.27 to 2.54-centimeter) wide sections.[13]
- Alternate the direction you curl your hair in. Curl the first section away from your face, then the next one towards your face, etc.
- Leave the bottom inch (2.54 centimeters) of your hair uncurled for a beachier look.[14]
-
4Let down the rest of your hair and repeat the process. If you have very thick hair, let down the next third of your hair, curl it, then do the final third.[15]
-
5Tousle your curls, then mist them with hairspray. You could even use sea salt spray for a beachier look. Scrunch your hair with your fingers as it dries to give it more texture.[16]


Community Q&A
-
QuestionWhat can I do if I have naturally straight hair?
 Community AnswerIf the beach waves aren't staying in place as you'd want them to, try using hairspray if you haven't already.
 -
QuestionWhat method should I use if I have thick, wavy and kinky hair? I'm afraid it will just look poofy.
 Community AnswerI suggest straightening it if your hair is kinky. Clip half your hair up, straighten the lower section, then straighten the top half with a flat iron. This helps for thick hair. Now you can use a curling iron with a 1 or 1 1/4 inch barrel to curl your hair. This will give you soft, beachy waves.
 -
QuestionIs there any method I can use that doesn't involve hairdryers and other stuff like that?Community AnswerSure, you might like to try flat-twisting. Separate the hair into six sections and basically do a French rope braid.
Things You'll Need
Using Buns
- Styling mousse
- Hairspray
- Bobby pins or hair ties
- Comb
Using a Hair Straightener
- Heat protectant
- 1-inch (2.54-centimeter) hair straightener
- Hair clips
- Styling mousse
- Hairspray
- Comb
Using a Curling Iron
- Heat protectant
- 1-inch (2.54-centimeter) curling iron
- Hair clips
- Styling mousse
- Hairspray
- Comb

References
- ↑ https://www.youtube.com/watch?v=jbktrS7j3ZY
- ↑ https://www.youtube.com/watch?v=jbktrS7j3ZY
- ↑ https://www.youtube.com/watch?v=jbktrS7j3ZY
- ↑ https://www.youtube.com/watch?v=jbktrS7j3ZY
- ↑ https://www.youtube.com/watch?v=jbktrS7j3ZY
- ↑ http://abeautifulmess.com/2014/07/how-to-create-beachy-waves-with-a-flat-iron.html
- ↑ http://abeautifulmess.com/2014/07/how-to-create-beachy-waves-with-a-flat-iron.html
- ↑ http://abeautifulmess.com/2014/07/how-to-create-beachy-waves-with-a-flat-iron.html
- ↑ http://abeautifulmess.com/2014/07/how-to-create-beachy-waves-with-a-flat-iron.html
- ↑ http://abeautifulmess.com/2014/07/how-to-create-beachy-waves-with-a-flat-iron.html
- ↑ http://www.uptownwithellybrown.com/how-to-beachy-waves-for-short-hair/
- ↑ https://www.birchbox.com/magazine/video/how-to-get-beach-waves-for-short-hair
- ↑ http://www.uptownwithellybrown.com/how-to-beachy-waves-for-short-hair/
- ↑ http://www.uptownwithellybrown.com/how-to-beachy-waves-for-short-hair/
- ↑ https://www.birchbox.com/magazine/video/how-to-get-beach-waves-for-short-hair
- ↑ https://www.birchbox.com/magazine/video/how-to-get-beach-waves-for-short-hair
About This Article