This article was co-authored by Monica Morris. Monica Morris is an ACE (American Council on Exercise) Certified Personal Trainer based in the San Francisco Bay Area. With over 15 years of fitness training experience, Monica started her own physical training practice and gained her ACE Certification in 2017. Her workouts emphasize proper warm-ups, cool-downs, and stretching techniques.
There are 20 references cited in this article, which can be found at the bottom of the page.
wikiHow marks an article as reader-approved once it receives enough positive feedback. This article has 35 testimonials from our readers, earning it our reader-approved status.
This article has been viewed 872,141 times.
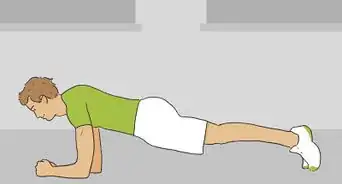
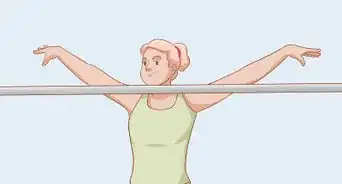
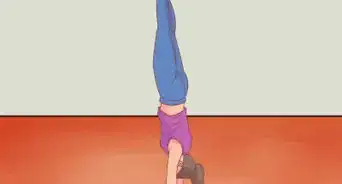
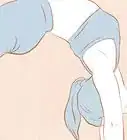
The backbend is a fun and graceful move that stretches your back, opens up your chest and looks great--when you can pull it off! The trick is to work your way up, starting with simple stretches and then practicing your bridge. Before long, you'll be backbending on the wall, with a spotter and then, finally, all on your own!
Steps
Stretching and Warming Up
-
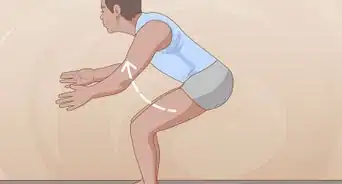
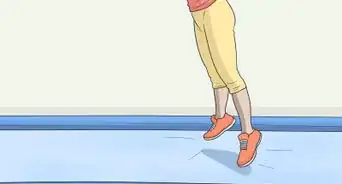
1Warm up and lay out your mat. Loosen up your muscles by jogging, jumping rope or doing jumping jacks. Get your blood flowing and your muscles warm to start stretching out. Use a yoga or gymnastics mat or a mattress, or clear an area on a soft carpet or rug. Make sure your area is clear of any tripping hazards, such as small objects.[1]
-
2Stretch your ankles. Flex your foot as far back as you can, so the toes are pointing up in the air. Then point your foot down, so the toes are parallel to the floor or, if you’re more flexible, angled slightly towards it. Repeat 10-20 times, then switch feet. Roll out your ankles by sitting and holding an ankle in one hand. Roll your foot in circles several times, then switch feet.[2]Advertisement
-
3Do a wrist extensor stretch. Extend your arm with your palm facing upwards and elbow straight. Pull your hand down with your other hand. Hold for ten seconds, then repeat with your other wrist.[3]
- Your wrists will be bending and bearing a lot of your weight in a backbend, so make sure you stretch them well.
-
4Do a wrist flexor stretch. Extend one wrist in front of you with your palm facing away and your fingertips up. Pull your fingers back with your other hand until you feel a nice stretch. Hold for ten seconds and repeat with the other hand.[4]
-
5Do a cat cow pose. This simple yoga pose will open up your chest and back and get you ready for more intense stretches. Start on your hands and knees with your wrists directly below your shoulders. Inhale and drop your belly towards the mat, arching your spine. Exhale and draw your belly into your spine, rounding your back. Repeat 10-15 times.[5]
-
6Try some deeper yoga poses. Get into cobra position by lying with your belly on the floor, placing your hands under your armpits and pushing up, arching your spine and stretching your chest. Try a camel pose by kneeling, placing your hands on your lower back and arching your spine back. If you’re more flexible, give the bow pose a try.
Doing a Bridge
-
1Lie on your back and bend your legs up. Place your feet close together on the floor and bend your legs so that your knees are sticking straight up off the ground.[6]
-
2
-
3Push through your shoulders and lift your body. Straighten your arms as much as you can. Focus on keeping your core, legs and butt muscles tight.[9]
- It’s okay if you can’t lift far off the ground yet, or if you need to keep your arms bent. Practice your bridges a couple times a day and you’ll feel yourself grow stronger.[10]
-
4Lift only your hips off the ground if you can’t push all the way up. From your position laying on the floor, place your arms down at your sides. Squeeze your butt and core to lift your hips off the ground.[11]
-
5Hold the pose for a few seconds, then lower yourself down. Bend your arms and slowly lower your body until you’re lying flat on the ground. Give yourself a short rest, then repeat 2-3 more times.
Practicing a Backbend Against a Wall
-
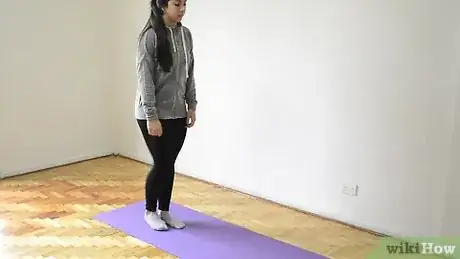
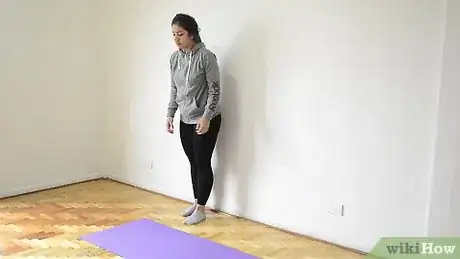
1Take one to two steps away from a blank wall. Place your feet about shoulder-width apart from each other.[12]
-
2Place your palms against your buttocks and push your hips forward. Lift and elongate your spine and rib cage. This will allow your spine to stretch out and arch more cleanly. [13]
-
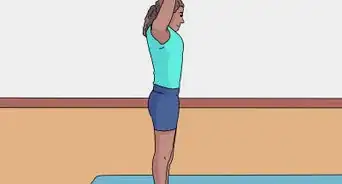
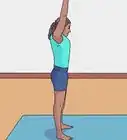
3Stretch your arms straight up above your head and tilt your head back. Reach back far enough with your neck and back so that you can look at the wall.[14]
-
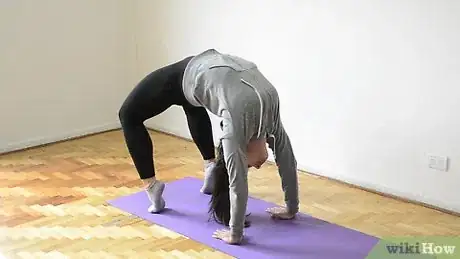
4Bend your back and place your palms against the wall. Keep your elbows straight, your head tipped back and your neck long. Press your hands against the wall. Remember to keep breathing![15]
-
5Walk down as far as you can. Continue to keep your elbows straight and breathe evenly.[16]
-
6
-
7Fall forward gently and touch your toes to stretch out. Exhale and bend smoothly from your hips, allowing your back to relax. Take a couple of deep breaths.[19]
- One good way to stretch out your back after a bridge is to sit on the floor, hold your knees in your hands, and rock back and forth in a ball.[20]
-
8Step farther from the wall and repeat. Placing more room between you and the wall will force you to bend back a little further each time without the wall to support you, getting you closer to a full backbend.
- Challenge yourself to walk down a little further each time, keeping your elbows straight and breathing evenly.
Doing a Full Backbend
-
1Do a backbend with a spotter supporting your back. Ask a friend or parents to place one hand on your lower back and one hand on your stomach. Using the same technique as your wall backbend (minus the wall!), slowly lower into a backbend with your spotter supporting you.[21]
- It can help to put an elevated mat down on the ground after you graduate from practicing against a wall.[22]
-
2Have your spotter lift you back up. Ask them to move both hands to your lower back and slowly raise you back to standing.[23]
-
3Try a full backbend without a spotter. Once you feel comfortable doing a backbend with a spotter, try it on your own. Lift your pelvis and ribs and keep your arms bent and strong behind your head. Keep your feet about shoulder-width apart. As you lower down, look through your arms to spot the floor.
-
4Breathe evenly and listen to your body. If you can’t go down all the way today, take a break and try again later. Take your time and remember the technique you perfected using the wall.
- If you’re nervous about trying your backbend the first time, place some pillows under your back so you know you have something soft to land on if you fall.
Standing from Your Backbend
-
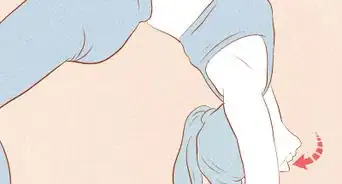
1Rock back and forth to introduce the movement. Push from your hands and roll forward into your toes, then back onto your heels while keeping your head and neck relaxed. As you get more comfortable, peel your hands just slightly off the floor as you rock, which will introduce the lifting motion to your body.[24]
-
2Tuck your chin against your chest. Focus your weight and power in your lower body and core.[25]
-
3Thrust up with your chest as you rock forward into your feet. Let your hands lift from the ground and slowly push yourself up into a standing position. Focus on using your core and quads to stabilize your body.[26]
- If you don’t feel comfortable pushing yourself up, it's fine to let yourself down to the ground slowly and lay down. You could even try kicking over if you're feeling confident or have a spotter, as long as you have plenty of space behind you.[27]
Expert Q&A
Did you know you can get expert answers for this article?
Unlock expert answers by supporting wikiHow
-
QuestionHow do you become flexible?
 Tanya BerensonTanya Berenson is a Gymnastics Instructor and the General Manager of the Los Angeles School of Gymnastics. With over 25 years of professional gymnastics experience, Tanya has also served as a consultant to USA Gymnastics, has served as the USA World Maccabi Games Head Coach, USA Gymnastics Meet Director, and RAS counselor. She holds a B.Ed. in Early Childhood Development from the University of California, Los Angeles.
Gymnastics Instructor That's a pretty broad question, as that can include back flexibility, center flexibility, and plyometric flexibility. The best thing to do is just start practicing. Try utilizing positions such as right split and left split. You want to get to a point in which you're not in pain but you feel it. Make sure you practice on a soft surface or small carpet.
 -
QuestionAre backbends dangerous?
 Tanya BerensonTanya Berenson is a Gymnastics Instructor and the General Manager of the Los Angeles School of Gymnastics. With over 25 years of professional gymnastics experience, Tanya has also served as a consultant to USA Gymnastics, has served as the USA World Maccabi Games Head Coach, USA Gymnastics Meet Director, and RAS counselor. She holds a B.Ed. in Early Childhood Development from the University of California, Los Angeles.
Gymnastics Instructor
-
QuestionHow do I get over a mental block stopping me from doing a backbend?
 Community AnswerStart at the wall, but slowly walk down only two to three steps with your hands, and do not go all the way down, just walk back up to your standing position. Put several pillows where you imagine your head will hit "when you collapse", which you won't, if you only take yourself several steps down the wall with your arms. The soft landing will take away the fear of falling on your head painfully. Always keep your eyes open, as seeing your position will give you a sense of control. When you feel comfortable walking down the wall 2-3 steps, then add one more, and so on. Take at least a week to get used to it.
Warnings
- Take your time. The backbend is a difficult move for beginners, so if it feels difficult or impossible the first time, be patient and continue practicing your bridge and wall backbends and work your way down.⧼thumbs_response⧽
- If your back, wrists or shoulders start to hurt, stop and rest for a while. If you’re still in pain after a day, consult a doctor or trainer before you start practicing again.⧼thumbs_response⧽
Things You'll Need
- A spotter
- A blank wall
- Mattress or yoga mat, or a soft ground surface[28]
References
- ↑ Monica Morris. ACE Certified Personal Trainer. Expert Interview. 18 November 2019.
- ↑ https://www.physioadvisor.com.au/exercises/flexibility-joints/ankle/
- ↑ https://www.bodybuilding.com/fun/5-exercises-to-prevent-wrist-injuries.html
- ↑ https://www.bodybuilding.com/fun/5-exercises-to-prevent-wrist-injuries.html
- ↑ https://www.yogaoutlet.com/guides/how-to-do-cat-cow-pose-in-yoga
- ↑ https://www.thoughtco.com/gymnastics-bridge-stretch-1715040
- ↑ Tanya Berenson. Gymnastics Instructor. Expert Interview. 22 May 2020.
- ↑ https://www.thoughtco.com/gymnastics-bridge-stretch-1715040
- ↑ https://www.youtube.com/watch?v=hKAl-jcRzWM&feature=youtu.be&t=2m51s
- ↑ Tanya Berenson. Gymnastics Instructor. Expert Interview. 22 May 2020.
- ↑ https://www.youtube.com/watch?v=hKAl-jcRzWM&feature=youtu.be&t=50s
- ↑ https://www.youtube.com/watch?v=A4FroY3QhXU&feature=youtu.be&t=26s
- ↑ https://www.youtube.com/watch?v=A4FroY3QhXU&feature=youtu.be&t=36s
- ↑ https://www.youtube.com/watch?v=A4FroY3QhXU&feature=youtu.be&t=41s
- ↑ https://www.youtube.com/watch?v=5OYW6z7Yp8Y&feature=youtu.be&t=1m34s
- ↑ https://www.youtube.com/watch?v=A4FroY3QhXU&feature=youtu.be&t=53s
- ↑ Tanya Berenson. Gymnastics Instructor. Expert Interview. 22 May 2020.
- ↑ https://www.youtube.com/watch?v=5OYW6z7Yp8Y&feature=youtu.be&t=2m28s
- ↑ https://www.youtube.com/watch?v=A4FroY3QhXU&feature=youtu.be&t=1m8s
- ↑ Rosalind Lutsky. Former Gymnastics Coach. Expert Interview. 30 December 2018.
- ↑ https://www.thoughtco.com/gymnastics-back-walkover-1715039
- ↑ Rosalind Lutsky. Former Gymnastics Coach. Expert Interview. 30 December 2018.
- ↑ https://www.thoughtco.com/gymnastics-back-walkover-1715039
- ↑ https://www.youtube.com/watch?v=bWiuX_voKFs&feature=youtu.be&t=45s
- ↑ https://www.youtube.com/watch?v=bWiuX_voKFs&feature=youtu.be&t=1m5s
- ↑ https://www.youtube.com/watch?v=bWiuX_voKFs&feature=youtu.be&t=59s
- ↑ Rosalind Lutsky. Former Gymnastics Coach. Expert Interview. 30 December 2018.
- ↑ Tanya Berenson. Gymnastics Instructor. Expert Interview. 22 May 2020.
About This Article
Doing a backbend is a great way to get a deep stretch in your back, but it takes some time and effort to work up to this graceful pose. Before you start, warm up your muscles for a few minutes by doing some light cardio, such as jogging or jumping jacks. Next, do some gentle stretches, making sure to focus on your wrists, ankles, and back. One of the easiest ways to get into a backbend position is to do a bridge. Lie down on your back with your feet on the floor and your knees bent. Place your hands next to your head on either side with your palms flat on the floor. Your fingers should face your shoulders and your elbows should be sticking straight up towards the ceiling. Then, push up through your shoulders to lift your torso off the ground. You might not be able to get very far off the ground at first, but that’s okay. It will get easier with practice. You can also build up to it by just lifting your hips off the floor at first. As you get stronger, move to doing a full-body bridge. Another way to ease into a full back bend is by practicing the bend against a wall. Stand 1 or 2 steps away from a wall, with your back to the wall and your feet shoulder-width apart. Put your palms on your butt and push your hips forward to bend your back. Then, stretch your arms over your head with your palms facing back and lean backwards until you can put your hands on the wall. Walk your hands down the wall as far as you can, breathing deeply and evenly the whole time. Once you’ve reached your comfortable limit, walk your arms back up the wall and slowly straighten up from the hips. Then, gently bend forward and touch your toes to stretch out your back. Keep repeating your wall backbend, getting a little further from the wall each time. Eventually, you should be able to drop into a full backbend without using a wall—but you might want to ask a friend to support you while you do it. Have them put one hand on your lower back and one on your stomach as you go into a backbend from a standing position. Push your hips forward, tilt your chin up, then reach your hands up and back behind your head. Bend backwards until your palms are resting on the floor. Ask your spotter to boost you back up again by placing both hands on your upper back. Keep practicing until you feel ready to do it on your own. To get back up from a back bend, start by gently rocking back and forth on your hands and feet. Tuck your chin against your chest, then thrust up and forward with your chest and rock onto your feet. Carefully push yourself up into a standing position with your hands. You can also get out of the bend by gently lowering yourself toward the ground. As you’re doing a backbend, remember to keep breathing and listen to your body. Always stop if you feel pain—a backbend shouldn’t hurt. For tips on how to stand back up from your back bend, read on!
