This article was co-authored by Dean Theriot. Dean Theriot is a Personal Trainer and the Owner of Timberline Fitness in Houston, Texas. With over 25 years of experience in the fitness industry, Dean specializes in personal, group, and sport-specific training. Dean holds a BS in Exercise Physiology from LSU. Dean combines resistance and cardiovascular training with pilates exercises for comprehensive workouts for his clients. His sport-specific training includes football, basketball, and baseball.
wikiHow marks an article as reader-approved once it receives enough positive feedback. This article has 37 testimonials from our readers, earning it our reader-approved status.
This article has been viewed 1,809,892 times.
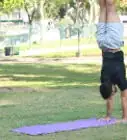
Perfecting your handstand is a prerequisite for learning other amazing gymnastic tricks. Doing a handstand is not only fun, it's a great form of exercise - plus it looks really impressive. If you take it one day at a time and work on improving your balance as well as your core and upper body strength, you'll be on your way to a steady and graceful handstand in no time. But always remember to be patient, practice makes perfect!
Steps
Freestanding
-
1Find a good spot to do a handstand. You'll need a place with lightly padded ground, since you'll be hitting the floor a few times before you're able to stand correctly on your hands. The park or your yard is an excellent choice, since the grass will give you a nice soft landing and you'll have plenty of open space to work with. This will help to ensure that you don't fall into someone or something, and that you don't hurt yourself.
- Look for a flat area, rather than a hilly area. It'll be a lot easier to execute the handstand where it's flat.
- Other great spots to do a handstand are on the sand at the beach, on gym mats at the gym, or in a carpeted room in your home.
-
2Stretch your limbs and joints. It's important to warm up a bit before you launch into your handstand. You want your muscles to feel nice and loose, and your body to feel limber. This will decrease the chance that you'll get injured. Do the following stretches to get into gear:
- Roll your wrists, ankles, and neck until they're nice and loose.
- Put your feet together and bend down to touch your toes. Try to keep your legs straight. Hold for 30 seconds, stand up, and repeat the stretch with your legs about a foot apart.
- Take a quick jog around the block to help loosen your muscles. There's no need to run very far; just go until you feel warmed up and ready for a physical challenge.
Advertisement -
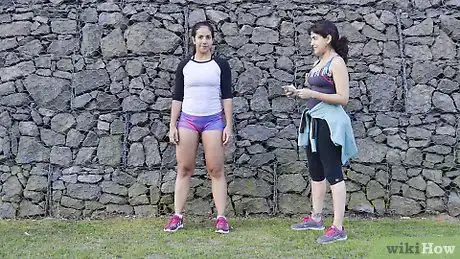
3Grab a spotter. The first time you do a handstand, it helps to have someone nearby to help hold you in position until you get the hang of balancing correctly. Ask a friend or family member to stand in front of you at first to catch your legs and hold you straight.[1]
- Once you can do the handstand without help, ask your spotter not to catch your legs unless you're about to topple over.
- Having a spotter isn't absolutely necessary. You can perfect your handstand on your own, or try doing it against a wall (see the next method).
-
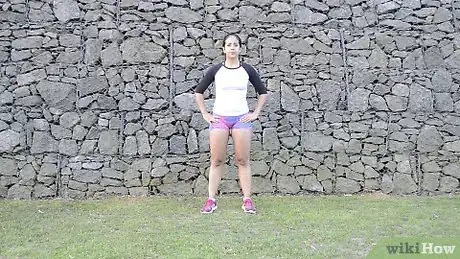
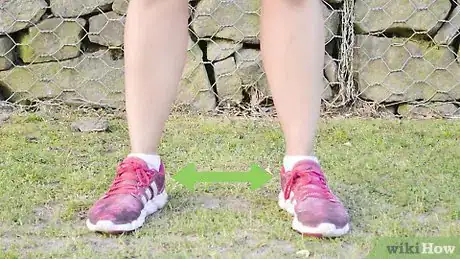
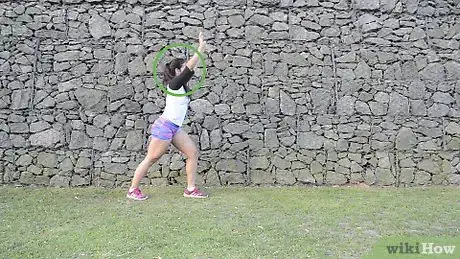
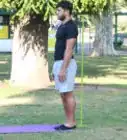
4Stand up straight with your feet comfortably apart. This is your starting position. Your feet, knees, torso and head should all be aligned and completely vertical. Hold your arms comfortably at your side.
- Some people like to start with their arms straight above their head. You can try both ways and choose the starting position that feels most comfortable to you.
-
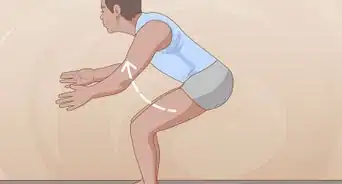
5Kick with your dominant leg. Then as you kick don't fall into a lunge, both legs should be straight, It shouldn't be very deep but should give you enough power to kick up. Make sure to kick and lunge straight forward, and not to one side or the other. Stepping to the side will cause your body to twist when you go into the handstand, making it much harder to balance.
-
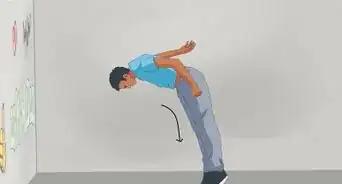
6Tip your body forward. Don't fall into a lunge, you will just hurt your back, as you approach the ground, let your legs start to straighten as your hands meet the ground. Hold your arms straight and move your head toward the ground. Move with a bit of force in a natural, forward motion over your lunged leg. This will allow for a balanced system over your lunged leg, where gravity actually aids in the handstand, rather than restricting it.
- The most common mistake is to throw your hands straight down at the ground and try to throw your legs upward. This results in a whipping motion and causes you to fall forward.
-
7Keep your arms straight as your hands approach the ground. Think of your self as a T, Your base leg being the vertical part and your arms and dominant leg being the horizontal part. Keep yourself in this T position until your base leg leaves the ground. Your shoulders should be tight in toward your neck, as though you were shrugging. Don't let your shoulders sag upwards or your elbows bend, which puts you at greater risk for injury.
-
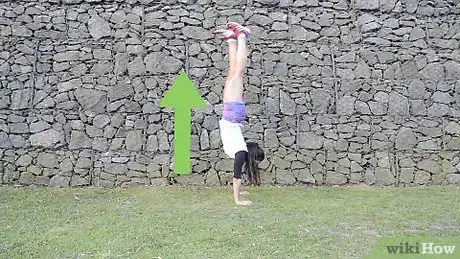
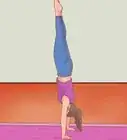
8Straighten your legs and torso toward the sky. The act of stepping forward, tipping over, striking the ground with your hands and lifting your legs should be one smooth, fluid motion that ends in a handstand.[2]
- Keep your head tucked in,as it would be if you were standing up, and your back and legs straight. Don't throw your head back. This will only result in your handstand arching your back and hurting. This won't look as impressive, either.
- Keep your legs tightly together. Keeping your legs straight and pressed firmly together typically helps you from wanting to fall to the side.
EXPERT TIPRosalind Lutsky worked as a gymnastics coach at SB Gymnastics at Stanford University, coaching children from ages 5-12 years old during her time as a Stanford student. She was a competitive gymnast growing up, and competed for her local gymnastics team in Minnesota.Former Gymnastics Coach
 Rosalind Lutsky
Former Gymnastics CoachWhat happens if you start falling? Rosalind Lutsky, former gymnastics coach, tells us: "If you’re falling forwards, tuck your head in — touching your chin to your chest — so that you can roll out of the handstand. If you’re falling backwards or sideways, try to reach your feet down and bend your knees."
-
9Balance your weight on your hands. Keep your weight between your palms and your first knuckles. Adjust your hands to balance your weight by moving it toward your fingers; you're more likely to lose balance if your roll it back toward your wrists.[3]
-
10When you are ready to come down, split your legs and drop your dominant leg to the ground. Start to stand up and as you do put your other leg on the ground.
- Keep your chest up as you stand up and look up.
- Keep your arms by your ears.
-
11End the Handstand with a finish.
- End your handstand with your arms by your ears .
- Let your arms fall farther away from your head and turn your palms outwards.[4]
-
12Kick up to a handstand. Make sure your weight is over your shoulders so that you can fall backwards. To start of with, bend your arms and tuck into a roll. As you get better at this skill you can try to do it with straight arms, this is the correct way to do it. Teach your body to absorb shock instead of hardening your muscles on impact. Never take too much weight onto one arm or one ankle. Make sure that you tuck your head to your chest before you roll out, as you could fall on your head a little harder than you would like.[5]
- Another way to fall without hurting yourself is to drop into a "crab back", "arch", or a "bridge", if you are flexible enough.
Using a Prop
-
1Find a sturdy wall or tree. In some cases it's easier to start learning a handstand against a wall or another sort of prop. If you're a bit leery of being upside down, or you're afraid you're going to take a tumble, this is a good way to learn a handstand at your own pace.[6]
- Another plus to this method is that you don't need a spotter. You can learn to do a handstand all by yourself.
- You'll be putting your feet on the prop, so find one that you don't mind getting a bit dirty, or do the handstand in socks.
-
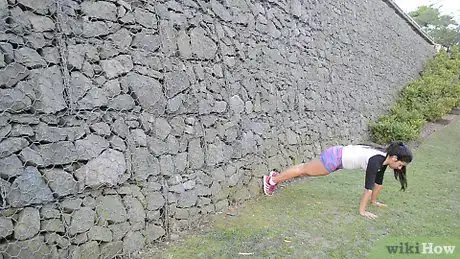
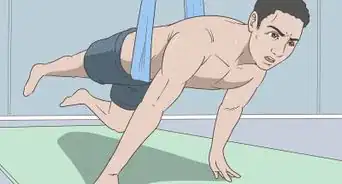
2Get into a plank position facing away from the wall. In other words, make like you're going to do a push up right next to the wall by starting on your stomach and lifting yourself up with your hands. You should be close enough to the wall that your feet are touching it.
- Your body should be parallel to the wall and your legs should form a 90 degree angle with your upper body.
-
3Walk your feet up the wall. Start moving your feet up the wall with your toes. At the same time, "walk" toward the wall with your hands. As you get closer to the wall, your body should become more vertical. Stop when your hands are about 12 inches (30.5 cm) from the wall. You are now doing a wall-assisted handstand!
- Keep your body in a straight line and your shoulders tucked in, as if you were shrugging.
- Your head should be directly centered between your shoulders; don't lean it too far backward.
-
4Push off the wall into a handstand. Use one of your feet to gently release your body from the wall so that your weight is completely balanced over your hands. Your body should now be in a straight, vertical line, ending with pointed toes.[7]
- Move your hands if you need to correct your balance. Remember to keep your weight between the palms and first knuckles on your hands, and correct by moving the weight toward your fingers.
- Bend your legs and move away from the wall when you're finished.
-
5Now start facing the wall. Now that you're used to being upside down and you've gotten a feel for how to do a handstand, it's time to change the way you start. Instead of gently walking yourself up the wall, you'll face the wall to start. When you learn how to do a handstand by facing the wall, you'll be able to do it anywhere, anytime. [8]
- Stand facing the wall with your feet shoulder-width apart.
- Step forward, tilt over, and plant your hands about 12 inches (30.5 cm) from the wall.
- Keeping your arms straight, lift your legs over your head in one fluid motion.
- Don't kick up to hard because it might hurt your heels on impact.
- Keep your shoulders tucked in and your head straight. Keep your legs straight and point your toes. Look at your hands too.
- Be sure your weight is centered between your palms and the first knuckles on your hands. Adjust as necessary to keep your balance.
- When you're ready to stop, roll out of your handstand.
Challenging Yourself
-
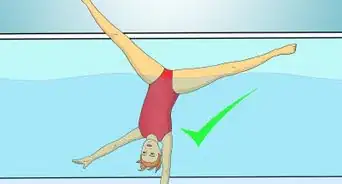
1Do a Handstand Split. This is an elegant way to finish your handstand. Instead of landing with a normal rollout, you'll move into the splits on the ground.
-
2Walk on Your Hands. Once you've mastered the handstand and you feel confident that you can balance well, try walking around! Do this often enough and your arm muscles will become very strong.
-
3Work up to a Handstand Push Up. After those muscles have bulked up a bit, try pushing up into your handstand from the ground. For support, you could also hold your handstand position where your feet are up against a wall.
- To improve your handstand push-ups, practice intense dumbbell overhead presses.
-
4Do a Front Limber. If you're an aspiring gymnast, the front limber is the logical next step after you've gotten the hang of standing on your hands.
Community Q&A
-
QuestionHow can I hold a handstand for a long time? I keep falling down as soon as I go up.
 Community AnswerFind that common balance point between your body. If you are too shaky, too still, or you're bending your knees too much, you won't find that balance point. Keep your body straight once you get into your handstand. Relax and try to ease out the difficulty. When you try to kick your leg up, do not do it with too much force, it is a simple one-sweep motion. It takes time to find this balance point, but it's worth it and feels great when you've succeeded.
 -
QuestionWhat if I can't land and I go backwards instead?
 Community AnswerPractice your handstand against a flat surface, such as a wall or door. This should help you to get used to where you're supposed to stop your feet in the air.
 -
QuestionWhat do I do when my arms start shaking?
 Community AnswerIt means your muscles are fatigued. Take a break and drink some water.
wikiHow Video: How to Do a Handstand
Warnings
- Stop when your arms are tired.⧼thumbs_response⧽
- Make sure the area that you attempt to do this stunt is dry and free of objects.⧼thumbs_response⧽
- If you're going to use a wall, make sure it won't receive a massive hole if you happen to overbalance and push your heel into it.⧼thumbs_response⧽
Things You'll Need
- Grass, carpet, or yoga mat.
- You might need knee pads.
- Crash mat for gymnastics or something soft to land on.
- A spotter for when you're learning.
- Some may need cheer shoes or tennis shoes, but some may not. It will either weigh you down or help you, it depends on the person.
References
- ↑ https://www.outsideonline.com/health/training-performance/how-to-do-handstand/
- ↑ http://www.beastskills.com/the-handstand/
- ↑ http://www.beastskills.com/the-handstand/
- ↑ http://www.beastskills.com/the-handstand/
- ↑ https://www.yogajournal.com/poses/6-steps-for-teaching-headstand
- ↑ https://www.doyouyoga.com/a-beginners-guide-to-handstand-98587/
- ↑ https://www.doyouyoga.com/a-beginners-guide-to-handstand-98587/
- ↑ https://www.doyouyoga.com/a-beginners-guide-to-handstand-98587/
About This Article
To do a handstand, first face a wall and place your hands on the floor 3 to 4 inches (8 to 10 cm) in front of it. Practicing in front of a wall will make doing a handstand easier when you’re first starting out. Straighten your legs so you’re in downward dog pose, then walk forward until your shoulders are lined up with your wrists. Next, raise one of your heels up toward the ceiling, and come up onto the ball of your foot that's still on the floor. Now, press into your hands and lift your bottom heel up in the air. Bring your top heel up to the wall so it’s resting on it, followed by your bottom heel. Pull your stomach in toward your spine and bring your shoulders up and away from your ears to help you balance. Then, try pressing off the wall with your feet and seeing how long you can hold a handstand for. When you’re finished, lower your feet back down to the ground one at a time. You can also do a handstand by walking your feet up the wall. First, get into downward dog pose with your heels 1 to 2 inches (2.5 to 5 cm) away from the wall. Then, press into your hands and walk both of your feet up the wall so they’re at a 90-degree angle with the wall. Walk your hands closer to the wall until your shoulders are lined up with your wrists. Now, continue walking your feet up the wall while walking your hands closer to it. Stop when your hands are 3 to 4 inches (8 to 10 cm) away from the wall and the tops of your feet are pressing into it. Then, practice pressing your feet away from the wall and holding a handstand for as long as you can. To come back down, walk your hands forward while walking your feet down the wall. If you want to learn how to do a handstand without the help of a wall, keep reading the article!
