This article was co-authored by Kelly Medford and by wikiHow staff writer, Jessica Gibson. Kelly Medford is an American painter based in Rome, Italy. She studied classical painting, drawing and printmaking both in the U.S. and in Italy. She works primarily en plein air on the streets of Rome, and also travels for private international collectors on commission. She founded Sketching Rome Tours in 2012 where she teaches sketchbook journaling to visitors of Rome. Kelly is a graduate of the Florence Academy of Art.
This article has been viewed 329,246 times.
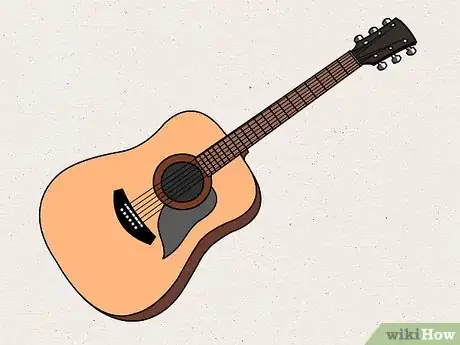
Ever wanted to draw or design your own guitars? Follow these easy steps and learn how to draw the perfect guitar. Note: Follow the red lines for each step.
Steps
-
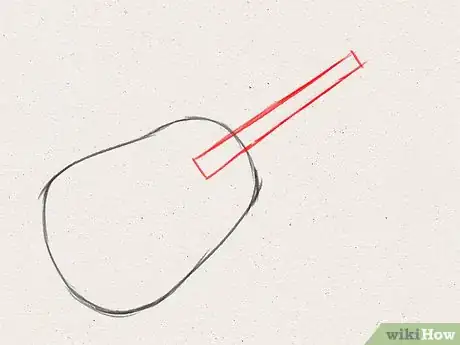
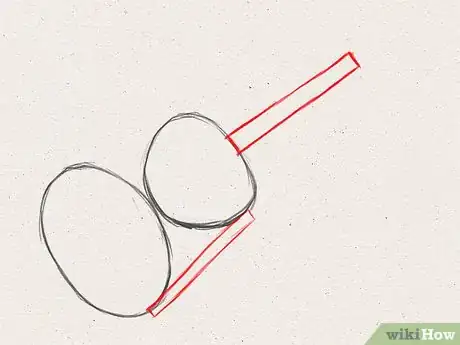
1Start off by drawing a horizontal egg shape for the body of your guitar.
-
2Draw a long rectangle at the end of the egg shape for the fret board.Advertisement
-
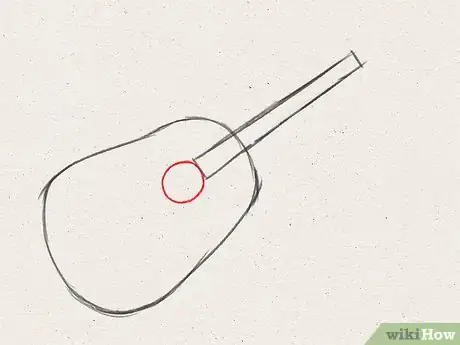
3At the start of the rectangle, inside the egg-shape, draw a circle.
-
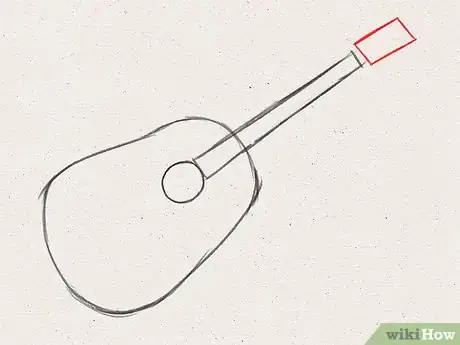
4Draw a small rectangle at the end of the fret board.
-
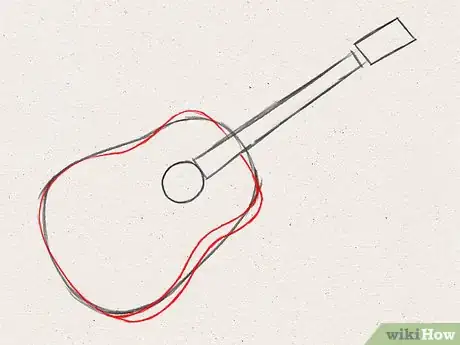
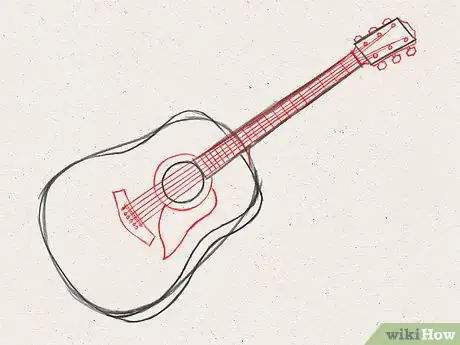
5Now add the thickness of the body. This thickness will be determined by the shape you want the guitar. This tutorial will use the basic shape.
-
6Add the details like the strings, the fret divisions, and the tuning knobs.
-
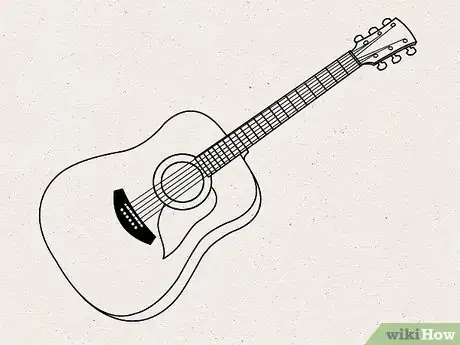
7Ink the drawing and erase the sketch.
-
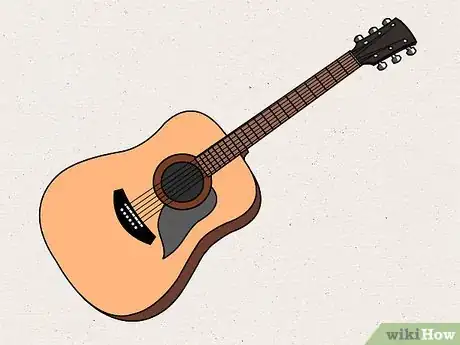
8Color the drawing and you are done!
Alternate Method
-
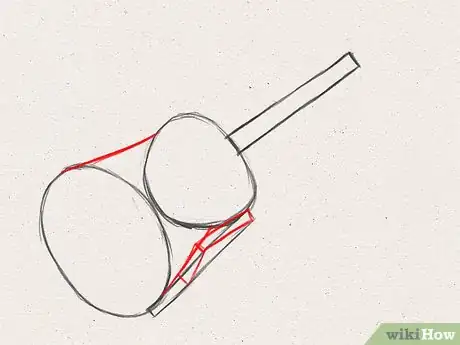
1Draw two ovals. The one on the left should be larger than the one on the right, like a lopsided snowman.
-
2Add two rectangles and one line to connect all the shapes. The upper rectangle will serve as the neck of the guitar, and the line is the beginning of a string.
-
3Connect the ovals by adding two lines. Add small rectangles to give the guitar a boxier, more realistic shape.
-
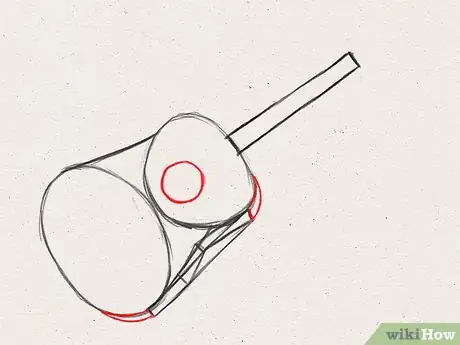
4Draw a small circle inside of the smaller upper oval. Add semicircles on the sides and tighten up your lines to make your guitar even more real-looking
-
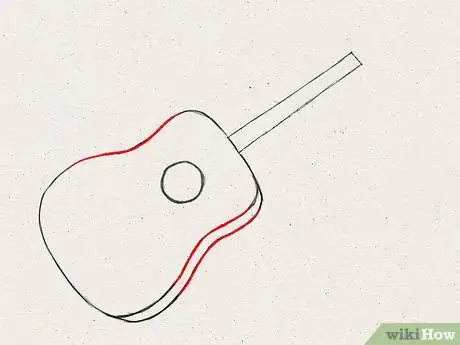
5Draw two wavy lines to indicate the shape of the guitar. (At this point you should really begin to see it start looking like a musical instrument; if it doesn't, go back and make sure you haven't distorted anything.) Erase excess lines as seen.
-
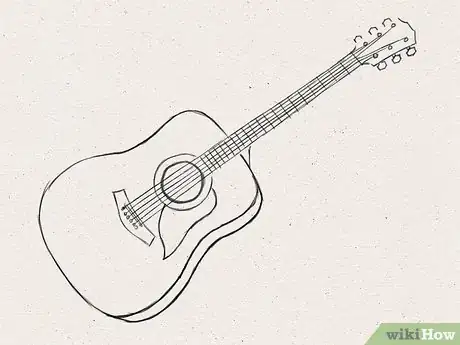
6Draw six lines to render the strings of the guitar. Draw other details like the tuning pegs and frets on the neck.
-
7Outline and color the drawing. Use shades of brown, unless your guitar is unusually colorful. Experiment with different shading and patterns to find out what looks the best.
Community Q&A
-
QuestionHow do I slow down the steps?
 Community AnswerYou can slow the video down on YouTube by clicking the Settings button, clicking 0.5 and it should be slower for you.
About This Article
To draw an acoustic guitar, start by sketching the shape of the guitar’s body. You can either start with a shape like an egg or a pear, or draw two circles side by side, with one being slightly bigger than the other. If you use the two circles method, draw curved lines on either side of the circles, connecting them together in the middle. Next, draw a long rectangle emerging out of the narrower end of the guitar. This will be the neck and fretboard. Make one end of the rectangle overlap with about the upper ¼ of the guitar’s body. Then, sketch in a circle just below the end of the fretboard where it overlaps with the body of the guitar. This circle represents the guitar’s sound hole. Make another, smaller rectangle at the opposite end of the fretboard to represent the headstock. This rectangle should be a little wider than the fretboard. Now it’s time to start filling in details. Add a second outline on one side of the guitar’s body to give it the appearance of thickness, and draw in details like the strings, tuning pegs, fret divisions, and pick guard. When you’re done, erase any unnecessary lines or rough parts of your sketch. If you want, ink your drawing and color it in, or add some shading to make it look more three-dimensional.
