This article was co-authored by wikiHow staff writer, Darlene Antonelli, MA. Darlene Antonelli is a Technology Writer and Editor for wikiHow. Darlene has experience teaching college courses, writing technology-related articles, and working hands-on in the technology field. She earned an MA in Writing from Rowan University in 2012 and wrote her thesis on online communities and the personalities curated in such communities.
This article has been viewed 60,509 times.
Learn more...
Templates can speed up the creation of projects, but they can also slow productivity down when they are slightly incorrect, out-of-date, or disorganized. This wikiHow article will show you how to control the look and feel of all of your slides by editing a template in PowerPoint on a computer.
Steps
-
1Open your PowerPoint template. Since the features are similar between the computer program, the web app, and the mobile app, this method works for them all.
- If you don’t have a PowerPoint template, you can search the web for one or create your own.
-
2Click the View tab. You’ll find this in the ribbon above the project.Advertisement
-
3Click Slide Master. The program window will resize to fit both the single-slide preview and the blueprint of your entire slideshow. They are organized by groups, but there is usually only one group and one slide master. Any edits you make here (not contextual) will change on all the slides.
-
4Edit the template. The slides on the left are your master slides, or blueprints, for all similar slides. Changing one thing on a slide will change it throughout the slideshow.[1]
- For example, if you change the font on a text-based slide, the entire group’s font will change. In Slide Master view, you will see a menu of formatting options, like adding or removing the slide title and footers, changing the background styles, hiding or showing the background graphics, and changing the theme.
- You can add elements such as an image placeholder throughout your slideshow, like a logo. Use Insert Placeholder from the Slide Master menu to add an image or a text box that will appear in the same spot, with the same dimensions, throughout the slideshow.
- Using the Themes drop-down, you can apply a pre-made consistent color scheme and font. Since not all themes will work with your customized template, you can use the colors and font styles as inspiration. Use the Colors and Fonts drop-downs to further customize your template.
-
5Click Close Master. This looks like a red X in a box. You’ll find this at the end of the Slide Master toolbar.
-
6Save your template. You’ll need to save it so you can use it again in PowerPoint.
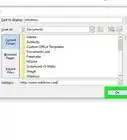
- From the File tab, select Save As.
- In the "Save as File Type" menu, choose PowerPoint template. It will save in your Custom Office Templates folder with a .potx extension.[2]
- Click Save after you’ve given the template a name.


References
About This Article

1. Open a PowerPoint Template.
2. Click Slide Master from the View tab.
3. Edit the slide masters themes, colors, fonts, and placeholders.
4. Click Save as from the File tab.
5. Click PowerPoint Template from Save File Type....
6. Click Save.