X
wikiHow is a “wiki,” similar to Wikipedia, which means that many of our articles are co-written by multiple authors. To create this article, 16 people, some anonymous, worked to edit and improve it over time.
This article has been viewed 270,629 times.
Learn more...
iOS includes powerful text-to-speech options that allow you to easily have selected text read back to you, in a wide variety of languages and accents. If you're using iOS 8 or later, there's also the very useful Speak Screen function, which will even automatically turn the pages on your ebook as it reads to you.
Steps
Part 1
Part 1 of 3:
Enabling Text to Speech
-
1Open the "Settings" app.
-
2Tap "General".Advertisement
-
3Tap "Accessibility". Here you will also find settings that can make it easier to hear audio, increase the contrast between light and dark colors, or add subtitles to supported videos.
-
4Tap "Speech".
-
5Toggle "Speak Selection" ON. This will enable your device to speak selected text.
-
6Toggle "Speak Screen" ON (iOS 8 and later). This will enable your device to speak text on the screen.
-
7Select a voice (optional). If you'd prefer to have your text read back to you in different accents and/or languages. Tap the "Voices" option to choose.
- Note: Adding different voices will download files to your phone. Some voice files, such as Alex, can take up a significant amount of space.
-
8Change the speaking rate using the slider. The speaking rate controls how fast the words are read back to you. Move the slider towards the rabbit for quicker speech, or towards the turtle for slower speech.
-
9Toggle text highlighting on or off (optional). You can have your device highlight words as they're read by toggling this option on.[1]


Advertisement
Part 2
Part 2 of 3:
Using Speak Selection
-
1Press and hold on the text you want to be read aloud. Use the vertical bars on each edge of the selection to adjust what words are selected.
-
2Tap the "Speak" button in the pop-up menu. If you can't see the "Speak" button, tap the arrow at the right edge of the pop-up menu to reveal it.
-
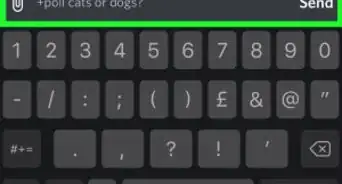
3(Optional) Select an emoji to have your device say its description. Beyond reading words, your device can also describe emoji. Simply highlight the emoji you want to be read out loud and tap "Speak".


Advertisement
Part 3
Part 3 of 3:
Using Speak Screen (iOS 8 and Later)
-
1Swipe down from the top of the screen with two fingers. You will have more success if keep your fingers spread moderately apart when swiping.
- Speak screen can also be enabled by starting Siri and saying "speak the screen".
-
2Use the onscreen menu to adjust playback. You can pause, play, back up, and fast forward, as well as change the rate of speech.
- Speak screen will not work when there is no content. For example, starting Speak Screen while on your Home screen will not work, as Speak Screen does not read your app names.
-
3Press the "X" to stop Speak Screen. Press the "<" button to return to your device while continuing to have the screen read aloud.
-
4Activate Speak Screen in Safari using the Reader button. When using Safari in iOS 8, you'll see a small button to the left of the address bar that will open the Speak Screen menu. This is more useful than using the swipe method because the swipe method will read all of the hidden HTML tags, possibly making it difficult to understand.
-
5Use Speak Screen in iBooks to keep reading automatically. Unlike Speak Selection, Speak Screen will automatically turn the pages of your book, allowing you to listen to your books being read to you while you work with other apps.[2]


Advertisement
Community Q&A
-
QuestionHow do I get Siri to recognize my voice?
 Community AnswerTalk to her nicely, every day for at least ten minutes a day and soon she will respond perfectly every time.
 -
QuestionHow do I record a text that's spoken out in iOS?
 Community AnswerScreen recording. Press and hold on the screen recording button until a drop-down menu opens up, tap on the microphone button to turn it on, tap start recording and return to the text you want read aloud to you and activate speak screen. When finished, stop the screen recording. I don't think there's a way to record audio only but, you can use an app to rip the audio from the video.
Advertisement


References
About This Article
Advertisement