This article was co-authored by Ashlea Henson. Ashlea Henson is a makeup and face painting artist and teacher with over 50,000 subscribers on YouTube. She is the Creative Administrator for Mimicks Face Painting and has the International Theatrical & Media Makeup Diploma.
This article has been viewed 31,023 times.
Elsa is a popular character from the movie Frozen and lots of little girls want to dress up like her. If you are trying to find a simple way to enhance your child’s Elsa look, then face painting is a great option. This is also a great design for professional face painters who want to offer an Elsa look to customers. You can paint a shimmery, blue tiara onto a child’s forehead with just a few colors and a little practice.
Steps
Creating the Crown
-
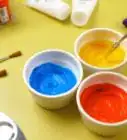
1Get your materials together. Painting your face to enhance an Elsa look is quite easy, but you will need some special items to do it. Before you get started, you will need:[1]
- light blue face paint
- dark blue face paint
- white face paint
- non-metallic white glitter (using non-metallic glitter reduces the chance of a problem if the glitter gets into the child’s eyes)
- stencils
- jewels to stick on your face
- a variety of paintbrushes (you will need a thick one and a couple of small pointed ones)
- a makeup sponge
-
2Draw your center point. You will need to run a wide brush across your light blue face paint and get a little dark blue face paint on one side of the brush as well. Then, make a thin, vertical line on the area just above and in between your eyebrows.[2]
- If the paint that you are using seems too thick, then you can also dip your brush in a bit of water to help thin it out.[3]
Advertisement -
3Extend the center point into a large teardrop. Next, take the brush and extend it out past the center point to create a large teardrop in the center of your forehead. Start with the brush pressed against the center point as you do so and just use one long sweeping motion.[4]
-
4Create two points extending from the teardrop. After you have created the large teardrop, take the brush and run it along the outside edges of the teardrop, extending them out and up towards your hairline. Now you have created the central piece of the crown.[5]
- Using the light blue face paint, create one more point extending out from each side of the crown.
-
5Close off the edges of the crown with two loops. Paint two loops next to the outer points on each side of the crown. Make sure that the outer loops on each side of the crown extend a little past the eyebrows.[6]
- You will also need to create two loops just above each of your cheekbones. Use the same light blue face paint to create these loops.
-
6Return to the center point and create three dark blue scallops. Next, you will need to dip your small brush into some dark blue face paint and use the brush to create three dark blue scallops over the area between your eyebrows. Draw one scallop shape in the center and then two smaller ones on either side of the center one.[7]
- Make sure that the paint is dry on your center point before you draw the scallops. If the paint is not yet dry, then it may smear.[8]
-
7Blend the edges. Use a sponge with a bit of light blue paint on it to blend the edges of the crown and soften the details a bit. Just lightly pat the areas around the edges of the design you have created to blend and soften the edges.[9]
- Make sure that you dab some light blue paint between the loops on the cheekbones and the loops on the edges of the crown. This dabbed on face paint will connect the whole design.
Finishing the Crown
-
1Use the stencil to make a snowflake. Hold your snowflake stencil over the central point of the crown, between your eyebrows. Press the stencil close to your skin and then use a sponge to dab white face paint over the stencil.[10]
- Before you remove the stencil from your face, press some glitter onto the area you have just painted.
- Repeat the process to create two more snowflakes over the painted areas just above your cheekbones.
-
2Draw white teardrops all over the crown. Start above your central snowflake and use a small brush sipped in white face paint to draw a teardrop extending down towards the upper tip of the snowflake. Then draw two more teardrops opposite this central teardrop.[11]
- Keep adding teardrops to the upper part of the crown that extend down towards the central snowflake.
- Then create four teardrops on the painted cheekbone area that extend down towards your mouth.
- The teardrops should be different lengths to add interest to the crown.
-
3Add dots of snow around the snowflakes. Take one of your small paintbrushes and dip the tip in some white face paint. Then, add small and large dots of white face paint to the areas under and next to the snowflakes.[12]
- These little dots should be different sizes to add a bit of interesting detail to the design.
-
4Outline the crown in dark blue. Next, take your small brush and dip the tip in dark blue face paint. Then, use the paint to outline the edges of your design. Go over the edges of all of the teardrops and loops to define the border of your design.[13]
- Having a dark outline will help to set off the crown. If you decide to experiment with different colors, just make sure that the color you use for the outer line is darker than the base color.
-
5Secure jewels to the center of your snowflakes. Finish your design by attaching three jewels. Use a bit of water soluble adhesive or use some gems that already have adhesive on the backs of them. Place the jewels in the centers of the snowflakes.[14]
- This step is optional, but it adds a bit of extra sparkle.
Community Q&A
-
QuestionHow do I face paint Disney villainesses?
 Community AnswerIt depends on the character you're trying to portray. A general idea would be higher cheekbones, dark eyeshadow, and a dark or bright lipstick. While you're doing the makeup, be sure to have a reference picture to look at in order to get the most accurate look possible.
Warnings
- Always do an allergy test before painting a child’s face, especially if the child has known allergies. Some children will develop a rash or a more severe allergic reaction from face paint. To do an allergy test, apply a small amount of each color that you will be using on the inside of the child’s wrist and check the area in a couple of days to see if it caused any redness or other signs of irritation. If the paint causes irritation to the child’s skin, then do not paint the child’s face.[15]⧼thumbs_response⧽
References
- ↑ https://www.youtube.com/watch?v=uef9lzamDLw
- ↑ https://www.youtube.com/watch?v=uef9lzamDLw
- ↑ http://www.nelliebellie.com/facepainting/
- ↑ https://www.youtube.com/watch?v=uef9lzamDLw
- ↑ https://www.youtube.com/watch?v=uef9lzamDLw
- ↑ https://www.youtube.com/watch?v=uef9lzamDLw
- ↑ https://www.youtube.com/watch?v=uef9lzamDLw
- ↑ http://www.nelliebellie.com/facepainting/
- ↑ https://www.youtube.com/watch?v=uef9lzamDLw
- ↑ https://www.youtube.com/watch?v=uef9lzamDLw
- ↑ https://www.youtube.com/watch?v=uef9lzamDLw
- ↑ https://www.youtube.com/watch?v=uef9lzamDLw
- ↑ https://www.youtube.com/watch?v=uef9lzamDLw
- ↑ https://www.youtube.com/watch?v=uef9lzamDLw
- ↑ http://www.fda.gov/Cosmetics/ProductsIngredients/Products/ucm143055.htm
- https://www.youtube.com/watch?v=uef9lzamDLw
