This article was co-authored by Monica Morris. Monica Morris is an ACE (American Council on Exercise) Certified Personal Trainer based in the San Francisco Bay Area. With over 15 years of fitness training experience, Monica started her own physical training practice and gained her ACE Certification in 2017. Her workouts emphasize proper warm-ups, cool-downs, and stretching techniques.
There are 12 references cited in this article, which can be found at the bottom of the page.
This article has been viewed 27,720 times.
Face pulls are one of the few exercises designed to work out the muscles in your shoulders, making them a great exercise for beginners or those looking to add something to their routine. Exercising your rear deltoids and trapezius muscles can improve your posture and help when lifting heavy objects, but doing it wrong can target the wrong muscles or potentially lead to back injuries. By getting the proper equipment, knowing the right form, and how to fix common mistakes, you can start doing face pulls like a pro.
Steps
Setting up the Equipment
-
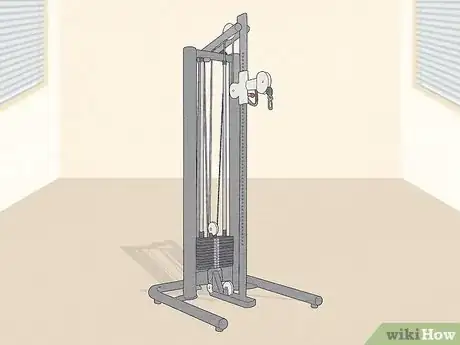
1Find a cable pulley machine. The best equipment for a face pull is a cable pulley machine, which should be available at any local gym.[1] A cable pulley machine is a tall piece of exercise equipment with a series of weights attached to an adjustable pulley designed for exercising muscles in your arms and back. It will allow you to easily adjust the size of the weight you’ll be lifting, as well as the height of the pulley mechanism.[2]
- If you don’t have access to a cable pulley machine, you can use a long resistance band attached to something sturdy a little above the height of your head.[3] This will be less customizable than the cable pulley machine but may be easier to access on a regular basis.
-
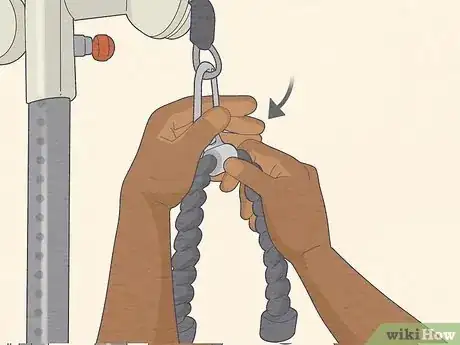
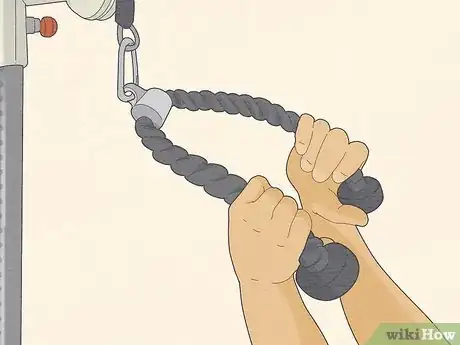
2Equip the rope attachment. The rope attachment for the cable pulley machine is a short length of rope with a weight on either end and a point to attach it in the middle. Open the carabiner on the machine and clip on the rope attachment.[4]
- Always take care of the equipment you’re using. If there’s a different attachment already on the machine, make sure to put it back with the other attachments when you equip the rope attachment.
Advertisement -
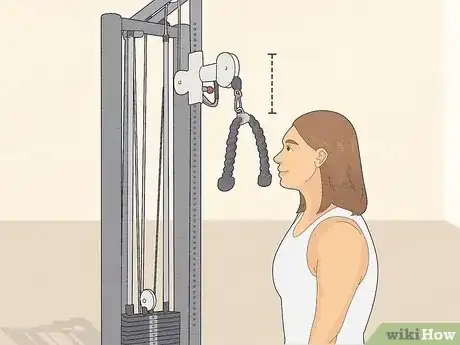
3Adjust the pulley to be a little above the height of your head. There will normally be a handle or some other mechanism on the side of the pulley rig that you can disengage and engage to adjust the height of the pulley.[5] Shift the pulley so that it is just above the height of your head before locking it in place.
-
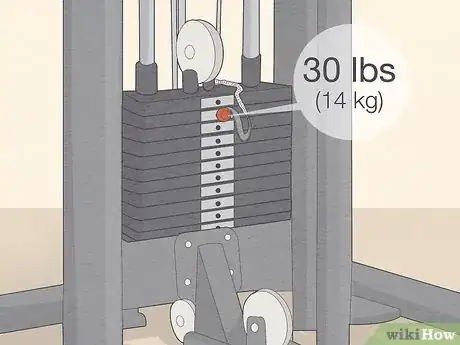
4Equip a weight around 30 pounds. Face pulls don’t require a heavy weight in order to get the workout you need.[6] Adjust the pin on the weights so that you can easily lift them with only the movement of your arms.The right weight will change from person to person, so start around 30 pounds (14 kg) and add more weight as needed.
- If you try and do a face pull with too much weight equipped, you’ll end up engaging muscles in your arms and lower back and increase the risk of injury.
Perfecting Your Form
-
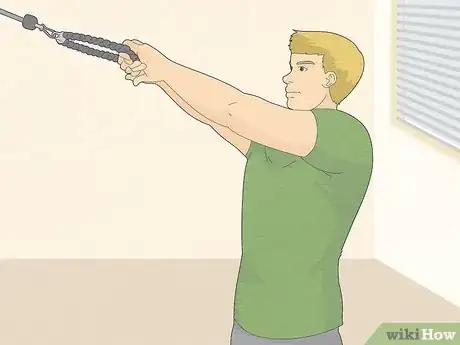
1Grasp one end of the rope in each hand. Firmly grasp the ends of the rope so that the weights on either end face toward you.[7] Take a few steps backward until your arms are fully extended toward the machine.
-
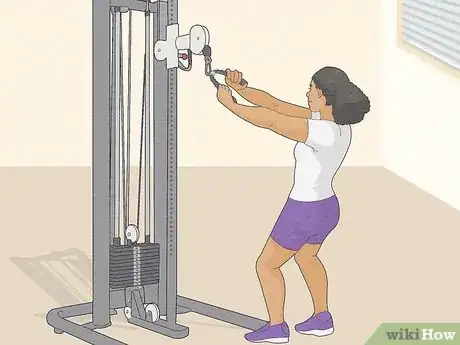
2Stand with your feet shoulder width apart and your knees bent. Find a firm stance with your knees slightly bent so that you won’t be pulled around by the machine. Lean back around 20 degrees so all of the work is being done by your arms and shoulders rather than your back.[8]
- If you find this stance difficult to maintain or start feeling pain in your lower back as you exercise, you might need to adjust your stance. Try shifting to a slightly staggered stance with one foot behind the other.[9]
-
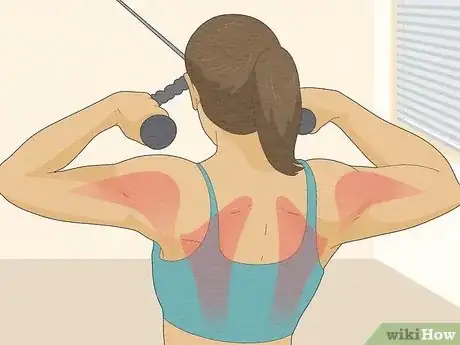
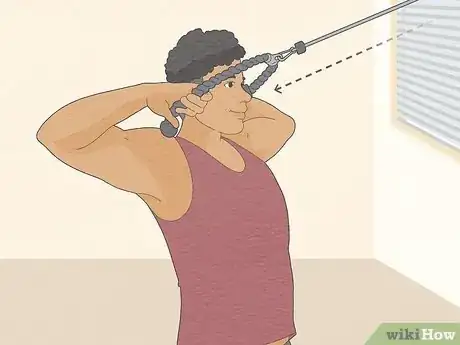
3Pull the ropes towards your face. Pull the two ropes toward your face, separating your hands and moving them around the side of your head as they get close. As you pull back, you should be squeezing your shoulder blades together. This will engage your rear deltoids, located at the rear of the shoulder, rather than your arms.[10]
- When holding onto the ropes, rotate your arm into a 90-degree angle, your elbow should be positioned at shoulder height as you pull the ropes.
- Always keep your elbows high and your wrists above your elbows when pulling the rope backward. Straying too much from this can change the muscles being targeted by the exercise.[11]
-
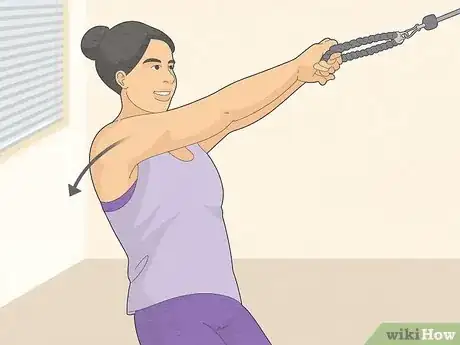
4Reverse the movement and repeat. Hold the ropes on either side of your face for around 1 second, before slowly returning to your initial position by reversing the pulling movement.[12]
- As face pulls are designed to slowly exercise your muscles with lighter weights, you should do two sets of 20 reps at the end of a back workout.[13] Over time, you may need to add more weight, but you shouldn't need to add more reps or sets.
Fixing Common Mistakes
-
1Exercise your rear deltoids and trapezius muscles. Face pulls are designed to work the muscles in and around the shoulder blades, so you should be feeling the exercise here rather than anywhere else. If you are working your biceps or lower back instead, revisit your posture, stance and underhand grip until you feel it in your shoulders.[14]
-
2Move slowly for each rep. It’s more important to move slowly and make sure you are exercising the right muscles than to power through quickly and risk injury. Do a set of around 20 reps slowly, making sure to pull the ropes all way back and fully stretch your rear delts each time.[15]
-
3Lean backward rather than forward. As you work through your face pulls, you might feel yourself starting to lean forward while you pull.[16] This might indicate that you have equipped too many weights or are working the wrong muscles. Always make sure you are leaning slightly backward rather than forward.
-
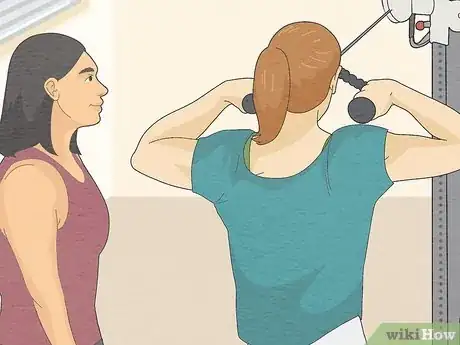
4Check that your form is correct. To make sure your form stays correct as you face pull, get a friend or trainer to keep an eye on you and make sure you’re not making any mistakes.
- You can also set up a camera or leave your phone to record you exercising. You can then review the footage after each set and see where you might be able to revise your form.
Expert Q&A
-
QuestionHow do you do kneeling face pulls correctly?
 Monica MorrisMonica Morris is an ACE (American Council on Exercise) Certified Personal Trainer based in the San Francisco Bay Area. With over 15 years of fitness training experience, Monica started her own physical training practice and gained her ACE Certification in 2017. Her workouts emphasize proper warm-ups, cool-downs, and stretching techniques.
ACE Certified Personal Trainer Try to use a lower pulley for kneeling face pulls if your cable machine gives you the option. The exercise is pretty much the same—just make sure that your elbows are positioned at shoulder height and that they stay isolated/not moving.
Warnings
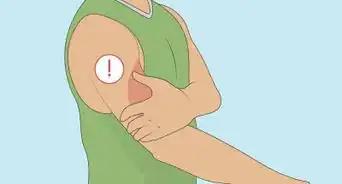
- If you feel any sudden or intense pain in your back, shoulders or arms, stop immediately!⧼thumbs_response⧽
Expert Interview
Thanks for reading our article! If you'd like to learn more about working out, check out our in-depth interview with Monica Morris.
References
- ↑ https://www.verywellfit.com/face-pulls-exercise-for-stronger-shoulders-4161298
- ↑ https://www.youtube.com/watch?v=8YzMI1v6tBc
- ↑ https://www.youtube.com/watch?v=wWKh-Q4boXw
- ↑ https://youtu.be/8YzMI1v6tBc?t=23s
- ↑ https://youtu.be/8YzMI1v6tBc?t=45s
- ↑ https://youtu.be/7bLivsAhDFY?t=1m34s
- ↑ https://tonygentilcore.com/2018/06/face-pulls-right-often
- ↑ https://youtu.be/7bLivsAhDFY?t=2m5s
- ↑ https://tonygentilcore.com/2018/06/face-pulls-right-often/
- ↑ https://youtu.be/7bLivsAhDFY?t=1m
- ↑ https://www.verywellfit.com/face-pulls-exercise-for-stronger-shoulders-4161298
- ↑ https://www.verywellfit.com/face-pulls-exercise-for-stronger-shoulders-4161298
- ↑ https://www.verywellfit.com/face-pulls-exercise-for-stronger-shoulders-4161298
- ↑ https://www.verywellfit.com/face-pulls-exercise-for-stronger-shoulders-4161298
- ↑ https://youtu.be/7bLivsAhDFY?t=3m1s
- ↑ https://www.muscleandfitness.com/workouts/shoulder-exercises/videos/face-pull



-Step-10-Version-5.webp)


