This article was co-authored by Scott Johnson. Scott Johnson is the Owner and Lead Design Consultant for Concrete Creations, Inc., an award-winning landscape and design company based in the San Diego, California metro area. He has over 30 years of experience in the pool and landscape construction industry and specializes in large estate outdoor environment construction projects. His work has been featured in San Diego Home & Garden Magazine and on Pool Kings TV Show. He earned a BS degree in Construction Management with an emphasis in Architecture and CAD design from Northern Arizona University.
There are 11 references cited in this article, which can be found at the bottom of the page.
This article has been viewed 41,354 times.
A fiberglass finish on the interior of a pond can improve a pond's durability and is superior to concrete or plaster. Fiberglass usually comes in cloth-like sheets that you can apply with a resin. If you want to fiberglass a pond, you'll have to prepare the materials properly, lay the fiberglass sheets, and finish the pond with a shiny black finish called a flow coat. If done properly, fiberglassing can improve the appearance and durability of your pond.
Steps
Preparing the Materials
-
1Purchase fiberglass cloth, resin, and flowcoat. You can buy the materials you need to fiberglass your pond from the hardware store or online. The typical fiberglass used for ponds is a 450g chopped strand mat. This fiberglass is durable enough to retain the water from a pond. Purchase an epoxy or polyester resin when you buy the fiberglass sheets. Flowcoat looks like paint and comes in a variety of colors. Adding a layer of flowcoat over the fiberglass is the finishing touch for your project and will make the walls of your pond shiny and smooth.[1]
- It should cost around $5-$10 for 3 by 3 metres (9.8 by 9.8 ft) of fiberglass mat.
- Polyester resin should cost around $20-$30 for 1 gallon (3.8 L) while epoxy resin can cost up to $100 for a gallon.
- Flowcoat should cost between $5-$20 for 1 gallon (3.8 L).
-
2Tape off areas that you don’t want to fiberglass. Use painter’s tape to tape off the areas around the lip of the pond. Apply the tape so that it wraps around the entirety of the pond's perimeter.Advertisement
-
3Wear gloves when handling fiberglass. A thick pair of rubber gloves will stop the fiberglass from agitating your skin and will prevent you from damaging the fiberglass cloth.[2]
-
4Wear a respirator when working on an indoor pond. If the pond is indoors, make sure that you’re working in a well-ventilated area and use a respirator. Wearing the proper gear will prevent you from inhaling the toxic fumes from the resin and particles from the fiberglass sheets.[3]
-
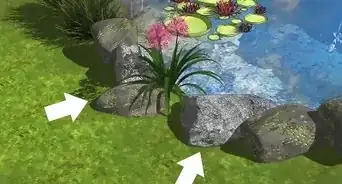
5Measure the walls and floor of your pond. Measure the height of the pond's walls. Then, take the width and length measurements of the pond's floor. This will help you determine how much fiberglass cloth you need. The surface area of a wall or floor is the length multiplied by the width. Write down the measurement so that you know the dimensions of your pond.
- If you need irregular or curved portions of the pond, use a tape measure and break the pond into separate 5 by 5 feet (1.5 by 1.5 m) parts. Once you get the surface area of all parts of your pool, add them together to get how much fiberglass cloth you need.
-
6Measure the fiberglass cloth. Fiberglass cloth will usually come in a roll that you can purchase online or at a hardware store. Carefully roll out the fiberglass and measure it so that it's 5–8 inches (13–20 cm) longer than the height of your walls. This additional slack will lay on the outer lip and the floor of the pond.
-
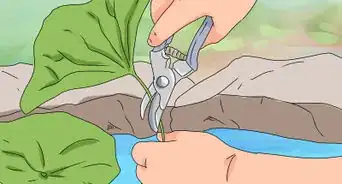
7Cut the fiberglass cloth with a rolling cutter or fiberglass scissors. Purchase a rolling cutter or fiberglass scissors at an art and crafts store or online. Cut out the sheets to your measurements.[4]
- Rolling cutters cost anywhere from $15-$30 while fiberglass scissors cost $40+.
-
8Mix your resin according to the instructions. Many epoxy resins will also come with a hardener that you must mix with the resin. Read the instructions on the package so that you know how to mix them properly.[5]
- Continue to mix your resin as you work so that it doesn’t harden.
- 2 kg (4.4 lbs) of resin is suitable for 2 square meters (6.5 sq. feet) of fiberglass cloth.
- You can purchase the resin at hardware stores or online.


Laying the Fiberglass
-
1Apply the resin to the wall with a brush or roller. Saturate a brush or roller into the resin. Apply it to the wall on the wall in long, horizontal strokes. Break up your work into 5 by 5 feet (1.5 m × 1.5 m) spaces. Working in smaller portions will help you manage the entire project and will prevent the resin from drying out while you work.[6]
-
2Lay a sheet of fiberglass cloth over the resin. Drape the cloth over the resin and flatten the sheet out with your hand, making sure there aren’t any air bubbles in the cloth.[7]
-
3Apply more resin to the top of the fiberglass cloth. Saturate your brush again and apply the resin over the top of the fiberglass sheets in long horizontal motions. The sheets should become transparent once saturated.[8]
-
4Lay a second and third sheet of fiberglass cloth over the first one. Drape another sheet of fiberglass over the first sheet. Press against the second layer of fiberglass and get the wrinkles out of it and apply another coat of resin over that cloth. Repeat the steps until there are three coats of fiberglass cloth on the walls.[9]
- The third layer of fiberglass should have resin applied over the surface of the cloth as well.
-
5Repeat the steps until all of the walls are covered in fiberglass. Continue to apply the fiberglass to the walls of your pond until all of them have been covered in three layers of fiberglass.
-
6Repeat the process to fiberglass the floor. Once all of the walls and the floor has fiberglass applied, you'll be done applying the fiberglass cloth.
-
7Let the resin dry for two hours. Cover the pond with a tarp so that dirt and other debris doesn't get stuck to the resin. Once you've given the fiberglass time to dry, you can apply the flowcoat.


Applying Flowcoat Over the Fiberglass
-
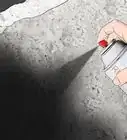
1Sand the surface with 80 grit sandpaper. Sand over the surface of the fiberglass cloth once it has dried. You don't want to sand through the fiberglass cloth, but you do want to sand off bumps and imperfections.[10]
-
2Mix the Flowcoat. You will usually have to mix a catalyst with the flowcoat before applying it to the walls. Read the instructions on the back of the flowcoat and mix it until it reaches a paint-like viscosity.[11]
-
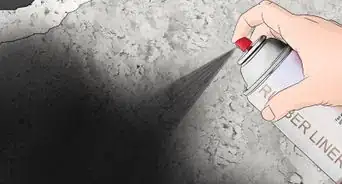
3Spread Flowcoat onto the fiberglass with a brush or roller. Use a roller or a brush and spread the flowcoat in horizontal, then vertical strokes. Cover the walls, then the floor of the pond. The flowcoat should look like a dark black paint.[12]
-
4Work in 5 by 5 feet (1.5 m × 1.5 m) areas until the entire pond is covered. Continue to apply the flowcoat over the surface of the pond’s walls, then the floor of the pond. Working in smaller sections will help you manage the flowcoat and help you achieve equal coverage.
-
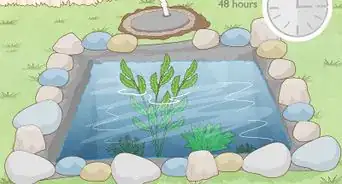
5Lay a tarp over the pond and let the flowcoat dry. Allow the flowcoat to dry for a full 72 hours. Lay a tarp over the pond so that nothing can disrupt the flowcoat while it sets. Once it's dry, you've successfully finished applying a fiberglass coating on your pond.


Expert Q&A
-
QuestionWhat causes algae to show up in my pond?
 Scott JohnsonScott Johnson is the Owner and Lead Design Consultant for Concrete Creations, Inc., an award-winning landscape and design company based in the San Diego, California metro area. He has over 30 years of experience in the pool and landscape construction industry and specializes in large estate outdoor environment construction projects. His work has been featured in San Diego Home & Garden Magazine and on Pool Kings TV Show. He earned a BS degree in Construction Management with an emphasis in Architecture and CAD design from Northern Arizona University.
Landscape & Design ConsultantYou can blame the sun. Sunlight feeds the algae and causes it to grow in the fall. You typically get algae blooms in the spring or summer, which is totally normal. If your algae is getting out of hand, pick up an algaecide and treat your pond with it. -
QuestionCan I fiberglass over pond paint? My pond was painted two years ago, and I would like it fiberglassed.
 NinoxTop AnswererYes, but you need to prepare the substrate before fiberglassing the pond. It can be done by sanding the surface and washing the surface beforehand.
 -
QuestionCan fiberglass be applied over dirt?
 Community AnswerFiberglass pools settle because the foundation under the pool moves. I am a huge proponent of gravel as a pool base material because unlike sand, it does not liquefy when saturated with water. A fiberglass pool set on good soil with a gravel base will not move – period.
Things You’ll Need
- Painter’s tape
- Rubber Gloves
- Respirator
- Measuring tape
- Rolling cutter or fiberglass scissors
- Fiberglass cloth
- Epoxy or polyester resin
- Paintbrush and paint roller
- Flowcoat
- Tarp


References
- ↑ https://www.grs.ie/information/
- ↑ https://www.jamestowndistributors.com/userportal/document.do?docId=274
- ↑ https://www.jamestowndistributors.com/userportal/document.do?docId=274
- ↑ https://www.youtube.com/watch?v=7l4ugREZ6eM&feature=youtu.be&t=8m14s
- ↑ http://www.sollercomposites.com/epoxyresinchoice.html
- ↑ https://www.youtube.com/watch?v=V0Numnshua4&feature=youtu.be&t=25s
- ↑ https://www.youtube.com/watch?v=V0Numnshua4&feature=youtu.be&t=1m4s
- ↑ https://www.youtube.com/watch?v=V0Numnshua4&feature=youtu.be&t=1m51s
- ↑ https://www.hunker.com/13417940/how-to-repair-fiberglass-swimming-pool-steps
About This Article

To fiberglass a pond, you'll need fiberglass cloth, epoxy or polyester resin, and some flowcoat. First, you'll want to cut the fiberglass cloth into strips that will fit in your pond. Then, you'll need to apply the resin to the sides and bottom of the pond and press the fiberglass cloth strips into it. You should apply 3 coats of fiberglass cloth and then let everything dry. Once it's dry, you'll need to sand the surface of the fiberglass to get rid of any bumps and imperfections. Finally, you can use a paint roller to apply a coat of flowcoat over the fiberglass. To learn how to mix resin and flowcoat for your project, keep reading!