This article was co-authored by wikiHow staff writer, Hannah Madden. Hannah Madden is a writer, editor, and artist currently living in Portland, Oregon. In 2018, she graduated from Portland State University with a B.S. in Environmental Studies. Hannah enjoys writing articles about conservation, sustainability, and eco-friendly products. When she isn’t writing, you can find Hannah working on hand embroidery projects and listening to music.
This article has been viewed 21,458 times.
Learn more...
Decorating your home with pictures when you first move in is super fun, but taking down your art and filling in the holes can get time-consuming. Trying to find paint that matches your wall color is annoying, especially if you weren’t the one who painted it. If you need to repair your drywall and you don’t have the paint to match it, you can fill your holes in smoothly to avoid using paint at all as you fix up your home.
Steps
Applying Lightweight Spackle
-
1Pull the nail out of your wall with the back of a hammer. Line up the back of a hammer with the nail and slide it upward until the nail fits into the hammer. Gently pull the hammer out towards yourself away from the wall until the nail pops out.[1]
Tip: Save the nail in your toolbox in case you want to use it later.
-
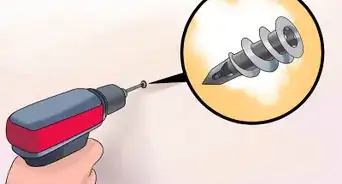
2Pick up lightweight spackling to avoid harsh edges. Lightweight spackling isn’t as thick and doesn’t weigh as much as typical putty or spackling does. Use this to ensure your wall won’t have any harsh edges left by the putty to make your job easier.[2]
- You can find this type of spackling at most hardware stores. Look for “lightweight” on the package.
Advertisement -
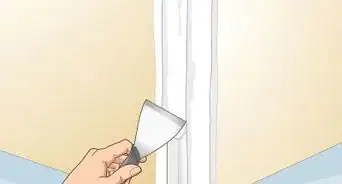
3Apply the lightweight spackle with a putty knife. Open up the tub of wall spackle and dip the end of your putty knife into it. Grab a small glob of spackle that is just larger than the hole you want to fill. Place the putty knife right above the hole and drag it downward to apply the spackle, focusing on the hole with about 0.25 inches (0.64 cm) of spackle around it.[3]
- You can find a putty knife at most hardware stores.
- Putty knives are flat, skinny tools made specifically for applying putty and spackling to walls.
-
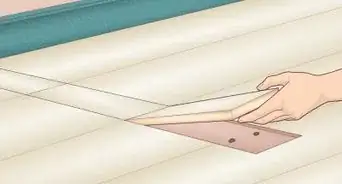
4Smooth out the spackle with your putty knife. Drag the edge of the putty knife down around the edges of the hole to remove any unnecessary spackle. This will take the excess off your wall and make it easier to smooth out later.[4]
- Try not to push your putty knife into the hole, or you could dent the flat surface of the spackle. Instead, stick to the outside edges.
-
5Wait 1 to 2 hours for the spackle to dry completely. Point a fan at your wall to speed up the drying process. Try not to touch the area until a few hours have passed so that the spackle has a chance to dry.[5]
- If you try to work on the spackle while it’s still wet, you could accidentally remove it from the hole in your wall.


Sanding the Spackle and Wiping it Off
-
1Sand the spackle slightly to remove the top layer. Use a fine grade sanding sponge or paper to slightly rough up the top layer of spackle. Don’t push too hard into the spackle or try to make it flush with the wall, or you could leave a shiny spot that is hard to cover up, especially on textured walls.[6]
- You can find sanding sponges or papers at most hardware stores.
-
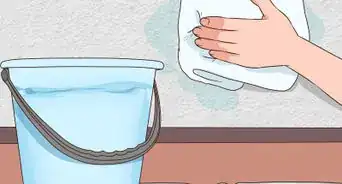
2Dampen a large sponge with warm water. Pick up a large, soft sponge used for grouting or tile work. Run it under the sink using warm water until the entire thing is wet, and then wring out the excess.[7]
- Look for these soft sponges at a hardware store near you.
Tip: If your sponge is still dripping water, it's too wet. Wring it out again until it isn't dripping anymore.
-
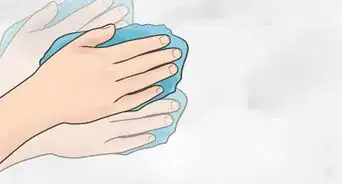
3Rub the sponge over the spackle to take off the top layer. Swipe the sponge back and forth over the spackle on your wall until it disappears completely. Clean off the surrounding area of your wall if you notice any white dust from the sanding.[8]
- Water breaks down the top layers of the spackle, but your sponge won’t be wet enough to dampen the spackle in the nail hole.
-
4Dry off the area with a clean cloth. Finish off your wall by making the area look clean and dry with a cloth. Make sure there isn’t any spackle left on the wall so the area looks smooth without any evidence of the previous hole.[9]


Things You’ll Need
- Hammer
- Lightweight spackle
- Putty knife
- Soft sponge
- Cloth
Warnings
- Use lightweight spackle to avoid having to paint over the hole.⧼thumbs_response⧽


References
- ↑ https://www.apartmentguide.com/blog/moving-out-fix-common-damage/
- ↑ https://www.youtube.com/watch?v=0COOF3BwgKI&feature=youtu.be&t=272
- ↑ https://www.apartmentguide.com/blog/moving-out-fix-common-damage/
- ↑ https://www.apartmentguide.com/blog/moving-out-fix-common-damage/
- ↑ https://www.apartmentguide.com/blog/moving-out-fix-common-damage/
- ↑ https://www.youtube.com/watch?v=0COOF3BwgKI&feature=youtu.be&t=170
- ↑ https://www.youtube.com/watch?v=0COOF3BwgKI&feature=youtu.be&t=188
- ↑ https://www.youtube.com/watch?v=0COOF3BwgKI&feature=youtu.be&t=199
- ↑ https://www.youtube.com/watch?v=0COOF3BwgKI&feature=youtu.be&t=207
About This Article