This article was co-authored by James Schuelke and by wikiHow staff writer, Hunter Rising. James Schuelke, along with his twin brother David, is the co-owner of the Twin Home Experts, a licensed plumbing, leak detection, and mold inspection company based in Los Angeles, California. James has over 32 years of home service and business plumbing experience and has expanded the Twin Home Experts to Phoenix, Arizona and the Pacific Northwest.
There are 14 references cited in this article, which can be found at the bottom of the page.
This article has been viewed 506,398 times.
Leaking pipes can cause a lot of damage to your home if they’re left untreated. There are many temporary fixes for leaking pipes you can use, such as epoxy putty or pipe clamps, while you wait for a plumber. If you want to fix the pipe yourself so it’s up to code, you can use a slip coupling to make the process easy. No matter what you use, be sure to turn off your water supply so your pipes don’t leak while you’re working!
Steps
Turning off Your Water Supply
-
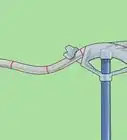
1Shut off the water supply to your home.[1] Locate your main water supply, which is typically in your basement or crawl space. Turn the dial clockwise to shut off the water going into your home so the leak stops and doesn’t cause more damage.[2]
- In an emergency, call your water company and see if they can shut off the water leading to your home.
Tip: If the leak is only in a drain pipe, then you don’t need to turn off your water supply.
-
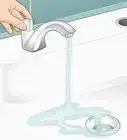
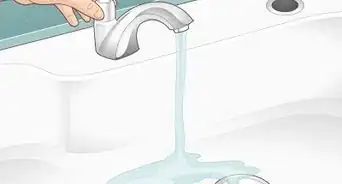
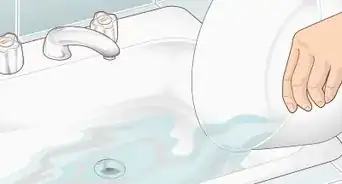
2Turn on the faucets connected to the pipe to drain them. Start by turning on the lowest faucet in your home, such as an outdoor hose pipe or a sink in the basement. Let the water run until the pipe is completely empty. If the leak is on a pipe leading to a specific fixture, then turn on that faucet to drain it.[3]Advertisement
-
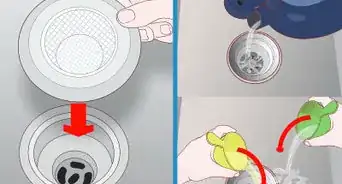
3Dry the leaking area on the pipe. Once all of the water is drained from the pipes, use a cleaning cloth to wipe the area around the leak completely dry. That way it won’t be slippery while you’re trying to work on it.[4]
- Set a cloth or bucket underneath the leak in case any stray drops of water come out of the leak.
- The way you fix your pipe depends on the location. For example, it could be a pinhole in the pipe or it may be a loose fitting where it connects to another pipe.[5]


Applying Epoxy Putty for a Temporary Fix
-
1Put on latex or nitrile gloves. Epoxy putty heats up while you’re working with it and could cause pain on bare skin. Make sure the gloves are thin enough where you can still work intricately. Wear the gloves any time you handle the epoxy putty.[6]
- You can buy latex or nitrile gloves from any hardware or big box store.
-
2Mix plumbing epoxy putty by hand to combine it. Rip off a small ball of epoxy putty from the tube and knead it together between your fingers. The darker epoxy will mix with the lighter exterior to activate it. Once the putty has a consistent light grey color, you can stop kneading it.[7]
- You can buy plumbing epoxy putty from your local hardware store.
-
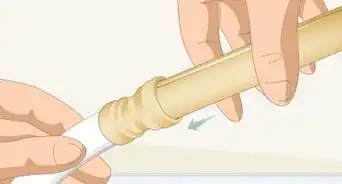
3Wrap the putty around the leaky area. Mold the putty around the leak on your pipe so it wraps completely around it. Make sure the putty forms a layer that’s about 1⁄2 in (1.3 cm) thick around the leak so it holds in place. Taper the edges of the putty onto the pipe so it makes a watertight seal.[8]
- Epoxy putty works on straight lengths of pipes as well as joints.
-
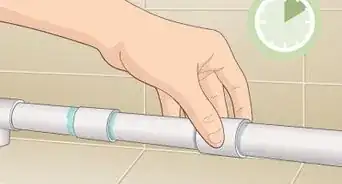
4Let the putty set for 5-10 minutes before turning your water on. Once the epoxy putty is mixed, it will set quickly so you can use your water again. Leave the putty alone for at least 5 minutes while it sets so it can solidify. Once the epoxy sets, you can turn your water back on.[9]
- Epoxy putty is a temporary fix, so be sure to fully replace your pipe or contact a plumber the next day.


Clamping Small Leaks
-
1Buy a pipe clamp that's the same size as the leaky pipe.[10] Pipe clamps use rubber gaskets create a tight seal to secure a small leak on your pipe. You can purchase these in the plumbing section of your local hardware store, but make sure to buy a pipe clamp that is the same size and at least as long as the pipe that’s leaking so you have a tight fit when you secure it.[11]
Clamps work on PVC and copper pipes.
-
2Align the rubber gasket on the pipe with the leak. The rubber gasket is the rectangular piece inside of the clamp that makes your pipe’s water-tight. Set the rubber gasket on top of the hole in your pipe so it seals the leak completely. If the leak is on the bottom of the pipe, hold the clamp in place until you secure the clamp.[12]
-
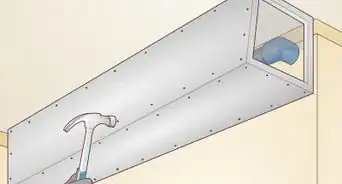
3Fit the clamp around the gasket and tighten the bolts. Close the clamp around your pipe so it fits tightly on it and feed the bolts provided with the clamp through the holes. Turn the nuts using a wrench to secure them to the bottom of the bolts. Continue tightening the bolts until the clamp stays in place and doesn’t turn any further.[13]
Warning: Clamps are only a temporary fix. You either need to replace the pipe or contact a plumber to replace it for you.


Putting a Slip Coupling on Your Pipe
-
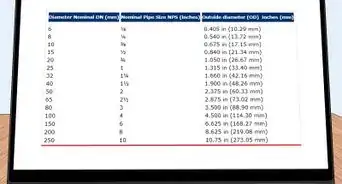
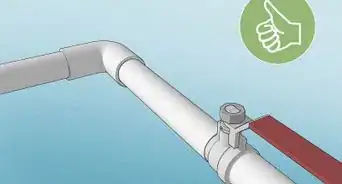
1Get a slip coupling that matches the size and type of your pipe. Slip couplings are small, watertight connections that connect 2 different pieces of pipe. Look for a slip coupling has the same diameter as the pipe you need to fix and is long enough so you can cut out the leak. Before you purchase one, make sure the coupling is the same material as your pipe, such as PVC or copper.
- You can buy slip couplings from your local hardware store.
- Slip couplings can be a permanent solution to fixing your pipes and they are up to code.
-
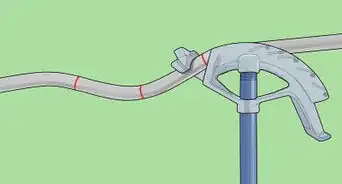
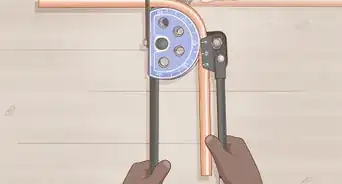
2Mark the length of the slip coupling on your pipe. Hold the slip coupling up to the leaky spot on your pipe so the coupling extends out from each side. Use a marker to draw a line on your pipe at the end of the slip coupling. This will help ensure that you cut out the right length of pipe so the coupling can still fit.[14]
-
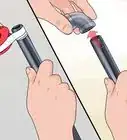
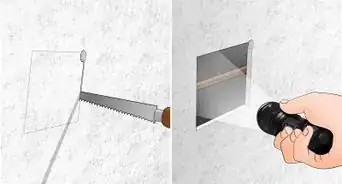
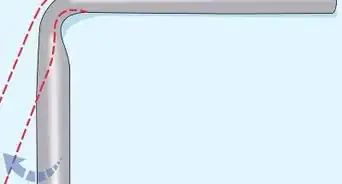
3Use a pipe cutter to cut out the leaky area on the pipe.[15] Pipe cutters are small devices that easily slice through a pipe as you rotate them around. Set the edge of your pipe cutter 1 in (2.5 cm) inside the line you drew and tighten the screw on the bottom of the device. Rotate the pipe cutter around the pipe completely and tighten the screw again. Keep spinning and tightening the pipe cutter until it makes a clean cut through the pipe. Repeat the process 1 in (2.5 cm) in from the other line you drew.[16]
- You can buy pipe cutters from your local hardware store.
- Pipe cutters work on metal and PVC pipes.
- Some PVC pipe cutters look like a pair of scissors. Put the blade over the pipe and slowly squeeze the cutters shut.
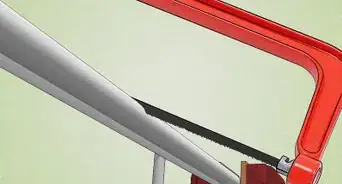
Tip: If you don’t have a pipe cutter, you can also use a hacksaw but it may not be as clean of a cut.
-
4Scrape the inside and outside of the pipe with a deburring tool. A deburring tool is a special tool used to scrape the inside and outside of the pipe to help reshape it after you make your cut. Hold the pipe steady with your nondominant hand and set the blade edge of the deburring tool inside the pipe. Scrape around the inside edge of the pipe with your tool to deburr it. The take the tool out of the pipe and scrape the outside edge.[17]
- You can buy deburring tools in the plumbing section of a hardware store.
- Make sure you deburr both sides of the cut pipe to prevent future leaks.
-
5Slide the slip coupling onto the ends of your pipe. Take your coupling and slide an end over one side of your pipe. Push the coupling on far enough so you’re able to line it up with the other side of the cut pipe. Line up the other end of the coupling with the pipe and pull it over so the 2 pipes are connected by the coupling. The coupling will hold the pipes together so water can flow between them.[18]
- Some couplings may make you tighten them by hand or with a wrench. Follow the directions on the packaging carefully to see if there are any additional steps.


Warnings
- Contact a plumber if you don’t feel comfortable cutting or replacing your own pipes or if the leak is difficult to reach.⧼thumbs_response⧽
Things You’ll Need
Applying Epoxy Putty for a Temporary Fix
- Latex or nitrile gloves
- Epoxy putty
Clamping the Leak Shut
- Pipe clamp
- Wrench
Putting a Coupling on Your Pipe
- Pipe slip coupling
- Pipe cutter
- Measuring tape
- Deburring tool

References
- ↑ James Schuelke. Professional Plumber. Expert Interview. 1 October 2019.
- ↑ https://www.wsscwater.com/customer-service/residential-tips/locating-and-operating-your-main.html
- ↑ https://youtu.be/u3aeRknUd1U?t=55
- ↑ https://youtu.be/m3cfvLGiw8E?t=80
- ↑ James Schuelke. Professional Plumber. Expert Interview. 1 October 2019.
- ↑ https://youtu.be/6C9PiaXnuGY?t=54
- ↑ https://youtu.be/6C9PiaXnuGY?t=66
- ↑ https://youtu.be/6C9PiaXnuGY?t=87
- ↑ https://youtu.be/6C9PiaXnuGY?t=127
- ↑ James Schuelke. Professional Plumber. Expert Interview. 1 October 2019.
- ↑ https://youtu.be/m3cfvLGiw8E?t=116
- ↑ https://youtu.be/m3cfvLGiw8E?t=123
- ↑ https://youtu.be/m3cfvLGiw8E?t=126
- ↑ https://youtu.be/Db_GYaTcrGk?t=235
- ↑ James Schuelke. Professional Plumber. Expert Interview. 1 October 2019.
- ↑ https://youtu.be/Db_GYaTcrGk?t=235
- ↑ https://youtu.be/Db_GYaTcrGk?t=240
- ↑ https://youtu.be/Db_GYaTcrGk?t=253
About This Article

To fix a leaking pipe, start by shutting off the water supply to your home and turning on all the faucets to drain the water that’s left in the pipes. Then, get a slip coupling that matches the size and type of the pipe, and hold it up to the part of the pipe that's leaking. Next, mark the end of the coupling on the leaky pipe, and use a pipe cutter to cut out the leaky area. When you're finished, scrape the inside and outside of the pipe with a deburring tool to reshape it. Finally, slide the coupling onto the ends of your pipe so it bridges the gap you just cut out. To learn how to fix minor pipe leaks using clamps, scroll down!