This article was co-authored by Duston Maynes. Duston Maynes is an Automotive Repair Specialist at RepairSmith. Duston specializes in leading a team that handles a variety of automotive repairs including replacing spark plugs, front and rear brake pads, fuel pumps, car batteries, alternators, timing belts, and starter motors. Duston holds an Associate’s degree in Automotive/Diesel Technology from The Universal Technical Institute of Arizona and is a Certified Diagnostic Technician and Automobile Mechanics Technician through BMW STEP. RepairSmith received The 2020 Big Innovation Award by Business Intelligence Group and The Startup of the Year by the American Business Awards. RepairSmith was also included in Built in LA’s 50 Startups to Watch and The Business Intelligence Group’s 52 Names Leading the Way in Customer Service. RepairSmith offers in-home services to provide car owners convenient and complete auto repair everywhere.
wikiHow marks an article as reader-approved once it receives enough positive feedback. In this case, 100% of readers who voted found the article helpful, earning it our reader-approved status.
This article has been viewed 527,156 times.
Your brake lights are an essential part of your braking system. Brake lights are intended to keep other drivers aware of you reducing your speed, so faulty brake lights could result in accidents. If your brake lights are on even when you're not braking, the most likely culprits are a faulty brake light switch or a blown fuse. Check each to ensure your brake lights are functioning properly before getting back out on the road.
Steps
Checking the Brake Light Switch for Damage
-
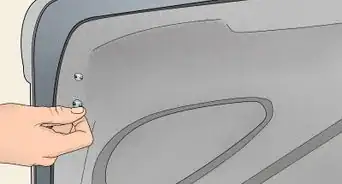
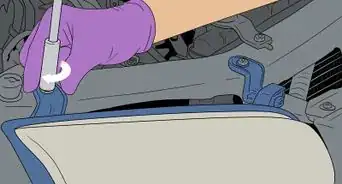
1Disconnect the battery. Before doing any work on the electrical system in your vehicle, you should always disconnect the battery. This will ensure you don’t shock yourself or damage anything as you work. Use a hand or socket wrench to loosen the nut securing the ground cable to the negative terminal of the battery. Slip the cable off and tuck it to the side of the battery.[1]
- You can locate the negative terminal by finding the letters “NEG” on the battery or looking for the negative (-) symbol.
- You will not need to disconnect the positive terminal.
-
2Put on eye protection. You will need to look around on the underside of your dashboard for this project, so it’s important that you put on eye protection to ensure no debris falls into your eyes. You will not need gloves for this project, but may choose to wear them to avoid poking yourself with wires.[2]
- Goggle style eye protection offers the highest level of protection.
- Glasses style eye protection will suffice for this task.
Advertisement -
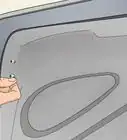
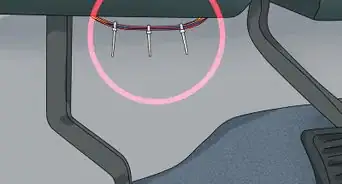
3Locate your brake pedal switch. The brake pedal switch is a button located along the shaft of the brake pedal, above the foot pad. As you press the pedal, the shaft presses the button, which turns on the brake lights.[3]
- If you are unsure where to locate your brake pedal switch, refer to the service manual for your specific vehicle.
- The switch will have a wired pigtail coming off of it and will be mounted directly behind the brake pedal.
-
4Disconnect the wiring pigtail from the switch. The wiring pigtail for the switch will be held in place with a plastic housing. Press on the clip release on the plastic housing to allow the pigtail to disconnect from the switch, then pull on the plastic portion of the pigtail to disconnect it.[4]
- Do not pull on the wires themselves as it may disconnect or tear them away from the pigtail harness.
- Be very careful not to break the plastic clip.
-
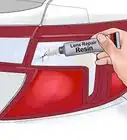
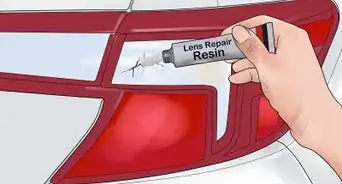
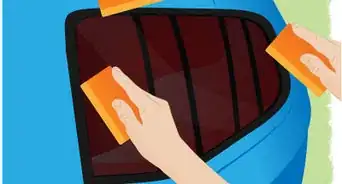
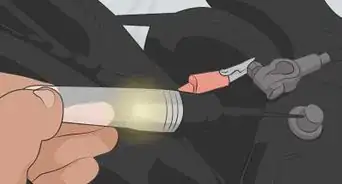
5Visually inspect the wiring. Look inside the pigtail harness for signs of burning or melting. If the wiring has overheated, the pigtail may have been damaged, resulting in the brake light staying on permanently. Any signs of damage inside the wiring pigtail could cause issues with your brake lights.[5]
- A damaged pigtail will have to be replaced in order to make your brake lights function properly.
- You may need to order the brake light switch pigtail from a dealership for some vehicles if they are not carried at your local auto parts store.
-
6Test the return of the switch. The switch itself is a long button that is pressed when you press the brake pedal down with your foot. While under the dashboard, press in on the pedal or on the button itself and see if the button pops back out when you release it. If it doesn’t, it likely means that the button is sticking in the “on” position.[6]
- If the button is sticking in the “on” position, it will leave the brake light on all the time.
- Have a friend stand behind the car to see if pressing and depressing the switch has any effect on the brake lights.
- If the button doesn’t affect the lights, there may be a blown fuse or the switch itself may have gone bad.


Installing a New Brake Light Switch
-
1Ensure the wiring harness is disconnected. Before removing the brake light switch, you need to be sure the pigtail is disconnected. If you already disconnected it to inspect it for damage, leave it hanging as you remove the switch. If not, disconnect it now by pressing on the plastic release and pulling back on the plastic housing.[7]
- Unless the pigtail harness needs to be replaced, you will reuse it with the new brake light switch.
- If you break the release, you may be able to use electric tape to hold the pigtail in place upon reassembly to avoid purchasing a new one.
-
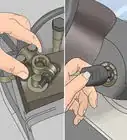
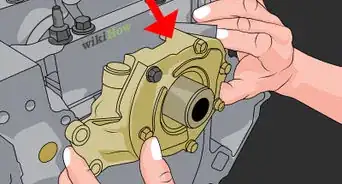
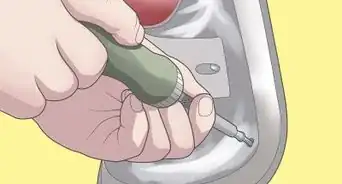
2Remove the switch from the brake pedal linkage. Different vehicles mount the brake light switch to the pedal linkage in different ways. If it is not readily apparent how to remove the switch from the pedal, refer to the service manual for your specific year, make and model vehicle.[8]
- The switch is usually held in place with one or two small bolts.
- Be careful not to lose the mounting hardware. You will need to reuse them when installing the new switch.
-
3Slide the new switch into place. With the old switch removed, slide the new switch into place exactly where the old one was. Use the mounting hardware that held the previous switch in place to secure the new one in the same manner.[9]
- Replace the bolts that secure the switch if they were damaged in the process of removing them.
-
4Reconnect the switch to the linkage and the harness. Plug the brake light switch pigtail into the new switch and reattach any other connections you may have needed to disconnect in your specific vehicle. The switch should now be in place behind the shaft of the brake pedal and connected to the vehicle.[10]
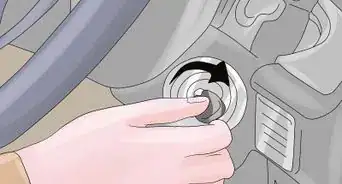
- Reconnect the battery and start the vehicle.
- Have a friend stand behind the vehicle while you test the new brake light switch to confirm it’s working.


Replacing Blown Fuses
-
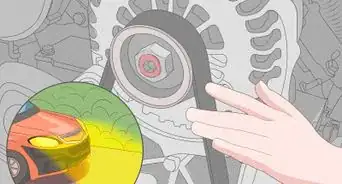
1Locate the appropriate fuse box. Most vehicles have at least two fuse boxes located throughout the body. One is often under the hood with a second fuse box on the driver’s side of the cabin. Refer to your vehicle’s owner’s manual to determine which fuse box houses the fuse for your brake lights.[11]
- You may need to remove a fuse box cover or pieces of the interior trim to access the fuse box.
- If you do not have an owner’s manual for your vehicle, try referring to the automaker’s website.
-
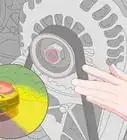
2Identify the fuse for the brake lights. Use the diagram in your owner’s manual or on the inside of the fuse box cover to determine which fuse powers the brake lights. A bad brake light fuse may have resulted in the lights being stuck on or off.[12]
- There may be more than one fuse for your brake lights. If that is the case, you will need to check each of them.
-
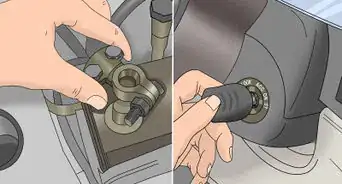
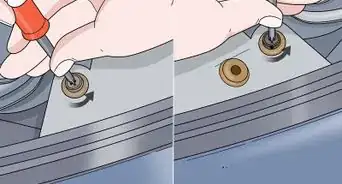
3Remove the fuse and inspect it for damage. Use a pair of needle nose pliers or plastic tongs to remove the fuse from its spot in the fuse box. Look into the fuse if it has a clear housing. If the metal is broken or burned inside the fuse, it will need to be replaced.[13]
- If you can’t look inside the fuse, inspect the ends for damage or signs of burning.
- Most automotive fuses have translucent covers to allow you to inspect them. If the cover itself is damaged so you can’t see through it, the fuse is likely bad.
-
4Replace a damaged fuse with one rated for the same amperage. Identify the amperage required for your brake light fuse by looking at the chart. Most automotive fuses are between 5 and 50 amps, with a number listed along the top of the fuse. Insert a new fuse in the spot you removed the faulty brake light fuse from. Once done, replace the lid to the fuse box and any interior pieces you may have needed to move to get to it.[14]
- Reconnect the battery and start the vehicle.
- Have a friend stand behind it to check to see if the brake lights function properly.


Community Q&A
-
QuestionI replaced my brake light switch, but the button goes into a hole and there were broken pieces everywhere. What is missing?
 Community AnswerMany people fill the hole with a small nut and bolt if the little plastic button has broken, or you could get a replacement from the dealer or an auto parts store.
 -
QuestionMy brake switch works but my stop has disintegrated. Can I replace just the stop?
 Community AnswerYes, as long as the switch still works. Typically the stop falls out or breaks before the switch fails. You can test this by sticking a piece of cardboard between the hole and the button on the switch. If the lights turn off, then the switch is working and you just need to replace the stop.
 -
QuestionI put a new brake light switch in, but the brake lights are still staying on. What do I do?
 Community AnswerYou probably need to replace the little piece that fell out of the hole, which probably activated the lights. If not, it may be an issue with the fuse for your brake lights.

-Step-5-Version-2.webp)
References
- ↑ http://www.agcoauto.com/content/news/p2_articleid/243
- ↑ http://www.agcoauto.com/content/news/p2_articleid/243
- ↑ Duston Maynes. Automotive Repair Specialist. Expert Interview. 14 July 2021.
- ↑ http://www.agcoauto.com/content/news/p2_articleid/243
- ↑ https://www.automd.com/35/how-to-replace-a-brake-light-switch/
- ↑ Duston Maynes. Automotive Repair Specialist. Expert Interview. 14 July 2021.
- ↑ https://www.automd.com/35/how-to-replace-a-brake-light-switch/
- ↑ Duston Maynes. Automotive Repair Specialist. Expert Interview. 14 July 2021.
- ↑ http://www.dailymotion.com/video/xfigk5_auto-repair-how-to-replace-a-brake-pedal-switch_auto
- ↑ http://www.dailymotion.com/video/xfigk5_auto-repair-how-to-replace-a-brake-pedal-switch_auto
- ↑ http://www.edmunds.com/how-to/how-to-inspect-and-replace-automotive-fuses.html
- ↑ http://www.edmunds.com/how-to/how-to-inspect-and-replace-automotive-fuses.html
- ↑ http://www.edmunds.com/how-to/how-to-inspect-and-replace-automotive-fuses.html
- ↑ http://www.edmunds.com/how-to/how-to-inspect-and-replace-automotive-fuses.html
About This Article

Before you fix a stuck brake light, make sure to disconnect the battery to ensure you don’t shock yourself or damage anything you work on. When the vehicle is safely shut down, start by disconnecting the wiring harness by pressing on the plastic release and pulling back on the plastic housing. Once the wiring harness is disconnected, remove the switch from the brake pedal linkage so you can slide the new switch into place. Use the mounting hardware that held the previous switch in place to secure the new one in the same way. Finish by plugging the brake light switch pigtail into the new switch and reattach any other connections you may have needed to disconnect for your specific vehicle. To learn how to fix a stuck brake light by replacing blown fuses, keep reading!