This article was co-authored by wikiHow staff writer, Travis Boylls. Travis Boylls is a Technology Writer and Editor for wikiHow. Travis has experience writing technology-related articles, providing software customer service, and in graphic design. He specializes in Windows, macOS, Android, iOS, and Linux platforms. He studied graphic design at Pikes Peak Community College.
This article has been viewed 366,773 times.
Learn more...
There are a variety of factors that could be causing your USB drive to not be recognized by your computer. It could be a problem with the hardware or a corrupt partition. It may have been formatted on a non-compatible computer. Luckily, you still may be able to extract the files from it, and can likely format the drive so that it's usable again. This wikiHow teaches you how to fix an unrecognized USB disk.
Steps
Performing Basis Troubleshooting
-
1Check the USB drive for damage. Check to make sure the USB connector isn't bent or missing parts. Check inside the connector to make sure there aren't any foreign objects. Clean the USB connector gently using a toothpick or Q-Tip. If the USB connector is severely damaged, you may need to take it to a specialist for repair or data recovery, or you can attempt to repair it yourself.
- If you notice any corrosion or gunk on the USB connector, you can try cleaning it using some electrical contact cleaner. It's inexpensive and available at most stores that sell electronic equipment.
-
2Plug the USB drive into another USB port. There could be a hardware problem with that particular USB port, so try plugging it into another USB port on your computer. If it works on another USB port, the problem is most likely with the USB port
- Avoid using a USB hub to connect the drive; connect it directly to your computer.
Advertisement -
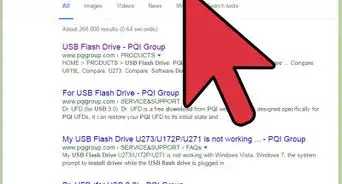
3Connect the drive to another computer. If the USB drive works on another computer but doesn't work in any of your USB ports, then there is something wrong with your computer's hardware or USB drivers. Also, check what type of computer the USB drive was formatted on. Computers running a different operating system or different bit processor may format the drive in a way that is not compatible with other computer types.
- A USB drive formatted on a Mac using Apple's APFS or HFS+ file system will not be read on a Windows computer. However, there are third-party applications, such as UFS Explorer that allow Windows to read Mac-formatted USB drives.
- If the drive was formatted on a Linux using a Ext 2 file system, you can install FS-driver] to read Ext 2 file system on Windows.
- If a USB drive was written by a computer that uses a different bit system (i.e. 32-bit or 64-bit), it may only work on computers that have the same bit system. You can check your computer's bit system in both Windows or Mac
- If a USB drive is encrypted, it may only work on the computer it was encrypted on.
-
4Shut down and unplug your computer. Sometimes your motherboard needs to be completely rebooted. To do this, you will need to shut down your computer and unplug it. This will prevent the motherboard from getting any standby power. Let it sit for several minutes and then reconnect your computer and start it back up. See if it is able to recognize your USB drive.[1] You may need to update your USB drivers or reformat the USB drive.
-
5
-
6Reinstall your USB drivers (Windows Only). If you are using a Windows computer, you can uninstall and reinstall your USB drivers. This may fix any problems with your USB drivers. Use the following steps to uninstall and reinstall the USB drivers:[2]
- Right-click the Windows Start menu.
- Click Device Manager.
- Scroll down and double-click Universal Serial Bus controllers.
- Right-click each driver and click Uninstall device.
- Restart your computer to reinstall the drivers.
-
7Reset the SMC (Mac only). If you are using a mac, you may be able to fix some of the USB problems by resetting the System Management Controller (SMC). Use the following steps to reset the SMC:
- Shut down your Mac.
- Disconnect the power cord or battery.
- Press and hold the Power button for 15 seconds. If you have a Macbook with a non-removable battery, press and hold "Shift + Control + Option + Power" for 15 seconds.
-
8Reset the NVRAM (Mac only). The Non-volatile random access memory (NVRAM) on your Mac contains a lot of USB information. Resetting the NVRAM could fix USB problems. Use the following steps to reset the NVRAM:[3]
- Shut down your Mac.
- Restart your Mac and immediately press "Command + Option + P + R" at the same time.
- Release these buttons when you hear the startup chime.
-
9Uninstall software that is conflicting with the USB drivers. Have you installed any software since the last time your USB drive was working properly? Particularly software from unknown sources on the internet. It's possible the software may be conflicting with the USB drivers. Uninstall any software that may be conflicting with the USB drivers and see if it is able to read the USB drive.


Checking the Disk's Health on Windows
-
1Insert the USB drive into your computer. You can use any functioning USB port on your computer.
-
2Right-click the Windows Start menu. It's in the lower-right corner. Right-clicking the Windows Start menu displays a list of system tools.
-
3Click Disk Management. Disk Management can be used to read, write, diagnose, partition, and format disk drives on Windows.
-
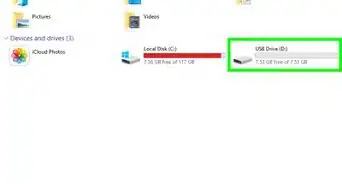
4Locate your USB drive. The easiest way to tell which drive is your USB drive is to look at the size. Your USB drive will typically be much smaller than your hard drives.
- If your USB drive isn't listed in Disk Management, then there is likely a hardware problem with either the USB drive or your USB port. Click here for detailed instructions on repairing a physically broken USB drive.
-
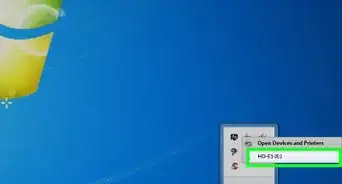
5Check the partition status on your USB drive. In the lower frame of the Disk Management window, you will see all of your connected drives listed with their partitions to the right of each drive. Your USB drive's partition should say Healthy.[4]
- If the partition is listed as healthy, but not recognized, you may need to assign a drive letter to the drive. It is also possible that the drive is written using a file system that is not recognized by Windows. If the USB drive was written using a Mac, it may be using Apple's proprietary APFS or HFS+ file system or Ext 2 for Linux, which cannot be read or written to on a Windows computer without third-party software.
- If the partition is Unallocated, you'll need to format the drive..


Assigning a Drive Letter to the USB Drive in Windows
-
1Insert the USB drive into your computer. You can use any functioning USB port on your computer.
-
2Right-click the Windows Start menu. It's in the lower-right corner. Right-clicking the Windows Start menu displays a list of system tools.
-
3Click Disk Management. Disk Management can be used to read, write, diagnose, partition, and format disk drives on Windows.
-
4Right-click on the USB drive's partition. If your drive is healthy but is not being recognized in Windows, it may not have a drive letter assigned to it. All connected drives need a drive letter so that the system can read and write on the drive.
-
5Click Change Drive Letter and Paths. It's in the menu that appears when your right-click a partition in Disk Management. This allows you to assign a drive letter.
-
6Click Add. This option allows you to add a new drive letter to the drive.
-
7Select "Assign the following drive letter". It's the first option at the top of the menu. Click the radio option next to this option to select it.
-
8Select a letter from the drop-down menu. You won't be able to select letters that already have drives assigned. Avoid choosing drive "A" or "B".
-
9Click Ok. This will rewrite the drive with a new drive letter.
- If you still can't access the drive after assigning a drive letter, you'll probably need to format the drive.


Repairing a USB Drive on Mac
-
1Insert the USB drive into your Mac. You can use any functioning USB port on your Mac.
-
2
-
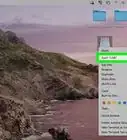
3Type Disk Utility into the search bar. This displays the Disk Utility app in the search results.
-
4Click Disk Utility.app. It has an icon that resembles a hard disk drive with a stethoscope. Click this icon to open Disk Utility.
-
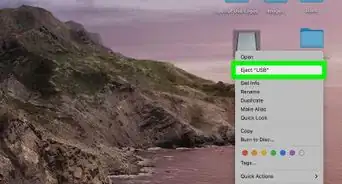
5Click the USB drive. All drives are listed in the column to the left. You should be able to tell which is the USB drive by its name and how much space it has on it.
-
6Click First Aid. It's the first icon at the top of the screen. It has an icon that resembles a stethoscope.
-
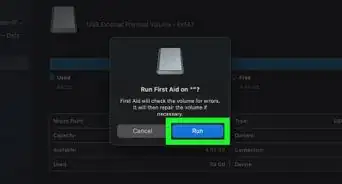
7Click Run. It's in the pop-up alert. This runs a disk diagnostic which will check for errors and attempt to repair them. Any critical errors will be listed when the diagnostic is finished


Formatting a USB Drive On Windows
-
1Insert the USB drive into your computer. You can use any functioning USB port on your computer. If your drive's partition is unallocated or still can't be seen even after assigning a letter, formatting the drive may be your only option to get it working.
- Be aware that formatting the drive will erase all data on the drive. Use this as a last resort. You may want to run a file recovery program on the inaccessible drive first to try to recover important files.
-
2Right-click the Windows Start menu. It's in the lower-right corner. Right-clicking the Windows Start menu displays a list of system tools.
-
3Click Disk Management. Disk Management can be used to read, write, diagnose, partition, and format disk drives on Windows.
-
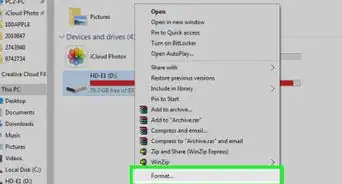
4Right-click on the USB drive's partition in Disk Management. This will display a pop-up menu.
-
5Click Format. It's in the pop-up menu. This opens the format wizard.
-
6Type a name for the drive. Use the space next to "Volume label" to type a name for the drive. This is the name that will be given to the drive once it is formatted.
-
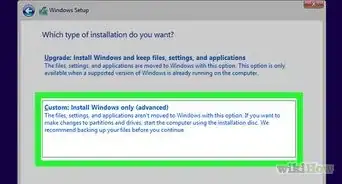
7Select a file system. You have three file system options to choose from. They are as follows:[5]
- NTFS is Windows' proprietary file system. Drives written in NTFS format will be readable and writable on Windows. On Mac, they can be read, but not written to. Select this option if you only plan on using the USB drive on Windows computers.
- FAT 32 is an older, universal file system that is compatible with most devices. Select this option if you want the USB drive to have the widest compatibility amongst a wide variety of devices and you have no files larger than 4 GB. The USB drive also can't be any larger than 8 TB.
- exFAT is a newer universal file system that doesn't have the same limitations as FAT32, but may not work on some older devices. Select this option if you have large files and need compatibility across a wide variety of newer devices.
-
8Uncheck the "Perform a quick format" box. This will make the format process take longer but can help repair errors in the drive.
-
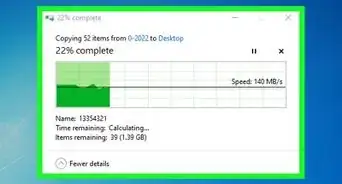
9Click OK and wait for the format to complete. You should be able to access the drive on any computer if the format is successful.
- If the format process fails then the USB drive is likely broken.


Formatting a USB Drive on Mac
-
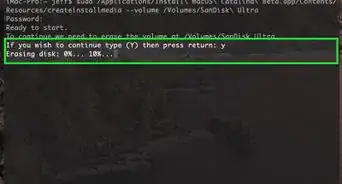
1Insert the USB drive into your Mac. You can use any functioning USB port on your Mac. Be aware that formatting a USB drive will erase all data on the drive. Use this only as a last resort.
-
2
-
3Type Disk Utility into the search bar. This displays the Disk Utility app in the search results.
-
4Click Disk Utility.app. It has an icon that resembles a hard drive with a stethoscope. Click this icon to open Disk Utility.
-
5Select the USB drive. All connected drives are listed in the column to the left You should be able to tell which drive is the USB drive by its name and how much space it has on it.
-
6Click Erase. It's the button in the middle at the top. It has an icon that resembles an eraser erasing a hard drive.
-
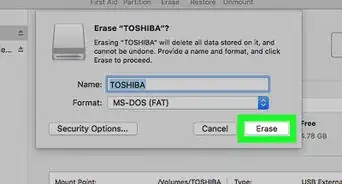
7Type a name for the drive. Use the space next to "Name" to type a name for the drive. This is the name that will be given to the drive once it is reformatted.
-
8Select a file format for the drive. Use the drop-down menu next to "Format" to select the file format. You have several options to choose from:[6]
- APFS is Apple's newest proprietary file system. This system is designed to work best on Solid-State Drives and other all-flash drives. This format cannot be read on Windows computers. Select this option only if you plan on using your USB drive on computers with the latest versions of macOS.
- Mac OS Extended is Apple's older proprietary system. Like APFS, this file system cannot be read on Windows computers. Select this option if you plan on using your USB drive only on Mac computers, some of which may be running an older version of macOS.
- exFAT is a cross-platform file system. Select this option if you plan on using your USB drive across a wide variety of devices.
- File systems that are listed as "Encrypted" give you the option to enter a password that will be needed to access the USB drive.
-
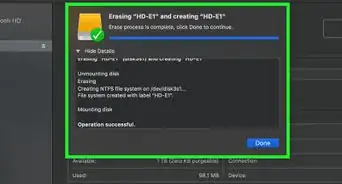
9Click Erase. This will begin rewriting the drive with the settings you selected. You should be able to access the drive when it is finished.
- If the USB drive can't be accessed once it has been reformatted, it is most likely broken.


Community Q&A
-
QuestionUSB drive refuses to accept format by Windows. What do I do?
 Community AnswerIt's possible the USB stick was corrupted and thus made permanently unusable. In this case, nothing can be done except to toss it and get a new USB stick.
 -
QuestionWhat does it mean when Windows cannot complete the format?
 Community AnswerIt means your USB motherboard has been damaged and can not communicate with PC. In this case, nothing can be done and you have to move on to a new USB stick.


References
- ↑ https://www.online-tech-tips.com/computer-tips/usb-device-not-recognized/
- ↑ https://support.microsoft.com/en-us/windows/update-drivers-in-windows-10-ec62f46c-ff14-c91d-eead-d7126dc1f7b6
- ↑ https://macpaw.com/how-to/fix-usb-ports-on-mac
- ↑ http://www.pcadvisor.co.uk/how-to/storage/3513573/how-fix-unrecognized-usb-drive/
- ↑ https://www.geeksforgeeks.org/difference-fat32-exfat-ntfs-file-system/
- ↑ https://www.howtogeek.com/331042/whats-the-difference-between-apfs-macos-extended-hfs-and-exfat/
About This Article

1. Try another USB port.
2. Try another computer.
3. Press Win + R.
4. Type "diskmgmt.msc" and press Enter.
5. Look for "Healthy" or "Unallocated" at the bottom.
6. If "Healthy," assign the drive a new letter.
7. If "Unallocated," format the drive.