This article was co-authored by wikiHow staff writer, Darlene Antonelli, MA. Darlene Antonelli is a Technology Writer and Editor for wikiHow. Darlene has experience teaching college courses, writing technology-related articles, and working hands-on in the technology field. She earned an MA in Writing from Rowan University in 2012 and wrote her thesis on online communities and the personalities curated in such communities.
This article has been viewed 3,136,513 times.
Learn more...
Is your USB flash drive not working? For software or driver issues, you can scan and repair your flash drive using your PC or Mac's built-in repair utility, which won't harm your files. If your USB drive has corrupt data, you can reformat it—but keep in mind that reformatting will erase all of your files. Finally, if the flash drive has physical damage, you might be able to repair it at home, but it's best to take it to a data recovery professional. This wikiHow guide will teach you simple ways to fix a USB flash drive.
Things You Should Know
- Try simple fixes first if your USB pen drive has minor physical damage, like wiggling it back and forth or cleaning the USB port.
- Use the scan and repair features on Windows and Mac computers to fix non-physical damage.
- As a last resort, format your USB flash drive to restore functionality to it. However, you'll lose all the files on your drive during that process.
Steps
Scanning and Repairing (Windows)
-
1Plug your flash drive into your computer. The flash drive should fit into one of the rectangular ports on your PC's housing. If you're encountering errors on your flash drive or it won't display your files, you may be able to fix it using your computer's repair feature.
- This method attempts to fix your USB drive without erasing its data.
-
2Advertisement
-
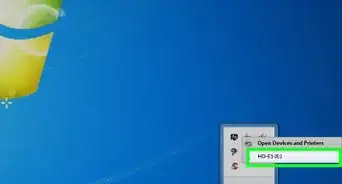
3Right-click your flash drive and select Properties. You'll see Properties at the bottom of the menu that appears when you right-click the drive.
- You may need to click > next to This PC first in order to view the flash drive.
-
4Click the Tools tab. This option is at the top of the Properties window.
-
5Click Check. You'll see this button at the top of the Tools tab in the "Error checking" section.
-
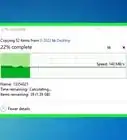
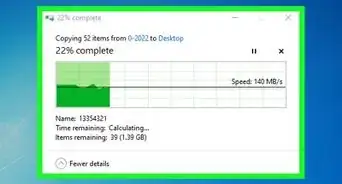
6Wait for Windows to repair your drive. You may also need to follow some on-screen instructions during the repair process.
- For example, you might need to confirm that you want to repair the drive by clicking Scan & Repair.
- Once the repair is complete, click Close to finish. If your flash drive's problems were driver or software-related, it should work now.


Scanning and Repairing (Mac)
-
1Plug your flash drive into your computer. The flash drive should fit into one of the rectangular ports on the side of your MacBook or on the front or back panel of your Mac desktop computer. If you're encountering errors on your flash drive or it won't display your files, you can use this method to scan for and fix errors.
-
2Open Disk Utility. You can do so easily from the Launchpad—just type Disk Utility, then click Disk Utility in the search results.[1]
-
3Select your flash drive. This is the indented icon below the "External" heading.
- If you don't see your USB flash drive, click the View menu and choose Show All Devices first.[2]
-
4Click the First Aid button. It's the stethoscope icon at the top of the Disk Utility window.
-
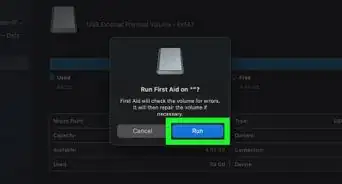
5Click Run when prompted. It's the blue button on the pop-up window. Disk Utility will now scan for errors and repair them as they're found.
-
6Click Done when the scan is complete. If your flash drive's problems were driver- or software-based, it should work now.
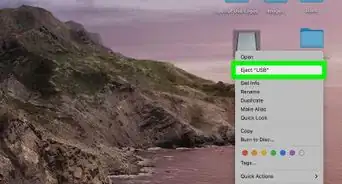
- When you're finished scanning, click the Eject icon next to the drive in Finder, or click and drag the drive to the Eject icon in the Dock.


Reformatting (Windows)
-
1Connect the USB flash drive to your computer. Plug it into one of your desktop or laptop's USB ports.
- Formatting your USB drive will erase everything that's on it.
-
2
-
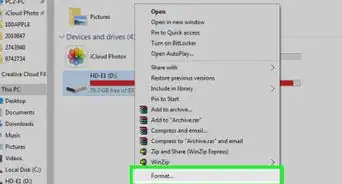
3Right-click your flash drive and select Format. If you don't see your flash drive, you might need to click > next to "This PC" first. The Format window will expand.
-
4Select a file system. Use the drop-down menu below "File System" to select a file system to reformat the drive in. Your options are as follows::
- NTFS - The default Windows operating system format. This format only works with Windows.
- FAT32 - The most widely compatible format. Works on Windows and Mac but has a storage limit of 32 gigabytes.
- exFAT (Recommended) - Works on Windows and Mac and has no storage limit.
- If you've formatted your drive before and you're positive that it isn't broken, you can also check the Quick Format box.
-
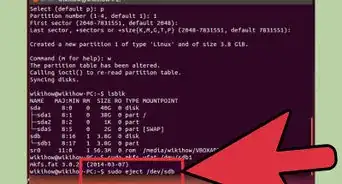
5Click Start, then click OK. Doing this will cause Windows to begin formatting your flash drive for you.
-
6Click OK when prompted. Your flash drive has successfully been formatted.


Reformatting (Mac)
-
1Connect the USB flash drive to your computer. Plug it into one of your Mac's USB ports.
- If your Mac doesn't have a USB port, you can purchase an adapter.
- Formatting your drive will erase everything that's on it.
-
2Open Disk Utility. You can do so easily from the Launchpad—just type Disk Utility, then click Disk Utility in the search results.
-
3Click your flash drive's name. It's on the far-left side of the Disk Utility window.
- If you don't see your USB flash drive, click the View menu and choose Show All Devices first.
-
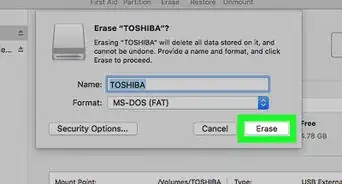
4Click the Erase icon. You'll see it at the top of the window.
-
5Type a name for the drive. Use the space next to "Name" to type a name for the drive once it is done formatting.
-
6Select a file format. Use the drop-down menu next to "Format" to select a file format. This will bring up a drop-down menu with the following options:
- Mac OS Extended (Journaled) - The default Mac format. Only works on Mac.
- Mac OS Extended (Journaled, Encrypted) - Encrypted version of the default Mac format.
- Mac OS Extended (Case-sensitive, Journaled) - Version of the default Mac format that treats files with the same name differently if there are case differences (e.g., "file.txt" and "File.txt").
- Mac OS Extended (Case-sensitive, Journaled, Encrypted) - A combination of the three above formatting options for the Mac format.
- MS-DOS (FAT) - Works on both Windows and Mac computers, but has file size limit of 4 gigabytes.
- ExFAT (Recommended) - Works on both Windows and Mac computers. Has no storage limit.
-
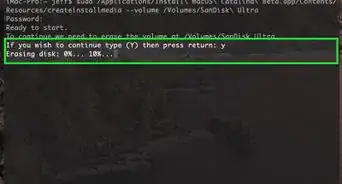
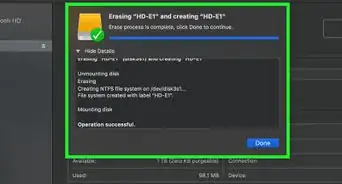
7Click Erase, then click Erase when to confirm. This will begin the formatting process. Once the formatting is complete, you'll see an icon for your flash drive appear on your Mac's desktop.
- When you are finished, click the eject icon next to the drive in the Finder, or click and drag the drive to the Eject icon in the Dock when on your desktop.


Simple Fixes for Physical Problems
-
1Try testing the flash drive on another USB port or computer. It may be the USB port that isn't working rather than the USB drive itself.
-
2Wiggle the USB flash drive. If your flash drive's connection head is just a little loose (as in, it doesn't properly connect when plugged in), wiggling it might help it connect long enough for you to copy the files to your computer.
- Don't use force or excessively bend your USB, as that will cause more damage.
-
3Look for grit or foreign objects in the USB drive's mouth. It may not be able to connect to your computer because of an easily-removed blockage. If you see something inside of the USB drive's mouth, gently swab it out with a toothpick or a q-tip.
-
4Check the USB port for debris. Any debris, like lint or dust, can clog up the port and make it seem as though your USB stick is broken. Clean the port with a can of air or a tiny non-metal object (like a Q-Tip), or try using a different USB port.
- If the port looks clean but still doesn't work, try using your flash drive on a different port or computer. If it works, you'll know that something is wrong internally with that specific USB port on your computer.


Soldering a Broken Connector
-
1Understand that physically repairing a flash drive is unlikely to work. Unless you have professional experience in repairing physically damaged flash drives, do not try to open it.
- If the flash drive's internal storage is damaged, your only viable option is to take the drive into a professional repair service.
- The prices for data recovery can vary from $20 - $850 based on the severity of damage done to the drive, and the type of recovery required.
-
2Get your repair tools for soldering a broken connector. If you decide you are comfortable risking your files, you will need:
- A soldering iron with solder and flux
- An old USB cable
- Wire cutters/strippers
- A small flathead screwdriver
- A magnifying glass or jeweler's loop
-
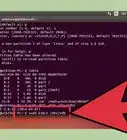
3Remove the flash drive's casing. Do so with your flathead screwdriver.
-
4Use the magnifying glass to inspect the circuit board (PCB) and solder pads. If the PCB (the green circuit board) itself is damaged or the solder pads are lifted, you will probably need the help of a professional.
- Solder pads are the 4 bits of solder that connect the prongs of the USB connector to the copper lines in the circuit board. If the connector has broken away without causing damage to the PCB or solder pads, continue to the next step.
-
5Set the flash drive on a hard surface. Place the connector end facing toward you and the solder pads facing up.
-
6Use wire cutters to cut one end off of the USB cable. Make sure you cut the USB end if the flash drive cable is an adapter.
-
7Strip away a section of the USB cable's wire. Try to expose about 0.25 inch (0.6 cm) of each of the four wires inside the cable that's attached to the USB cable.
-
8Solder each of the four wires to the four solder pads. Take your time while doing this, since failing to adequately secure the connection will most likely render your flash drive inoperable.
-
9Plug the other end of the USB cable into a computer. It should fit into one of the rectangular slots on your computer's housing.
-
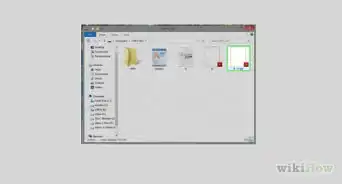
10Open your flash drive if possible. If your flash drive is recognizable by the computer, open it and move your files over onto your computer as quickly as possible:
- Windows - Open Start, click the File Explorer icon, and click your flash drive's icon.
- Mac - Open Finder and click your flash drive's icon.
- If the flash drive doesn't connect to your computer, you can try taking it to a tech department to see if they can still pull the files off of it.


Community Q&A
-
QuestionMy pen drive is not showing my folders, but when I am scanning the pen drive, it is then showing the names of folders. What should I do?
 Community AnswerThe files could have been hidden as system files. To show the files, go to folder properties and to the display tab. There you will find the option Show System Files and Show Hidden Files. Check both of them and apply. Your files should be visible now.
 -
QuestionWhen I try to format my pen drive, my PC shows the message "Windows was unable to format this drive". What is the solution?
 Community AnswerIt is most likely that your pen drive is dead (actually the pen drive's storage may be intact but the boot/power part inside the chip has failed).
 -
QuestionI have just recently bought a USB storage device. When I plug it into my laptop it makes the sound that it's connected and starts to install, but the folder doesn't show up in My Computer. What can I do?
 Community AnswerThis is similar to a problem I have accessing my mp3 player. I have two cables. Both charge the device but one provides a data connection so that the device is recognized as a drive on the computer, and the other provides no data connection. You could have a cable problem.
Warnings
- Formatting will erase all data on a drive.⧼thumbs_response⧽
- Always back up your important information.⧼thumbs_response⧽
- If the files are at all important, do not let someone who happens to own a soldering iron convince you that they can fix it. Take your drive to a professional repair service.⧼thumbs_response⧽
- Always eject a flash drive before removing it to ensure there is no damage to your files or to the drive itself.⧼thumbs_response⧽
Things You'll Need
- Your operating system (restore) disk.
- Your operating system serial key.
- A USB flash drive that is working properly for testing/comparing purposes.


References
About This Article