This article was co-authored by Tami Claytor. Tami Claytor is an Etiquette Coach, Image Consultant, and the Owner of Always Appropriate Image and Etiquette Consulting in New York, New York. With over 20 years of experience, Tami specializes in teaching etiquette classes to individuals, students, companies, and community organizations. Tami has spent decades studying cultures through her extensive travels across five continents and has created cultural diversity workshops to promote social justice and cross-cultural awareness. She holds a BA in Economics with a concentration in International Relations from Clark University. Tami studied at the Ophelia DeVore School of Charm and the Fashion Institute of Technology, where she earned her Image Consultant Certification.
This article has been viewed 403,357 times.
Why use a boring square fold for your napkin when you have the opportunity to spice up your table? Both cloth and paper napkins offer dozens of folding possibilities — when paired with decorative napkin rings, there are even more! Folding a napkin for a ring can be as simple or as complex as you want it to be, so feel free to run wild with your own creations!
Steps
Making an Easy "Puff" Fold
-
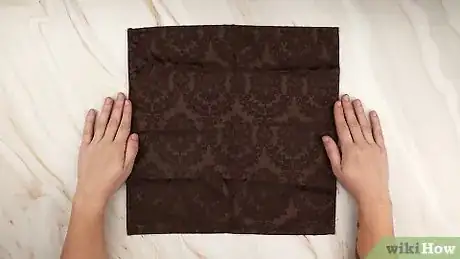
1Spread the napkin out flat. This method of napkin folding is quick, simple, and easy to duplicate, making it a good choice for beginners. To start, lay your napkin flat on your table or work surface. Flatten out any folds or creases you see.
- Note that this method works best with large, square, cloth napkins. For the nicest-looking results, use napkins without wrinkles, stains, or frayed ends.
-
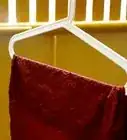
2Lift the napkin by its center. Pinch the very center of the napkin between your thumb and forefinger. Lift it up so that it's not touching the table or work surface. The napkin should hang below your hand in gentle, flowing folds.Advertisement
-
3Smooth out any folds. If needed, use your free hand to straighten out the folds of the napkin so that it hangs freely. Alternatively, shake it up and down a few times with the hand you're pinching it with.
- When you're done, the napkin should hang downward loosely like a pair of drapes.
-
4Slide the napkin ring over the pinched end. Grasp the middle section of the napkin with your free hand to hold it in place. Then, use the hand you were pinching the napkin with to slide the ring over the napkin's folded end and pull it through.[1]
- If possible, push your ring up the napkin until it's held in place by the bulk of the napkin. Not all napkins are thick enough for this — if yours isn't, just slide the ring up an inch or two and set the napkin down.
-
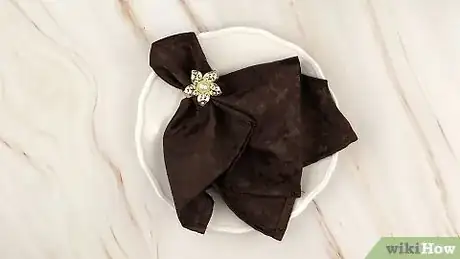
5Puff up both ends. Next, simply puff up the unfolded end of the napkin to give it some visually appealing volume — this is easiest with hefty cloth napkins. For added panache, give the smaller bottom part of the napkin a quick fluffing as well. Congratulations! You're done. Arrange your napkin as you wish.[2]
- There are many different ways you can arrange your napkins for maximum impact — for instance, you may want to place your napkin directly on a plate to draw attention to it or put them all in a basket in the middle of the table so that your guests can grab them as they need them. It's up to you!
Making a Fan Fold
-
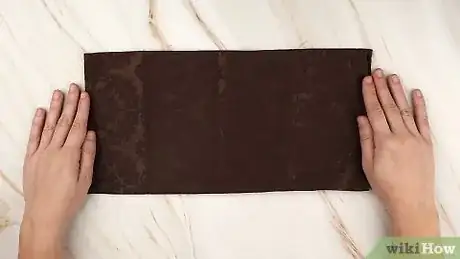
1Crease your napkin in half. This method isn't much harder than the basic "puff" fold above, but it looks incredibly elegant, making it a great choice for when you're trying to impress your friends. To start, lay your napkin flat and fold it in half. Press down on the fold to make a firm crease. Unfold the napkin.[3]
- For this method, it's more important than normal to use a stiff, square cloth napkin. These sorts of napkins hold creases more easily than paper napkins, making your final "fan" shape look much sharper. In addition, if you don't use a square napkin, the dimensions of your fan may be off.
-
2Accordion-fold your napkin. Folding parallel to the crease you put in the napkin, make alternating folds from one side to the other. Aim to fit about four to six folds on each side of the central crease — the precise number doesn't matter. Press down to form creases as you go. When you're done, your folded-up napkin should be a long, skinny, "accordion-ing" strip.
- Note that your original crease should act as one of the folds in your "accordion".[4] You may need to adjust the width of your folds slightly to get them to line up perfectly with the crease. Over time, this gets easier.
-
3Fold the accordion-ed napkin in half. Next, find the middle point of your accordion-ed strip and fold it over itself so that its edges line up. This should leave you with one round, folded end (probably too thick to crease at this point) and one open, fanned-out end.
-
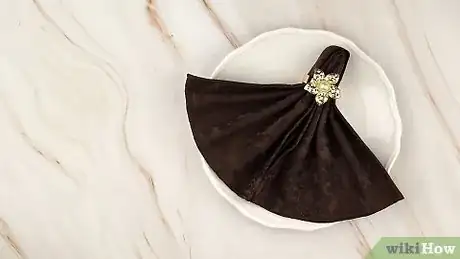
4Insert the folded end into your ring. Now, all you need to do is put the napkin in your ring. Pull the ring up over the folded end of your napkin until it's about halfway up. Pull on the edges of the open end of your napkin to fan it out and display the accordion-ed folds. Congratulations! You're done.
- As usual, you can make a bold statement by simply putting this folded-up napkin in the center of your plate. You may also want to try putting the folded end in a skinny glass or champagne flute for an exotic, peacock-like arrangement.[5]
Making a Double Roll
-
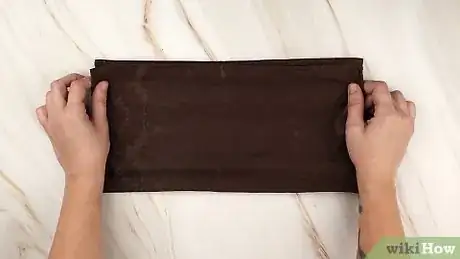
1Fold the napkin in half. This fold is simple, formal, and easy — perfect for last minute preparations for a wedding or fancy party. To start, fold the bottom edge of the napkin up to the top to make a rectangle. To be clear, the bottom edge of your napkin should be folded and the top edge should be open.
- While a square napkin is best here, the material of the napkin isn't as important for the double roll as it is for other types of napkin folds because the napkin doesn't need to support its own weight. Thus, this is a fine choice if you're working with paper napkins.
-
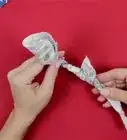
2Roll one end of the napkin to the middle. Next, take one side of the napkin and tightly roll it inward. Stop when you reach the rough middle point of the napkin. Use the napkin ring or a plate to hold this roll in place while you tackle the other edge.
-
3Roll the other end into the middle. Next, repeat the same rolling procedure for the other side of the napkin. The two rolls should meet in the middle of the napkin. They should be roughly the same size — if they're not, you may want to make minor adjustments so that they're symmetrical.
-
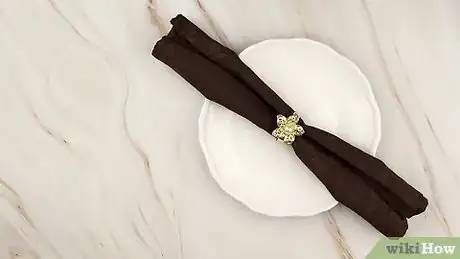
4Pull the ring over the rolls. Simply pull the ring over the double-rolled napkin so that it rests roughly in the middle point. That's it! Your napkins are ready to be given to your guests or arranged as you please. If you have any spare ribbon lying around, these skinny rolls look even better tied up with a bow!
- Don't forget to arrange your napkins rolls-side up — otherwise, they'll just look like an ordinary roll or bundle.
Making a Double Candle Fold
-
1Fold the napkin diagonally. This amazing fold looks breathtaking when pulled off correctly but doesn't require much more work than any of the standard folds above, surprisingly.[6] To begin, lay your napkin flat on your table or work surface and fold one of the top corners to the opposite bottom corner. Your napkin should look like a triangle when you're done.
- As above, a stiff, square cloth napkin works best here. You may find that this fold needs more stiffness than any of the other ones in this article — more so than the others, this fold uses the natural strength of the cloth to support the weight of the napkin.
-
2Roll from the long end to the point. Grab the long, wide end of the napkin and start rolling it toward the point of the triangle. Roll as tightly as you can. The more tightly you roll your napkin, the more easily it will be able to hold its final shape, so the tighter, the better.
- When you're done, your napkin should look like a narrow, skinny, roll. The edges of the napkin should make repeating diagonal lines on the surface of the roll.
-
3Fold the napkin in half. Taking care not to let your roll unravel, fold the napkin roughly at its middle point. The "points" at the ends of the roll should align with each other. Keep a grip on the folded base of the napkin to keep it from unrolling.
-
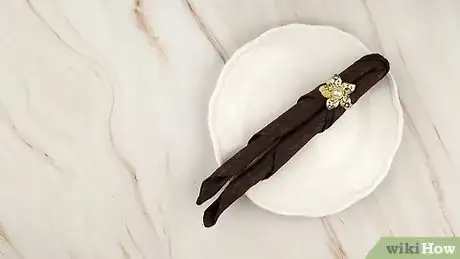
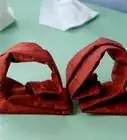
4Stuff the folded end into your ring. Next, take the folded end of your napkin and push it into the ring (it should fit rather snugly — if your ring is too big or too small, this can be tricky). The two rolled-up edges of the napkin should stand upright, resembling a pair of skinny candles. Congratulations! You're done.
- One great trick for arranging your napkins with this fold is to bring the folded edge of the napkin flush with the bottom of the ring and stand it upright. The ring should resemble the rim of a candlestick, enhancing the candle-like appearance of your napkins. Note, however, that this arrangement is very easy to tip over.[7]
References
- ↑ Tami Claytor. Etiquette Coach. Expert Interview. 29 September 2020.
- ↑ Tami Claytor. Etiquette Coach. Expert Interview. 29 September 2020.
- ↑ http://www.napkinfoldingguide.com/26-napkinringfan/
- ↑ http://www.napkinfoldingguide.com/26-napkinringfan/
- ↑ http://www.southernliving.com/food/entertaining/how-to-fold-a-napkin-for-a-wine-glass
- ↑ http://www.napkinfoldingguide.com/27-twincandles/
- ↑ http://www.napkinfoldingguide.com/27-twincandles/
About This Article
To fold a napkin for a napkin ring, start by spreading the napkin out on a flat surface. Then, pinch the center of the napkin with your thumb and forefinger and lift it up so it's not touching the surface anymore. Next, smooth out any folds or wrinkles in the napkin with your free hand or by shaking the napkin a few times. Finally, slide the napkin ring over the pinched end and then puff up both ends to give the napkin some volume. To learn how to make a fan fold and a candle fold with a napkin, scroll down!
