This article was co-authored by wikiHow Staff. Our trained team of editors and researchers validate articles for accuracy and comprehensiveness. wikiHow's Content Management Team carefully monitors the work from our editorial staff to ensure that each article is backed by trusted research and meets our high quality standards.
The wikiHow Tech Team also followed the article's instructions and verified that they work.
This article has been viewed 112,392 times.
Learn more...
Problems with the Apple Mobile Device Driver are often the cause of issues in which Windows is unable to recognize an iPod. Before diving too deep into that process, you should check to make sure that your iTunes and OS software are up to date and you are using functioning cables and USB ports. Once that is done, you can go into the Device Manager to check the status of your Apple mobile Device Driver. From there you will either need to re-enable the driver, update it manually, or restart the Apple Mobile Device Service.
Steps
Basic Troubleshooting
-
1Connect the device to your PC with a different USB cable. It is possible that the cable you are using is defective. In some cases, using an uncertified charging cable can result in reduced functionality.[1]
-
2Connect the device to a different USB port. It is possible that the USB port you are using is defective. Try both different ports and buses on the computer.
- If you are using a desktop (tower) PC with both front and rear USB ports, you can often use one set even if the other is malfunctioning, since they are usually connected to a different bus.
- If you have both USB 2.0 and USB 3.0 ports, they usually utilize separate USB chips and will function separately.
- If you are using a USB hub, try using a root port on the computer instead. This will tell you whether the hub or the computer bus is at the heart of the problem.
Advertisement -
3Make sure the iPod is charged. If the iPod battery is completely depleted, it may not be detected until it is charged enough to power on.
- Connect the iPod to a wall charger for a faster charge than via USB.
-
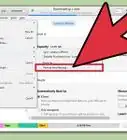
4Update iTunes. In iTunes, open the “Help” menu and select “Check for Updates”.
- You may need to hit Ctrl+B to make the menu bar appear.
- You can also download the latest version of iTunes from https://www.apple.com/itunes/download/.
- Later versions of iTunes may utilize a newer version of the Apple Mobile Device Driver.
-
5Update Windows. Open Windows Settings and Select “Update and Security”. Click “Check for Updates” to receive the latest updates to your operating system.
- Updates to Windows may include updates to USB chips or other relevant software.
- On older versions of Windows, look for Windows Update in the Control Panel.
Troubleshooting the Apple Mobile Device Driver
-
1Connect the iPod to the computer. Plug the USB cable that you use to charge the iPod into one of the USB ports on the computer. [2]
- If an alert box appears on your iPod or computer saying “Trust This Computer”, choose “Yes”.
- Make sure that the USB cable is firmly plugged into both the iPod and the computer.
-
2Open the Device Manager. Hit ⊞ Win+S and enter “Device Manager” into the search field. Select “Device Manager” from the results.
-
3Expand the “Universal Serial Bus Controllers” section. Click the arrow next to the list item to expand. This is located at the bottom of the list and you should see “Apple Mobile Device Driver” displayed in the expanded list. [3]
- If you do not see Apple Mobile Device Driver listed here, try disconnecting and reconnect your device. If you still do not see it, check for an “Apple” device listed in “Imaging Devices” or “Portable Devices” and proceed to the manual update steps.
-
4Examine any icons displayed on “Apple Mobile Device Driver”. You may see a down arrow, an exclamation/question mark, or no icon at all.
- If you see a down arrow icon, right-click the “Apple Mobile Device Driver” and select “Enable”.
- If you see an exclamation/question mark, proceed to the manual update steps.
- If you see no icon then try restarting the Apple Mobile Device Service.
Updating the Apple Mobile Device Driver
-
1Right-click “Apple Mobile Device Driver” and select “Update Driver Software”. A window will appear prompting you how to update.
-
2Select "Browse my computer for driver software". This will take you to another page with more options.
-
3Click "Let me pick from a list of device drivers on my computer”. This is located at the bottom of the page and will take you a new page with browsing options.
-
4Click “Have Disk”. This is located in the lower right, just below the list of hardware.
-
5Click “Browse”. This is located in the bottom right corner of the “Browse” popup window.
-
6Navigate to your iTunes “Drivers” folder.. The most common filepath for this is: “C:\Program Files\Common Files\Apple\Mobile Device Support\Drivers”.
- On newer 64-bit operating systems, the likely filepath is “C:\Program Files (x86)\Common Files\Apple\Mobile Device Support\Drivers”.
-
7Select the file named "usbaapl" (“usbaapl64” if running 64-bit version of Windows). Once selected, click “Open” to return to the “Have Disk” page with the full filepath displayed.
- If you do not see the file listed here, then you may be in the wrong folder location. Double check your filepath.
-
8Install the driver software. Click “Next”, then “Finish” as prompted. Windows will now install/update the driver.
-
9Open iTunes. Once the download is complete your device will appear in iTunes.
- If you still do not see your device, try restarting the Apple Mobile Device Service.
Restarting the Apple Mobile Device Service
-
1Close iTunes. Click the red ‘X” in the upper right corner.
-
2Disconnect your device from the computer. If you still have the device manager open, the listing for the Apple Mobile Device Driver will disappear.
-
3Hit ⊞ Win+R. This will open up the Windows “Run” command.
-
4Enter “services.msc” and click “OK”. This will open up the Windows Services console.
-
5Right-click “Apple Mobile Device Services” and select “Properties”. All services appear on the right in descending alphabetical order.
-
6Select the dropdown menu next to “Startup Type” and choose “Automatic”. This menu is located about halfway down the “General” tab.
-
7Click “Stop”. This button is located below the dropdown menu. After a moment the Service Status will display “Stopped”.
-
8Click “Start”. This button is located to the left of “Stop”. After a moment the Service Status will display “Running”.
-
9Click “OK”. This will save your settings and close the window.
-
10Restart your computer. This ensures that your changes will take effect.
-
11Connect your device to the computer. Once booted into the OS, connecting the device will launch iTunes automatically and appear listed in the software.[4]
- It is possible that you may need to launch iTunes manually, but the device should still successfully appear listed among your devices in iTunes.
Warnings
- Always use caution when uninstalling or disabling devices in the Device Manager.⧼thumbs_response⧽
-Step-1-Version-2.webp)
-Step-2-Version-2.webp)
-Step-3-Version-2.webp)
-Step-4-Version-2.webp)
-Step-5.webp)
-Step-6.webp)
-Step-7.webp)
-Step-8.webp)
-Step-9.webp)
-Step-10.webp)
-Step-11.webp)
-Step-12.webp)
-Step-13.webp)
-Step-14.webp)
-Step-15.webp)
-Step-16.webp)
-Step-17.webp)
-Step-18.webp)
-Step-19.webp)
-Step-20.webp)
-Step-21.webp)
-Step-22.webp)
-Step-23.webp)
-Step-24.webp)
-Step-25.webp)
-Step-26.webp)
-Step-27.webp)
-Step-28.webp)
-Step-29.webp)
