This article was co-authored by wikiHow Staff. Our trained team of editors and researchers validate articles for accuracy and comprehensiveness. wikiHow's Content Management Team carefully monitors the work from our editorial staff to ensure that each article is backed by trusted research and meets our high quality standards.
There are 7 references cited in this article, which can be found at the bottom of the page.
This article has been viewed 55,432 times.
Learn more...
Polyurethane gloss will naturally catch the light better, drawing eyes to rich woodwork. If you want the gloss to go on perfectly, you’ll have to prepare its surface by sanding it down and thoroughly cleaning it. After that you’ll be ready to seal the wood and apply the undercoats of the gloss. A final coat will leave your woodwork warmly glowing, and some maintenance tips will keep the finish looking brighter for longer.
Steps
Preparing the Wood for Gloss
-
1Clean visible dirtiness with a damp cloth. For a little extra cleaning power, add a dot of mild soap, like dish detergent. Wipe the wood thoroughly until it is clean. Follow the damp cloth with a dry one to remove any remaining moisture. When the wood is clean and dry, you’re ready to sand.
-
2Prepare your work area. Use painter’s tape to tape along the edges where the wood meets other parts of your home. This will prevent gloss from accidentally spreading. Try to apply tape as precisely as possible.[1]
- If a tapeline is uneven, it’s usually fairly obvious. Overlap the ends of pieces of tape to decease seepage at its seam.
- If you’re glossing a stationary fixture, like the wooden casement of a window, you’ll need to lay out a drop cloth. Smaller pieces of wood can be painted on a work bench or while being propped between sawhorses.
- A perfect gloss finish can be ruined by dust or debris that gets caught in its surface, creating cloudiness. Avoid applying gloss in dirty or dusty rooms.[2]
Advertisement -
3Sand the wood where you’ll apply the gloss. Especially if there’s already a finish on the wood, you’ll want to start with a medium grit paper. Rub the wood with firm, regular back-and-forth motions until the bare wood is exposed. Next, lightly sand the wood with a fine grit paper until it is smooth to the touch.[3]
- You don’t have to be too aggressive when sanding. Sanding too much can end up altering the shape of the wood.
- When sanding, try to follow the grain of the wood. The grain is the direction in which the wood appears to flow.
- This process shouldn’t create too much sawdust, but if you have lungs that are especially sensitive, you may want to wear a breathing mask.[4]
-
4Vacuum and wipe up sawdust. Take a shop vac or a normal vacuum with a suitable attachment and suck up the sawdust created by your sanding. After you’ve removed as much sawdust as possible with the vacuum, wipe down all surfaces of the wood with a clean, lint-free rag.[5]
- Pay attention to corners, nooks, and crannies. Sawdust sometimes gets pushed deeply into cracks.


Applying the Undercoats
-
1Open and stir the polyurethane gloss. Avoid vigorous stirring or shaking the can, because that can cause bubbles to form in the gloss. When you finish mixing, you can lay the paint stirrer on the gloss lid to keep it clean.[6]
-
2Seal the wood. The seal coat is a single coat that goes on before the gloss. Depending on the product you use, this process can vary. Many glosses are self-sealing or intended to be sealed with a coat of wood stain. When using wood stain, simply paint an even layer on the surface of the wood to seal it.
- Always follow the label of the gloss for best results. Self-sealing glosses will not need a seal coat and can be applied directly to the bare, clean wood.
- When applying the seal coat with a brush, use even, overlapping strokes. Keep an eye on corners and edges; puddling tends to occur in these locations.
- Check the label of wood stain to determine how long you should wait before adding coats of gloss over the seal coat.[7]
-
3Seal the wood with thinned oil based gloss if necessary. Oil based glosses can usually be thinned with mineral spirits and then applied as a seal coat. Mix half as much mineral spirits as gloss in a painter’s tray. Apply it to the sanded, clean surface of the wood in an even coat with a paintbrush.[8]
-
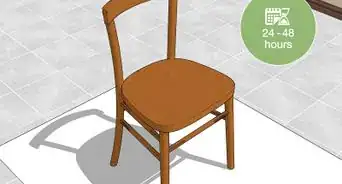
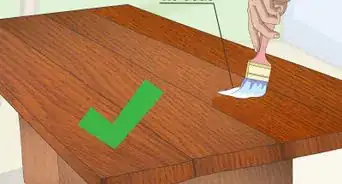
4Apply two coats of polyurethane with a brush. After the seal coat is dry, use a clean brush to evenly apply a coat of undiluted gloss to the surface of the wood. Then wait 24 hours and repeat this process to apply the second undercoat.
- Depending on the brand of glass you’re using, the recommended drying time between coats may be different. Double check this information on the label before applying the gloss.[9]
- Water based glosses usually need to be lightly sanded with a fine grit paper after each coat dries.
-
5Shave off bumps and uneven spots with a razor. Hold the razor so it forms a low angle and slides easily along the even surface of the topmost coat. Holding the razor in this fashion, slice off the uneven parts of the gloss where blemishes are present.
- Drips and puddling in the undercoats will result in hardened droplets/unevenness. Dust or bugs may also have gotten into the finish. Most of these blemishes can be removed with a razor blade.[10]
-
6Sand areas where blemishes have been removed. Wet a 400-grit, wet/dry sandpaper with water. Using a gentle, buffing motion to lightly sand all areas where you've removed blemishes with the razor blade. This will improve the overall smoothness of the finish.[11]


Finishing up and Maintaining
-
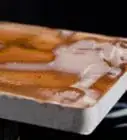
1Paint on the final coat. The second undercoat should be completely dry before you apply the final coat, but avoid waiting longer than 48 hours to add the final coat. In the same fashion as previous coats, apply the final layer of gloss with a clean paintbrush.
-
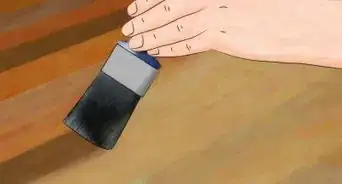
2Polish the dried surface of the gloss, if desired. Check your gloss information to learn the best methods for polishing. Generally, a little bit of automotive polish can be buffed into gloss with a clean cotton cloth to bring out its shine.
- If the finish is a little cloudy after using the polish, apply a little more and continue to buff the gloss. Allow this second application to dry, buff the surface once more, and it should look bright and new.[14]
-
3Dust frequently to prevent the loss of luster. Dust can cause gloss to dull. Wiping up dust can sometimes grind it into the surface of gloss, which can cause premature cloudiness. Vacuum cleaners with soft-bristle attachments work great for safely removing dust and buildup.
- The vacuum won’t always be able to suck up all the dirtiness on your wood. Be prepared to use a rag and mild soap when necessary.
-
4Use mild cleaners and soft cloths when cleaning. Over time, your wood will likely need a thorough wipe down. Mild detergents, like dish soap, and water will be enough for light to moderate dirtiness. To bring back shine to your gloss, try a wood formulated product, like Murphy’s Oil Soap.
- Avoid using cleaners with abrasives or surfactants, as these usually contribute to dullness in the finish of gloss.
- Use as little water as possible when cleaning the surface of your wood. Too much water can cause the wood to swell, which can cause gloss to crack.[15]


Purchasing Gloss
-
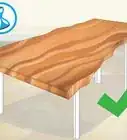
1Prioritize oil based glosses for durability and water bases for clarity. Most glosses are either water or oil based. Oil bases will be more durable, especially with regard to heat, making them ideal for the kitchen. Water bases go on clear and have less odor and toxicity.[16]
- If you really want to preserve the color of wood, or if young children will be exposed to it, a water base might be your best choice.
-
2Select a gloss rating. The shinier a gloss is, the higher its gloss rating, and the higher the gloss rating, the more durable the finish. Although there are a wide range of glosses available at most hardware and paint stores, the three main categories are:
- Semi-gloss: makes a slightly glossy finish. It is ideal for rooms that require scrub brush cleaning, like kitchens and bathrooms.
- Gloss: gives wood a highly glossy, slick finish. This finish protects well against finger oil and grime. However, it tends to highlight imperfections in wood.
- High gloss: creates the most reflective finish and is the most durable. Cabinets exposed to dirt and oil are prime candidates for high glosses.[17]
-
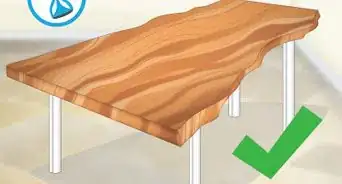
3Estimate the amount of gloss you'll need. For most small projects, like single pieces of furniture, window casements, and similar sized objects, a sole can of gloss will be sufficient. Most gloss provides an estimate of how much area it can cover in its label information.
- Gloss and paint are very similar. Because of this, you can use an online paint calculator to estimate the amount of gloss you'll need for larger projects.[18]


Community Q&A
-
QuestionCan gloss prevent termites?
 ZackTop AnswererTermites will find a way past the gloss coating. Some exterminators recommend paint that is infused with termite-resistant chemicals.
Warnings
- Oil based glosses usually give off harmful fumes. Only apply oil based glosses in well-ventilated areas.⧼thumbs_response⧽
Things You’ll Need
- Car polishing compound
- Clean cotton cloth (for polishing)
- Clean, lint-free rags (several; microfiber recommended)
- Mild detergent (like dish soap)
- Paintbrush
- Painter’s tape (or masking tape)
- Paint tray
- Paint stirrer
- Sandpaper (medium and fine grit)
- Shop vac (or normal vacuum with attachments)
- Utility knife
- Razor blade
- Wood gloss


References
- ↑ https://www.homebuilding.co.uk/how-to-paint-gloss-properly/
- ↑ https://www.familyhandyman.com/woodworking/staining-wood/how-to-apply-polyurethane/view-all/
- ↑ https://www.familyhandyman.com/woodworking/staining-wood/how-to-apply-polyurethane/view-all/
- ↑ https://www.homebuilding.co.uk/how-to-paint-gloss-properly/
- ↑ https://www.familyhandyman.com/woodworking/staining-wood/how-to-apply-polyurethane/view-all/
- ↑ https://www.familyhandyman.com/woodworking/staining-wood/how-to-apply-polyurethane/view-all/
- ↑ https://www.familyhandyman.com/woodworking/staining-wood/how-to-apply-polyurethane/view-all/
- ↑ https://www.familyhandyman.com/woodworking/staining-wood/how-to-apply-polyurethane/view-all/
- ↑ https://www.homebuilding.co.uk/how-to-paint-gloss-properly/
- ↑ https://www.familyhandyman.com/woodworking/staining-wood/how-to-apply-polyurethane/view-all/
- ↑ https://www.familyhandyman.com/woodworking/staining-wood/how-to-apply-polyurethane/view-all/
- ↑ https://www.homebuilding.co.uk/how-to-paint-gloss-properly/
- ↑ https://www.bobvila.com/articles/2253-how-to-choose-a-paint-finish/#.WYzcNlF97IU
- ↑ https://www.familyhandyman.com/woodworking/staining-wood/how-to-apply-polyurethane/view-all/
- ↑ http://cleanmyspace.com/the-secrets-to-maintaining-high-end-finishes-in-your-home/
- ↑ http://www.diynetwork.com/how-to/skills-and-know-how/painting/whats-the-difference-between-polyurethane-varnish-shellac-and-lacquer
- ↑ https://www.dunnedwards.com/howto/selecting-gloss
- ↑ http://www.improvenet.com/r/paint-calculator
About This Article