This article was co-authored by Lauren Kurtz. Lauren Kurtz is a Naturalist and Horticultural Specialist. Lauren has worked for Aurora, Colorado managing the Water-Wise Garden at Aurora Municipal Center for the Water Conservation Department. She earned a BA in Environmental and Sustainability Studies from Western Michigan University in 2014.
There are 15 references cited in this article, which can be found at the bottom of the page.
This article has been viewed 92,330 times.
Henna (lawsonia inermis) is a perennial tropical plant prized for its beautiful clusters of fragrant red, yellow, pink, or white flowers and leaves that can be crushed to create hair, fabric, and skin dye. In the United States, henna (also commonly known as Mehndi) can be grown outdoors in zones 9b-11. It also can be grown as a houseplant anywhere with plenty of sunlight and warmth.[1]
Steps
Collecting Your Supplies
-
1Obtain seeds from a nursery or reputable supplier. Don’t expect to find henna seeds at your local big-box garden center. Henna seeds are specialty items. You may have the best luck finding them online.
-
2Find a suitable storage container for your seeds. Store seeds in an airtight, opaque container until you’re ready to sow them. Keep the container in a cool, dark place. If seeds are exposed to moisture or sunlight, they might sprout prematurely and rot.[2]Advertisement
-
3Gather several paper towels and a plastic Ziploc bag. Use high-quality paper towels so they don’t disintegrate when they become wet.
-
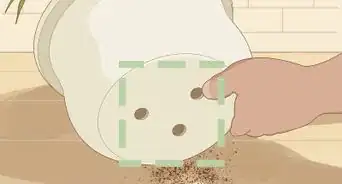
4Purchase small seedling pots. Start new plants in small pots even if you plan to eventually plant them outside. Make sure pots have drain holes in the bottom.


Germinating Henna Seeds
-
1Prepare the growing surface. Layer several flat paper towels on top of each other. The goal is to create a thick, sturdy cushion that will serve as the seeds’ incubator.[3]
-
2Add water. Sprinkle cold water onto the paper towels without saturating them. Paper towels should be moist, but solid enough that you can pick them up.
-
3Add seeds. Sprinkle a pinch of seeds down the middle of the moist paper towels. Add a generous number of seeds, but don’t overdo it! You should be able to see plenty of white space between the seeds and the paper towels. Fold the paper towels in half down the middle with the seeds inside.
-
4Chill seeds. Place the folded paper towels into the Ziploc bag. If you need to fold the paper towels additional times to make them fit, that is fine. Seal the bag and place it in a refrigerator. The refrigerator replicates winter temperatures and prepares the seeds for “spring” and germination.
-
5Transfer seeds to a warm, sunny spot. After three or four days, remove the Ziploc from the refrigerator and place it in a warm spot like a sunny windowsill or porch. The heat and light should create condensation that triggers germination.[4]
- Leave the Ziploc bag slightly open once you remove it from the refrigerator. This allows air circulation and reduces the odds that the seeds will become moldy. The goal is to encourage a warm, slightly moist environment inside the bag.
-
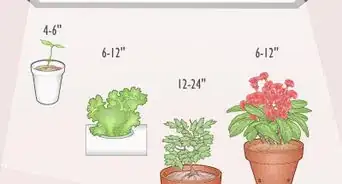
6Wait for seeds to become seedlings. After about a week, check on the seeds. Continue checking on the seeds until you discover they’ve become seedlings. If you see them turning white, you'll know you're making progress! The warmer the environment, the more quickly seeds will sprout. When seedlings reach about half an inch long, it’s time to plant them!


Planting Your Plants
-
1Plant henna plants in a commercially available soil mixtures suitable for cacti and succulents. Henna thrives in soils with pH ranging from 4.3 to 8. Add organic matter, such as garden manure, to the soil to promote growth.[5]
-
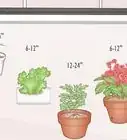
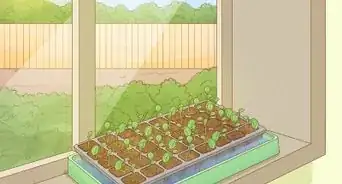
2Plant seedlings in small pots. You can plant multiple seedlings in one pot (the exact number will depend on the size of your pots.) Make sure to leave plenty of space between the seedlings so you’ll be able to dig them up and transfer them later.
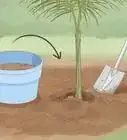
- Even if you plan to plant your henna seedlings in the ground eventually, start them in pots. You can safely transfer plants into the ground, if desired, after about 5 months.
- Keeping immature seedlings in a pot allows you to safeguard them from the elements. You'll be able to bring the pots inside as needed until they’re strong enough to withstand strong wind, rain, etc.
-
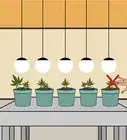
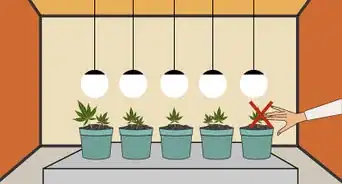
3Plan to grow your henna as a houseplant if you live in a cooler climate. Henna plants won’t survive outdoors if temperatures drop below 50ºF (11ºC). When your henna plant is inside, keep it in a sunny, warm spot such as a windowsill.
- Even if your plant is a potted houseplant, you can leave it outside in the sun in warm temperatures.
- To protect your plant against an unexpected early-season cold front, bring it indoors in early fall.
- Keep your plant indoors until spring, after the threat of cold fronts has subsided.
-
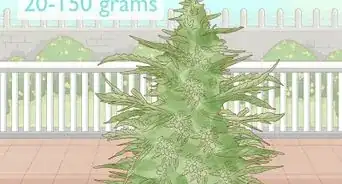
4Consider planting your henna plant in the ground if you live in gardening zones 9b-11. In these zones, henna plants thrive outdoors. If you take care of them, expect outdoor plants to reach about 8 feet (2.4 m) tall within 5 years.[6]
- Find out what garden zone you’re in by consulting the U.S. Department of Agriculture Plant Hardiness Zone Map.
-
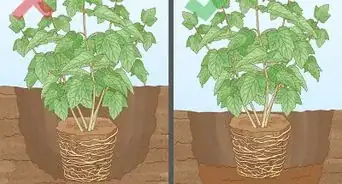
5Keep in mind that henna’s growth habit is shrub- or tree-like. If you plant henna outside, make sure it has plenty of room to grow tall and wide as it matures.[7]
-
6Remember that mature henna is spiny. Don’t plant a henna plant in the ground in a spot that has heavy foot traffic. Passersby could be pricked by the spines. A mature henna plant can serve as a natural security barrier to discourage intruders.[8]


Watering Properly
-
1Water henna plants when soil becomes dry. Henna plants thrive in the heat and are very drought-tolerant once established. Allow your henna plant’s soil to dry completely, then saturate it with water all at once.[9]
-
2Avoid watering henna plants a little at a time daily or every other day. Henna plants prefer dry conditions. When the plant’s soil is constantly moist, root rot or scale can develop.[10]
-
3Make sure your indoor henna plant’s pot is draining properly. After watering, excess water should drain from the pot. Place a saucer under the plant to collect extra water, and empty the saucer when after watering.


Nurturing Henna Plants
-
1Transfer your potted henna plant indoors in winter if you don’t live in garden zones 9b-11. Exposure to cold can damage or kill your plant.[11]
-
2Treat pests. If your henna plant develops aphids, spray it with a water-soap solution to kill the insects. If your plant develops scale, visit a reputable garden center that can recommend a suitable insecticide that will kill the scale without damaging your henna plant.[12]
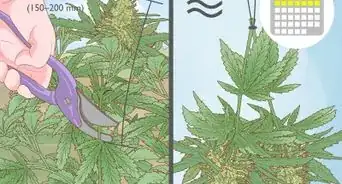
- If your plant develops aphids or scale, trim the affected stems and leaves and discard them in right away.[13]
-
3Fertilize your plant. To maximize flower and leaf growth, fertilize your plant. Always use fertilizers at the recommended dilution strength or less. Never apply more fertilizer than is recommended, especially to seedlings and young plants. Look for a fertilizer with a 1-2-1 nitrogen-phosphorous-potassium (NPK) rating to encouraged balanced growth.[14]
- Ideally, fertilize established perennials once, in spring, when you notice new growth beginning to emerge. Overfertilizing can burn or kill plants.[15]


Expert Q&A
Did you know you can get expert answers for this article?
Unlock expert answers by supporting wikiHow
-
QuestionWhat are the benefits of Mehndi?
 Maggie MoranMaggie Moran is a Professional Gardener in Pennsylvania.
Home & Garden SpecialistMehndi can help relieve headaches, detox the body, boost hair health, and protect the skin.
Support wikiHow by unlocking this expert answer.
-
QuestionHow do you make henna from the plant?Maggie MoranMaggie Moran is a Professional Gardener in Pennsylvania.
Home & Garden SpecialistTo make henna, take the leaves from the plant, dry them, crush them, and make them into a paste.Support wikiHow by unlocking this expert answer.
-
QuestionWhere does the henna plant grow?Maggie MoranMaggie Moran is a Professional Gardener in Pennsylvania.
Home & Garden SpecialistThe henna plant is native to North Africa as it is a tropical plant that likes a dry climate and well-drained soil.Support wikiHow by unlocking this expert answer.
Warnings
- Mature plants are spiny. Be careful!⧼thumbs_response⧽
- Never over-water henna plants!⧼thumbs_response⧽


References
- ↑ https://www.britannica.com/plant/henna
- ↑ http://www.gardeningknowhow.com/garden-how-to/seeds/storing-seeds.htm
- ↑ http://www.hennapage.com/henna/encyclopedia/growing/seeds.html
- ↑ http://www.gardeners.com/how-to/how-to-start-seeds/5062.html
- ↑ http://www.agrifarming.in/henna-farming-information
- ↑ http://planthardiness.ars.usda.gov/PHZMWeb/
- ↑ http://www.plants.usda.gov/core/profile?symbol=LAIN5
- ↑ http://www.gardenguides.com/117990-african-tree-types.html
- ↑ https://stanfordesp.org/download/3d60f4244ed353ca447513329288b0e4/H2198_Henna_Your_Hands.pdf
- ↑ http://www.missouribotanicalgarden.org/gardens-gardening/your-garden/help-for-the-home-gardener/advice-tips-resources/pests-and-problems/environmental/overwatering.aspx
- ↑ http://www.inaturalist.org/taxa/285378
- ↑ http://ipm.ucanr.edu/PMG/PESTNOTES/pn7404.html
- ↑ http://asianetindia.com/grow-henna-plant-home/
- ↑ http://aggie-horticulture.tamu.edu/ornamental/a-reference-guide-to-plant-care-handling-and-merchandising/fertilizing-foliage-flowering-plants/
- ↑ http://msue.anr.msu.edu/uploads/files/Fertilizing_Established_Perennials_Finneran.pdf
About This Article