This article was co-authored by Jamie Corroon, ND, MPH. Dr. Jamie Corroon, ND, MPH is the founder and Medical Director of the Center for Medical Cannabis Education. Dr. Corroon is a licensed Naturopathic Doctor and clinical researcher. In addition to clinical practice, Dr. Corroon advises dietary supplement and cannabis companies regarding science, regulation, and product development. He is well published in the peer-review literature, with recent publications that investigate the clinical and public health implications of the broadening acceptance of cannabis in society. He earned a Masters in Public Health (MPH) in Epidemiology from San Diego State University. He also earned a Doctor of Naturopathic Medicine degree from Bastyr University, subsequently completed two years of residency at the Bastyr Center for Natural Health, and is a former adjunct professor at Bastyr University California.
There are 46 references cited in this article, which can be found at the bottom of the page.
wikiHow marks an article as reader-approved once it receives enough positive feedback. This article received 13 testimonials and 90% of readers who voted found it helpful, earning it our reader-approved status.
This article has been viewed 1,106,358 times.
More and more countries are allowing the use and cultivation of marijuana for medicinal purposes. If you have a prescription for medical marijuana but cannot find a source, or if you simply want to save money, you may want to grow your own. Or, you might want to go into the business of selling medicinal marijuana. Either way, you'll need to check to see if it is legal to grow marijuana, pick the right strain, decide on how you will grow it (outdoors, indoors in soil, or hydroponically), and then harvest and cure your crop.[1] Done right, you can produce high quality medicinal marijuana on your own.
Steps
Choosing your Strain
-
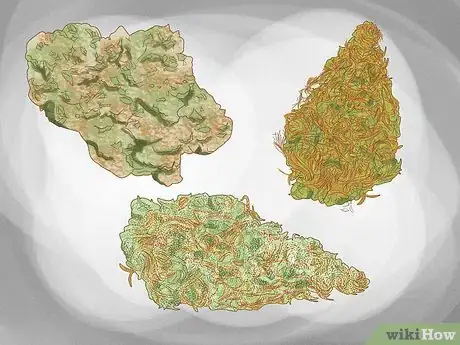
1Decide what strain you want. The types available include Indica, Sativa, and hybrids, each of which is better for treating different illnesses due to varying amounts of the active ingredients THC, Cannabinol, and Cannabidiol.[2] Various strains of Indica and Sativa will have different smells, tastes, and potencies, which will appeal to different users.
- Choosing strains for your condition – For a quick guide to the best strains for each condition, see http://www.unitedpatientsgroup.com/resources/medical-marijuana-strains. For a more in-depth guide to strains, try http://www.medicalmarijuanastrains.com/strain-guide/.
- Choosing strains by taste and potency – All marijuana contains the same ingredients, so though some is specifically recommended for ailments, any strain will provide relief. If your more interested in choosing by taste or potency, consult http://www.medicalmarijuanastrains.com/strain-guide/.
- Picking strains that are easy to grow – If you don't have much of a green thumb, you'll want to pick one of the easy to grow strains like AK-48, Northern Light, Aurora Indica, Jack Herer, Super Lemon Haze[3]
-
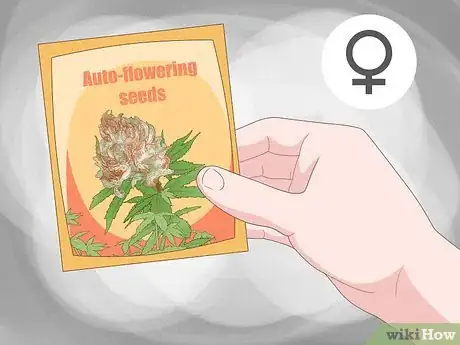
2Consider auto-flowering seeds. The buds in flowers are what contain the active ingredients that produce a high, so getting your plants to flower is vital.[4] Unlike normal cannabis, which requires 24 hours of light to grow and then a 12 hour light cycle to flower, auto-flowering plants flower with 24 hours of light. This means faster flowering and no need to separate growing plants (24 hours of light) and flowering plants (12 hours of light).[5]Advertisement
-
3Purchase feminized seeds to increase your yield. Marijuana plants come in female and male varieties, and only female plants produce the buds that yield a high. That means the more females you grow, the higher your yield will be. Luckily, you can purchase feminized seeds to ensure that your crop will be all female.[6]
- Be aware that under stress, female plants will become hermaphrodites and produce male flowers. You can avoid this by growing your plants in a low stress environment.
-
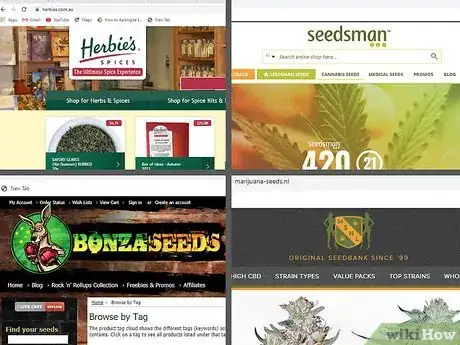
4Purchase your seeds from a reputable dealer. Websites such as Herbies, Seedsman, Sensi Seeds, Bonza Seeds, or Marijuana-seeds.nl will offer discretion, as well as quality seeds that are what they say they are.[7]
Setting Up a Grow Room or Tent
-
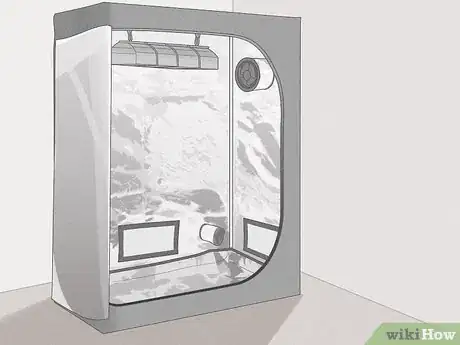
1Use a grow tent or grow box if you don't want to devote an entire room to your crop. They come in all sizes, holding from 8 up to 256 plants. They keep light out, offer easy hookups for your grow lights, are waterproof, and provide an exhaust point. Many are sold with lights, exhaust system, and hydroponic system included, making them great for beginners.
-
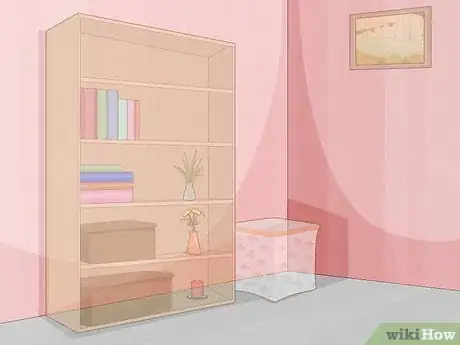
2Pick the room you will use and clear it out. If you are going to devote an entire room to your crop, you'll want to clear it out. Marijuana plants need a warm, humid environment, so to prevent the growth of mold or pests, you'll want to remove all chairs, curtains, carpets, clothes, and other surfaces that could host mold.[8]
- You'll need an electrical outlet for your grow lights, as well as easy access to water.
- Marijuana grows best between 72 and 77 degrees. Try to choose a room where it is easy to maintain this temperature. Too many windows can make a room too hot, while a basement might require continual heating.
- A tile or concrete floor will make for easier cleanup of spilled soil or water.
-
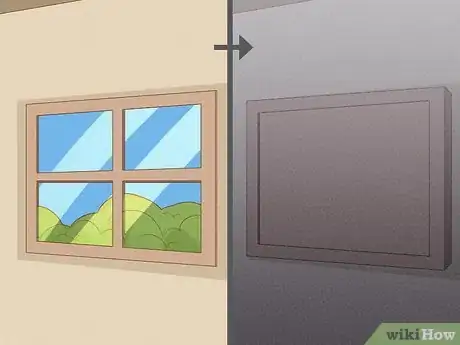
3Block out all light. Your plants need total darkness in their dark period. Otherwise, they may become stressed and become a hermaphrodite – i.e. grow male flowers that contain no THC and thus reduce your yield. Cover the windows and seal any light leaks with opaque reflective tape.[9]
-
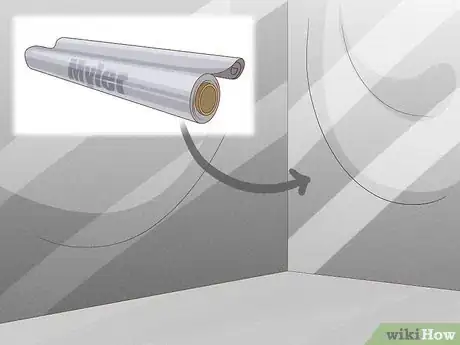
4Cover the walls and ceiling with reflective material. The more light your plants get, the better they will grow. Reflected light from your walls and ceiling can greatly speed up grow time. To make your walls reflective, consider using:[10]
- Mylar – Aluminized mylar is expensive, but it reflects up to 97% of the light that hits it. Hang it flat against the wall and keep it clean.
- Flat white paint – It's cheap, easy to clean, and reflects up to 85% of the light that hits it.
- Emergency blankets – You can buy them at camping stores. They only reflect 70% of light, but they're inexpensive and good for small spaces like cabinets or closets.
- Aluminum foil – Don't use it! It reflects light poorly, is hard to keep flat, and creates a fire hazard.
-
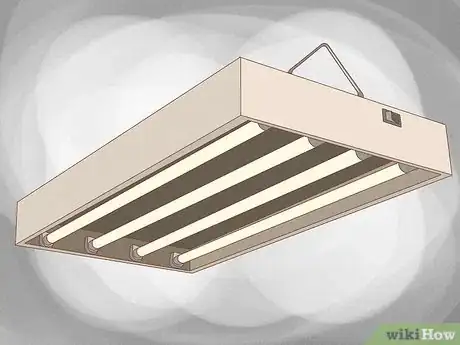
5Choose the grow light you will use. To grow, your plants will need light provided by bulbs that provide a full spectrum of light (unlike normal household bulbs). You have several choices, but broadly speaking, high pressure sodium (HPS) or metal halide (ML) lights will cost less to set-up but more to run, while LED lights will cost you more up front, but save money in the long-run.[11]
- CFL – Compact fluorescent lights may be used for starts and seedlings, but generally do not produce enough light for the vegetation or flowering phase.
- HPS – High pressure sodium lights produce lots of light in the orange spectrum, making them best to use to induce flowering. A good rule of thumb when deciding how many lights to get is that you will need 50w per square foot of growing area.
- ML – Metal halide lights produce a lot of light in the blue spectrum, making them ideal for use during the plant's vegetation phase, as they will keep your plant short and bushy. Again, you will need about 50w per square foot.
- LED – Full spectrum LED lights are much more energy efficient and do not get hot, so you can mount them closer to your plants and won't need fans to remove heat. You can also use one set of lights for both the vegetation and flowering phase. Follow the recommendations of the manufacturer for how many lights you'll need for your growing footprint.
-
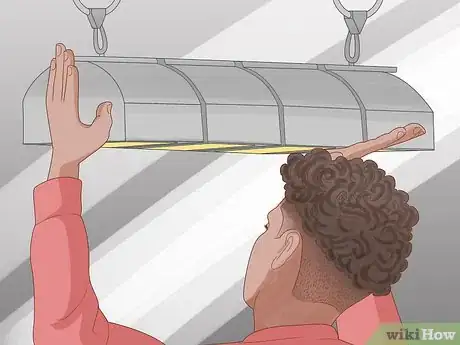
6Install your lights. You'll need a hood that directs and focuses light on your crop. While LED lights can plug directly into the wall, the hoods that hold HPS and ML bulbs cannot, so you'll also need a ballast for these bulbs, which converts the electricity from yoru wall into a current appropriate for the lights.
- HPS and ML bulbs – They are very hot, so consider getting a cooled hood that allows for a ventilation hook up that draws heat away. For a quick guide to how far from your plants they should be, see http://www.growweedeasy.com/hps-grow-lights-setup.
- LED – These lights usually come with a built-in fan for cooling.
-
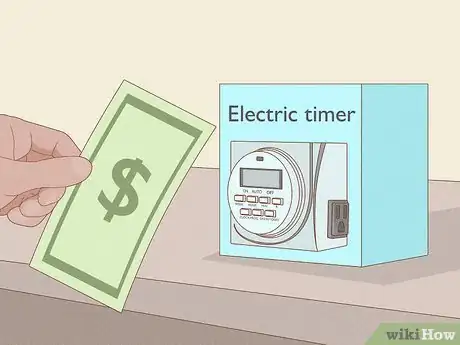
7Consider purchasing an electrical timer. If you plant auto-flowering seeds, you won't need to worry about turning the lights on and off. Otherwise, you'll need to turn the lights off twelve hours a day to initiate flowering. An electrical timer will do this for you in case you forget or are away from your plants.[12]
-
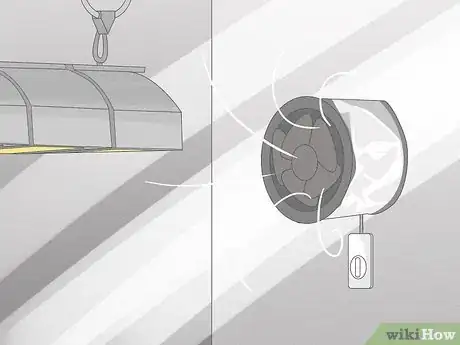
8Set up your ventilation system. You need to keep air circulating in your grow room or grow tent in order to draw heat away from your crop, to ensure the plants get enough CO2, to control humidity, and to neutralize the odor of the plants. Without a ventilation system, you'll have smaller yields and risk losing your plants to diseases brought on by excessive heat and humidity.[13]
- Oscillating fan – Use an oscillating fan to circulate air so as to avoid hot spots and to create a breeze that will improve growth by helping with transpiration.
- Carbon filter – Attaching a carbon filter to your exhaust fan will remove odors that might aggravate your neighbors.
- Exhaust fan – You'll want a fan with a high enough CFM rating (cubic feet exhausted per minute) to replace all the air in your grow room or tent every 1-3 minutes.
- Determine the cubic area of your space (length x width x height).
- Take into account efficiency. If the exhaust travels a straight, short path, multiply your area by 2. If the path is long or twisting, multiply by 3.
- Pick a fan with a CFM higher than the number you calculated, particularly if you are going to attach a filter.
- Air intake – You'll need a way for new air to enter your tent or room as the old air is blown out. A simple hole (in the tent or a door or window) will do, so long as it is 3-4 times bigger than the exhaust hole. If the intake hole is smaller, you'll want to use an intake fan to avoid putting to much stress on the exhaust fan.
-
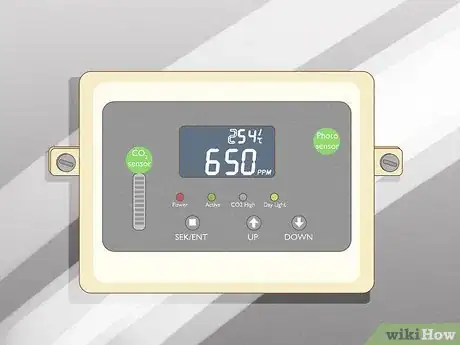
9Set up your meters. Your plants will grow best in certain temperature, humidity, and pH ranges. Installing a thermometer, humidity meter, and pH meter in your system will help you perfect the growing environment.
-
10Make sure your water is the right pH and not too hard. You can use tap water for your plants, but you'll want to make sure its pH is between 5.8 and 7.0, and it doesn't carry too many minerals.
- Letting water sit for 24 hours will help bring its pH closer to 7.
- Raise water's pH by adding lime, wood ash, or a pre-mixed solution (available at most garden centers).[14]
- Lower water's pH by adding sulfur, phosphoric acid, or a pH-lowering solution.[15]
- If you live in a hard water area (meaning your tap water has a high mineral content), you will want to filter your water. Consult the water hardness map at http://www.qualitywatertreatment.com/city_water_guide.htm.
Cultivating Marijuana Indoors
-
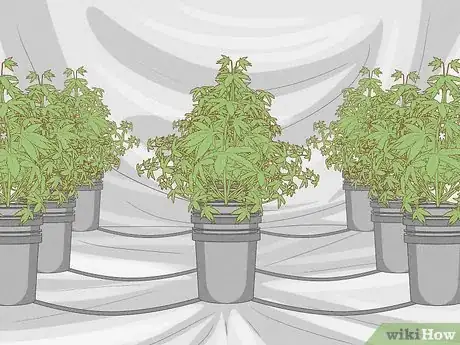
1Grow indoors with soil for security, control, and ease. While you can grow more marijuana outdoors or achieve higher yields indoors with hydroponics (growing plants without soil), growing indoors with soil offers a winning mix of ease and security that makes it a good choice for beginning growers who only need enough medical marijuana for themselves.[16]
-
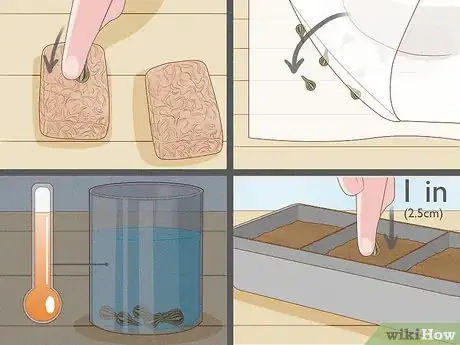
2Germinate your seeds. Germinating is simply the process by which you start your seeds sprouting. You can germinate them in a variety of ways – the key is to keep them warm and moist.[17]
- Starter cubes – These cubes of growing medium are the easiest option. Stick your seed in the hole, pointed end down, and keep the cube moist and warm. Once the seedling appears, you can plant the cube directly in potting soil. Good brands include Jiffy Pellets and Rapid Rooters.
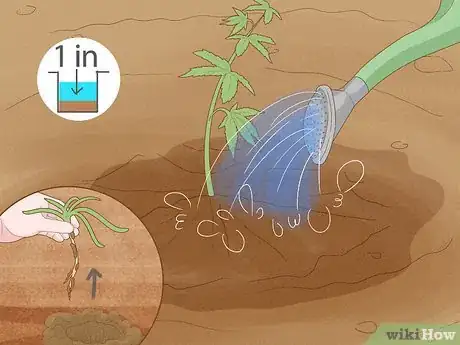
- Wet paper towel – Put the seeds in the paper towel, fold it and put it in a dark place for 1 to 3 days. When a white root pops out, plant 1 inch deep with root downward.
- Warm water – For older or dried out seeds, try dropping them in a glass of slightly warm water and placing it in a dark place. They should sprout in 24-32 hours. If they haven't after this time, move them to a moist place to finish sprouting.
- Germinate in soil – You can germinate your seedling directly in potting soil. Plant 1 inch deep with the pointy end down, and keep the soil moist and warm.
-
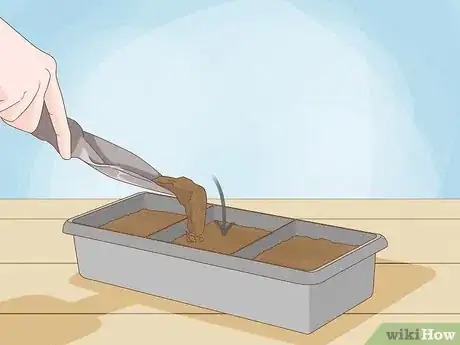
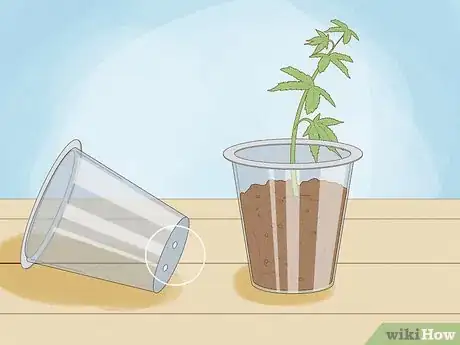
3Plant your seedlings in potting soil. Seedlings carry their own nutrients, so don't start them out in overly-nutrient rich soil. For best results, plant seedling in potting soil contained in plastic cups with holes poked in the bottom for water drainage.[18] You can transfer to a larger pot and begin slowly adding nutrients after two to four weeks.
-
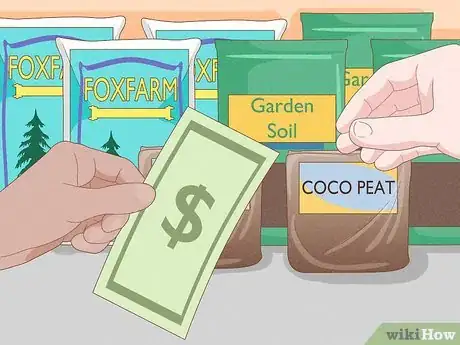
4Purchase and prepare your soil. You can buy a soil mix like Fox Farms designed for marijuana, or purchase garden soil and add the necessary nutrients. You can also use coco peat (coconut shell hair), which retains moisture and drains well, and has the correct pH. If using garden soil, consider:[19]
- pH – Marijuana needs soil with a pH between 6.0 and 7. For overly acidic soil, use 1 cup of dolomite lime for every ¼ liter of soil to increase pH. To increase acidity, add coffee grounds or citrus peelings.
- Texture – Moist soil should barely stay together when run through your hand, and feel spongy when you clench it in your fist. If the soil is too dry, you can add vermiculite to increase water retention, but be sure to adjust pH afterwards. Perlite will increase drainage and will not impact pH.
- Nutrients – As well as inorganic fertilizers, there are a variety of organic materials you can add to your soil to increase the phosphorous and nitrogen content, including guano (nitrogen and phosphorous), worm castings (nitrogen), kelp meal (potassium and nitrogen), and bone meal (phosphorous).
-
5Care for your plants during the vegetative stage. During this stage, your plants do nothing but grow. The vegetative stage lasts 4-5 weeks before flowering can start, but can go longer if you want bigger plants.[20] To keep your plants healthy, you'll need to make sure their environment is ideal:[21]
- Water – Poke your finger in the soil – if it is dry up to your first knuckle, add water. Water until 10-20% of the water you added has drained out the bottom of the pot.
- Light – You need to provide at least 18 hours of light a day to keep your plants in the vegetative state. 24 hours of light will not harm the plants, but you can save energy by giving 18 hours of light and 6 hours of dark.
- Nutrients – Add the nutrients to the water you use to water the plants. Start by adding half the amount recommended on the packaging. As your plant gets bigger, you can add more nutrients.
- pH – The ideal pH is between 6 and 7. Add 1 cup of dolomite lime for every ¼ liter of soil to increase pH. To increase acidity, add coffee grounds or citrus peelings.
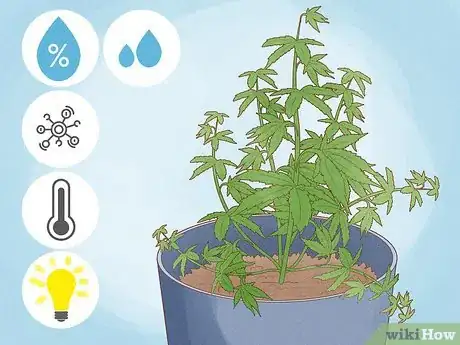
- Temperature – Keep the temperature between 70 and 85 degrees. 70-75 degrees is best for most plants. If you have a CO2 generator, you can raise the temperature to 80 degrees.[22]
- Humidity – Keep relative humidity at 70-80% during the seedling phase and 50-80% during the vegetative phase. Increase it with a humidifier. Lower it with a dehumidifier or by increasing the rate of your exhaust fan.
-
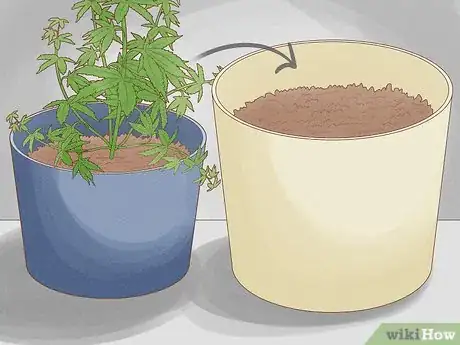
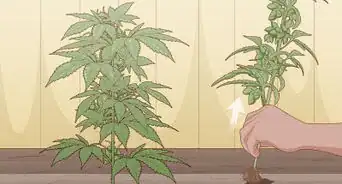
6Transfer your plants to larger pots as needed. If your plant becomes too big for its pot, its growth will slow. To transfer, invert the plant in its pot while holding your hand over the soil around the plant's base. Let the plant and its soil fall into your hand, and gently place it into a hole dug in the soil of the new pot. The size of the pot needed depends on how high you want the plant to be:[23]
- 12" = 2-3 gallon container
- 24" = 3-5 gallon container
- 36" = 5-7 gallon container
- 48" = 6-10 gallon container
- 60" = 8-10+ gallon container
-
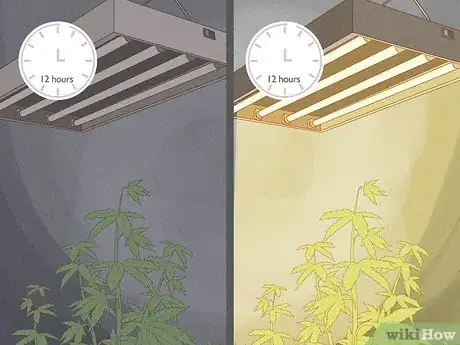
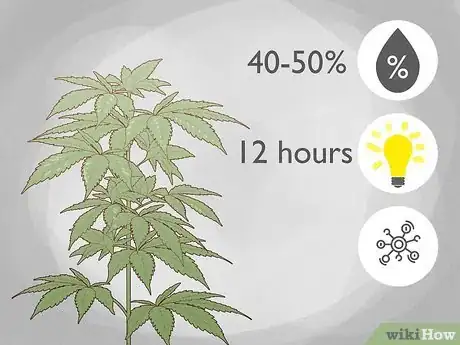
7Induce flowering. You can keep your plant in the vegetative stage as long as you want, but a good rule of thumb is to end the vegetative stage when it is half the final height you desire, as plants generally double in height while flowering. Switch the light schedule to 12 hours on, 12 hours off to induce flowering.
-
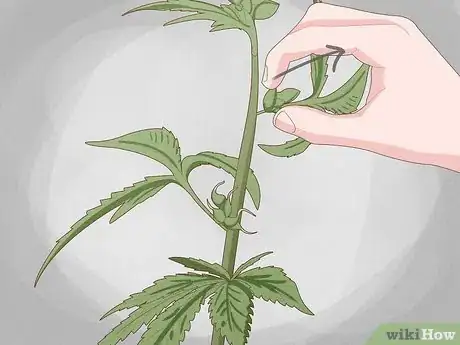
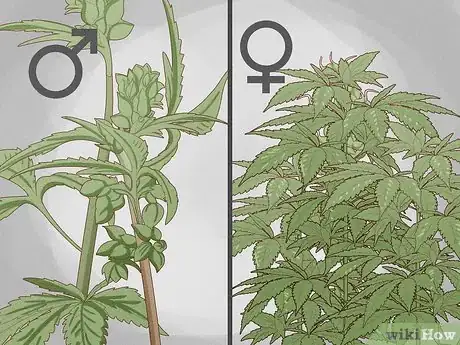
8Remove any male flowers. Even if you have all female seeds, plants may still produce a few male flowers if stressed. You'll want to remove them immediately to prevent pollination, because seedy buds are less potent.[24]
- A male flower has pollen sacks (little balls) around where the main stem connects to the branches.
- A female flower has white hairs at that spot.
-
9Adjust the growing conditions for flowering. Your plant has different requirements during the flowering stage. For the best buds and highest yields:[25]
- Light – During the 12 hours of light, give as much light as possible to the bud sites. Tuck leaves to the side to expose them.
- Nutrients – Switch to a formula lower in nitrogen and higher in phosphorus, as too much nitrogen can limit bud growth. After 4 weeks, you'll want to start steadily reducing the amount of nutrients you provide. Provide no nutrients in the last 2 weeks to avoid any chemical taste to your buds.
- Humidity – Lower it to 40-50% to reduce the risk of disease.
Cultivating Marijuana Using Hydroponics
-
1Use hydroponics to achieve higher yields indoors. Hydroponics means growing plants without soil. Water-soluble fertilizer is used instead. It can produce bigger yields in a shorter period of time, but is more expensive, harder to set up, and requires more careful maintenance. It is ideal for people who are going into the business of growing medical marijuana for sale. That said, hydroponics kits can be purchased that make this an attractive option even for beginners growing their own supply.[26]
-
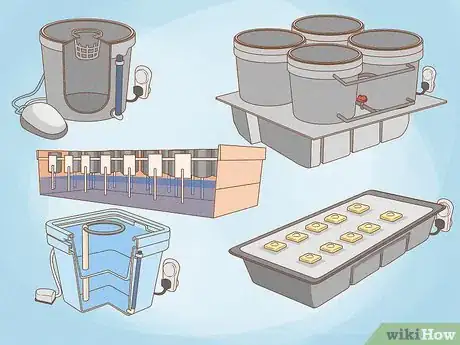
2Choose your hydroponic system. There are active systems, which use mechanical devices to deliver nutrients to the plants, and the passive wick systems. While active systems can produce higher yields faster, they are also more expensive, more delicate, and require more maintenance.[27] [28]
- Passive Wick System – The plant sits in a well-draining substrate above a nutrient solution, and nutrients are constantly drawn up into the substrate through a wick. Substrates: vermiculate, peat moss, coco peat.
- Ebb and Flow – A nutrient reservoir periodically floods the containers where your plants are growing. The solution then slowly drains back into the reservoir. Substrates: rockwool or coco peat.
- Top Feed/Drip Feed – Emitters drip nutrients directly into the soil near the roots. Excess nutrients then drain back down into the nutrient reservoir. Substrates: hydroton clay pebbles, coco peat, or rockwool.
- Nutrient Film – Multiple plants are placed in a tilted tray, with nutrients constantly flowing down the slope past their roots, then being pumped back to flow past again. An effective system, but best for experience growers as it requires a lot of fine-tuning. Substrates: rockwool or coco peat.
- Deep Water Culture – The roots grow in a constantly oxygenated nutrient solution. It is a low maintenance system, but a loss of power or incorrect nutrient levels can kill your plants. Substrates: rockwool or hydroton clay pebbles.
- Aeroponics – The plant roots are held in a dark, sealed box where small nozzles emit a mist of nutrients over them, providing a humid, oxygenated area for the roots. This is the most effective system for growing marijuana, but is also very expensive. Also, if the power cuts out, the mist stops and your plants die. Substrate: hydroton clay.
-
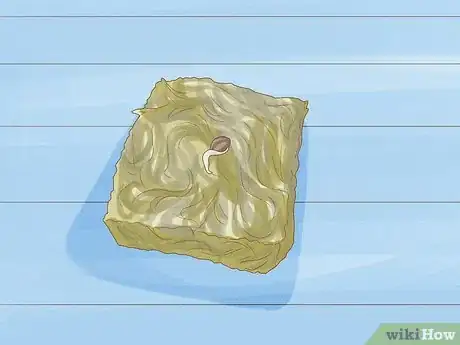
3Germinate your seeds. The easiest way to do this is to germinate (sprout) your seeds in a bit of rockwool. Keep it warm, wet, and in a dark place. Once sprouted, you can transfer the rockwool directly to your substrate.[29]
- For older or dried out seeds, try germinating them in warm water in a dark room. If they have not sprouted after 32 hours, move them to a substrate to continue germinating.
-
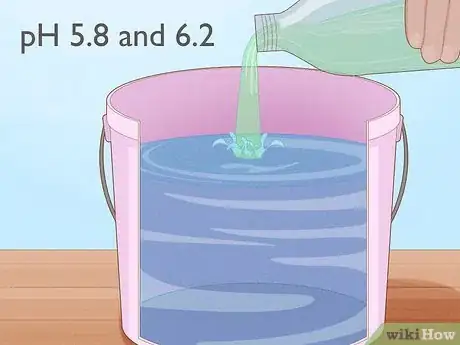
4Fill your system with nutrient solution. Do not mix nutrient solution inside your system. Instead, fill a bucket with water (pH 6-7, filtered if hard) and add the appropriate amount of nutrient solution to it. Adjust the pH after the solution is mixed; it should be between 5.8 and 6.2.[30]
-
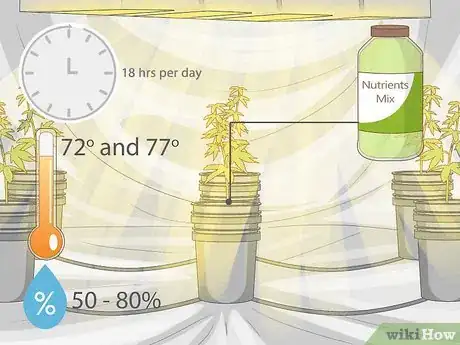
5Care for your plants during the vegetative stage. The vegetative stage lasts as long as you want your plants to keep getting bigger. Once you have transferred your seedlings to you hydroponic system, you'll need to maintain the system, as well as the lighting and temperature in the growing environment.
- Light – Your plants should receive at least 18 hours of light a day to keep them in the vegetative stage. 24 hours of light will not harm them.
- Temperature – Keep it between 72 and 77 degrees.[31]
- Humidity – Keep it at 50-80%.
- Nutrient mix – It should be changed at least every two weeks, or when the reservoir has dried. Mix the new solution in a bucket. Quickly throw out the old solution, clean the reservoir and pumps with hot water, and add the new solution.[32]
- Cleaning – Clean your system once a week. Scoop up any plant material, flush all pots to remove roots, and wash tools in the dishwasher.[33]
-
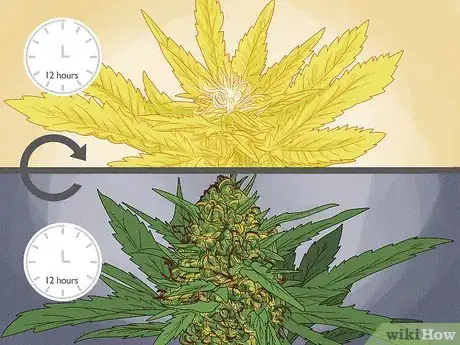
6Induce flowering. The flowers of female marijuana plants are what produce the buds with active ingredients. Your plant will be capable of flowering after 4-5 weeks of growth. Plants typically double in height after flowering begins, so you'll want to induce it when they are half as tall as the final height you are aiming for. To induce flowering, change the light cycle to 12 hours light, 12 hours dark.
-
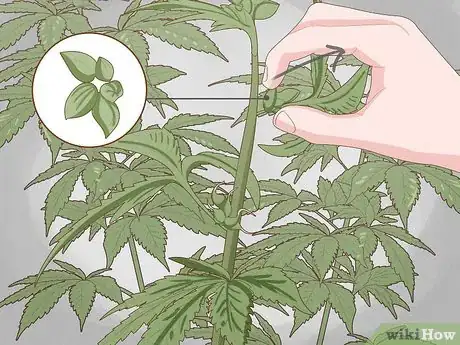
7Snip off any male flowers. Female marijuana plants can become hermaphroditic if stressed due to too much light during dark periods, lack of nutrients, low temperatures, low CO2, or other reasons. They will then produce male flowers. You'll want to remove them immediately to prevent pollination and the resulting seedy buds.[34]
- A male flower has pollen sacks (little balls) around where the main stem connects to the branches.
- A female flower has white hairs at that spot.
-
8Change your care regimen during flowering. Flowering plants have different nutrient requirements, and are also more prone to disease. To maximize your yield:
- Nutrient mix – Switch to a low nitrogen, high phosphorus formula. A Nitrogen-Phosphorus-Potassium mix of 5-50-17 is ideal, though 15-30-15 will work. Use nothing but clean water the last two weeks of flowering to flush out any chemical taste.[35]
- Humidity – Lower it to 40-50% to reduce the risk of disease.
- Light – Tuck leaves out of the way of the buds so they get plenty of light.
Cultivating Marijuana Outdoors
-
1Grow outdoors for less expensive, larger crops. Growing your crop outdoors allows you to save on the cost of setting up your grow room and electricity for lighting. Your plants can also get much larger due to more sun and CO2, yielding a big harvest. And it's also relatively easy. The downsides are security worries and the potential for bad weather to ruin your crop. Still, if you have a secure place to grow your crop, this is a good option.[36]
-
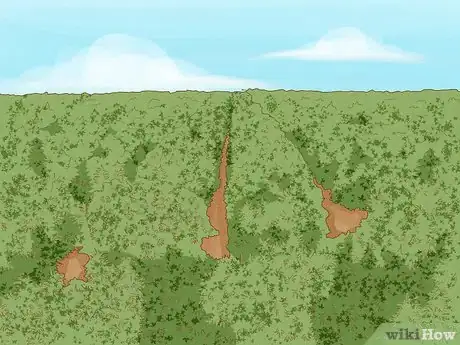
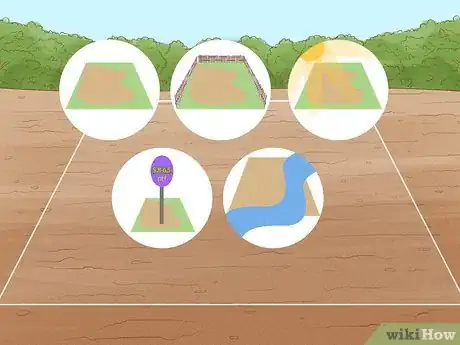
2Choose where your planting location. When selecting a spot for your crop, you'll want to consider space, protection, sun exposure, water, and soil.[37]
- Space – Remember, you don't need a lot of square feet to grow a big crop, since outdoor plants will get much taller than indoor ones.
- Protection – You must protect your crop from three things: people (angry neighbors or thieves); wind; and animals like rabbits and deer. Take advantage of natural features like hills, or screen off your crop.
- Sun exposure – The more sun your plants get, the better. Look for a southern exposure. Watch out for buildings, bushes, or trees that might cast shade over your garden.
- Water – Marijuana plants need lots of water. If it doesn't rain a lot where you live, make sure your garden is within easy reach of a stream or a hose.
- Soil – Good soil is compact when squeeze but breaks apart again with little pressure. It should drain well, so avoid places with standing water. pH should be between 5.8 and 6.5. If grasses or weeds are already flourishing there, then it's a good site.
-
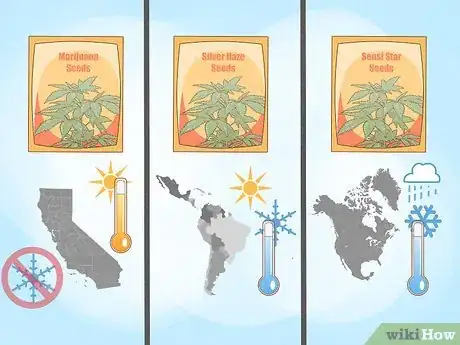
3Choose strains that flourish outdoors. If you live in a warm, sunny place that doesn't experience frosts, then you can use outdoor or indoor strains. If you live further north, you'll want to use hardier strains that grow well outdoors.[38] Check howtogrowmarijuna.com or grow-marijuana.com for a complete guide to outdoor strains.
- Warm climates with no frosts (like southern California) – Choose any seed you want.
- Sunny climates with occasional frosts (like the Mediterranean or southern US) – Most indicas and some hybridized sativas, like Silver Haze #9.
- Colder, damper climates (like northern Europe or the northern US) – You'll have best luck with strains specifically designed for such climates, like Sensi Star or Holland's Hope. Also consider autoflowering strains like Auto Frisian Dew or Snow Ryder, which do well in colder climates.
-
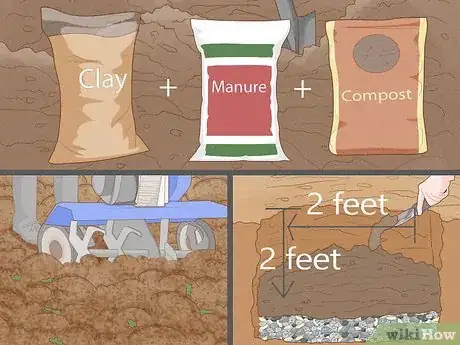
4Prepare your site for planting. You'll need to improve the soil, clear the site, and dig holes for your plants.[39]
- Soil - If you are not blessed with soil that has the correct pH and drains well, you'll want to improve it for higher yields. For clay soil, add compost and manure or perlite to improve drainage. For sandy soil, add compost and mulch or vermiculite to increase water retention.[40] You can also plant your crop in a container if the soil is very bad.
- Clearing – Pull up all grasses and weeds. You don't want them competing with your crop.
- Holes – You can simply plant your seeds a half inch deep in the soil, but for better results, you'll want to prepare holes with good drainage. Dig a hole about 2 feet deep and 2 feet in diameter. Line the base with gravel and fill it in with prepared soil.
-
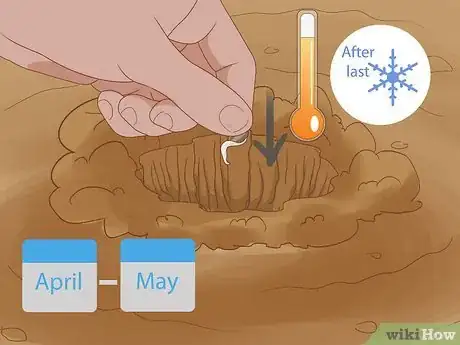
5Plant in April or May, after the last frost. In warmer climates, you can plant in April. In colder climates, it's best to start your plants indoors, then transfer them outdoors in May after the last frost. Starting them indoors will give them extra growing time to ensure they flower before the first frost of fall.[41]
-
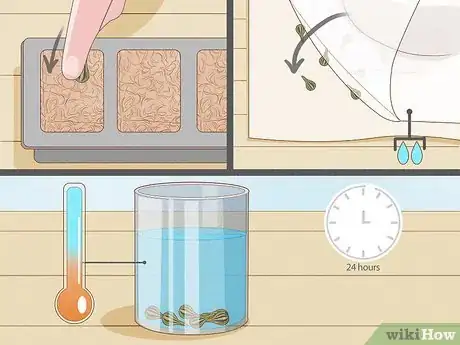
6Germinate your plants. Germinating simply means sprouting. If you want to plant your seeds directly at your site, put them a half inch under the soil. Be warned though that young cannabis plants are delicate and frequently fall prey to snails and insects. Accordingly, most people germinate their seeds, plant them indoors and don't move them out until they are 3-4 weeks old. There are several ways to germinate:
- Starter cubes – The easiest method. Stick your seed in a cube of growing medium like a Jiffy Pellet or Rapid Rooter. Once the seedling appears, you can plant it directly in potting soil.
- Damp paper towel – Fold a damp paper towel over the seeds and put them in a dark place for 1 to 3 days. When the root pops out, plant the seed 1 inch deep with the root downward.[42]
- Warm water – For older or dried out seeds, try dropping them in a glass of slightly warm water and placing it in a dark place. They should sprout in 24-32 hours. If they haven't after this time, move them to a moist place to finish sprouting.
-
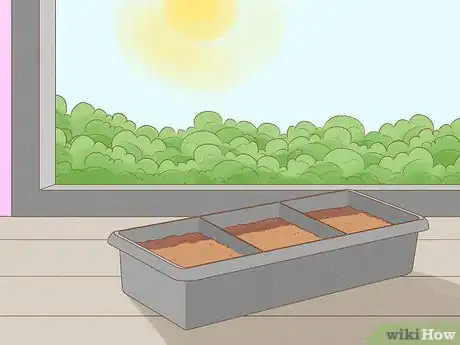
7Give your seedlings plenty of light. If starting your seedlings off indoors, you'll need to make sure they have plenty of light. You can put them on the windowsill or in a room with lots of light, or use artificial lights (see Setting up a Growing Room above).
-
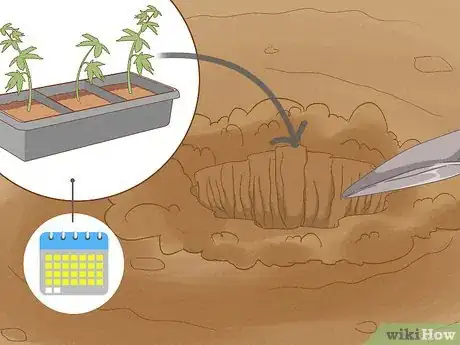
8Transfer seedlings to your growing site. If you have decided to start your seedlings off indoors, you'll want to transfer them to the growing site after 3-4 weeks. Carry the potted plants to the site and turn them upside down to remove them from the pots. Plant them – soil, roots, and all – in the holes you have dug. Water after planting.
-
9Care for your plants as they grow. During the vegetative and flowering stage, your plants will need water and nutrients.
- Water – If it rains 1 inch a week, you don't need to add water. Otherwise, you'll want to water your plants every other day. Try to use pH 7 water.
- Weeding – Remove any weeds growing around your crop.
- Vegetative nutrients – Give your plants nitrogen rich nutrients during the vegetative stage. You'll want a nitrogen-phosphorus-potassium ratio of around 10-5-7.[43]
- Flowering nutrients – Switch to a phosphorus-rich formula with a ratio between of 5-50-17 and 5-10-7. For the last two weeks of flowering, stop giving nutrients to avoid a chemical taste. Water with plain water to flush out chemicals from your plants.
-
10Sex your flowering plants. As soon as your plants start to flower, you'll want to sex them (i.e. determine which ones are male and female), so that you can remove the male plants. Otherwise, you'll end up with seeds in your buds, which reduces their potency.[44]
- Male flowers – Male pre-flowers have small bumps where the main stem connects to the flower. In developed flowers, these bumps become little balls (pollen sacs).
- Female flowers – Pre-flowers have white hairs protruding. Developed flowers will have a thicker concentration of hairs.
Harvesting and Processing Your Crop
-
1Determine if your plants are ready to harvest. Your plants will be ready to harvest 2 to 4 months after starting the flowering stage. There are two methods to determine when your plant is ready to harvest:[45]
- Pistils (the white hairs on the flowers) – Wait until new white hairs have stopped growing. Harvest when 50-75% of the hairs have darkened for the highest THC level. Harvest when 80-90% have darkened for more CBN, which has a relaxing effect.
- Trichomes – Trichomes are the "crystals" or glitter that accumulate on your buds during the flowering stage. Use a magnifier to examine the ones with mushroom-like heads on the ends. Harvest when most trichomes are milky or cloudy for the most intense high. Wait until they are amber for a more relaxing, narcotic type high.
-
2Harvest and prepare the plant for drying. Using a sharp knife, cut the plant off at the stalk above the ground. Remove the large fan leaves. Using scissors, cut each branch from the plant. Handle them gently so as to not lose any trichomes (the clear buds that contain THC).[46]
- Leaving the smaller leaves on the plant will result in a slower drying time, which means more flavor and potency.
-
3Dry the branches. Hang the branches upside down with plenty of space between them to ensure even drying and to prevent the growth of mold. Keep them at room temperature to prevent drying too fast, and use a fan to promote air circulation (don't point the fan directly at the marijuana). You'll know your marijuana is dry enough when the smaller stems crack instead of bending when you flex them. Drying usually takes about a week.[47]
-
4Prepare the marijuana for curing. Use small scissors to remove any remaining leaves shielding the buds. (These trimmings contain some active ingredients and can be used in cooking.) Separate the individual buds from the stems and place them in 1 quart mason jars so the jars are about 75% full.
-
5Cure the marijuana. During curing the marijuana will very, very slowly continue to dry out, and compounds that give it a grassy smell and taste will break down. The key is to try to keep the air in the jars at 60-65% relative humidity (RH). You'll want to open your jars at least once a day for the first 1-2 weeks to ensure they are curing properly and to allow for air exchange. A hygrometer can help you get accurate RH readings. Leave it in the jar for 24 hours to get an accurate reading.[48]
- Wet buds (over 70% RH) – If buds feel damp to the touch take them out to dry for another 12-24 hours. Wet buds in a jar run the risk of growing mold.
- Moist buds (65-70% RH) – If you shake the jar and some buds stick together, then they are too moist. Take the lid off the jar for 2-4 hours.
- Sticky buds (60-65% RH) – This is the zone where you want your buds to be. Buds feel a little sticky. They are neither wet, nor dry and crumbly. They do not clump together when you shake the jar.
- Dry buds (less than 60%RH) – If the buds feel brittle and crumbly, then insert a 62% Humidipak to restore moisture. Continue opening the jar once a day.
-
6Let the marijuana cure for up to six months. After the first 2 weeks, your jars should all be in the cure zone (sticky, 60-65% RH). You can now open them once a week to check on them. After 4-6 weeks, you can start opening them once a month. You should cure for at least 3 months, but buds will continue to improve for up to 6 months. After that, you'll want to put them in long-term storage.
-
7Storing your buds. Make sure your buds are not wet, or they will mold in long-term storage. Humidity should be 62% or slightly less.[49]
- Short-term storage (under 6 months) – Put the buds in an airtight container, such as the mason jars or a Ziploc bag. Store in a cool, dark place.
- Long-term storage (over 6 months) – Consider vacuum sealing your buds to ensure they retain flavor and potency.
Understanding the Legality of Growing Marijuana for Personal Use
-
1Check to see if home cultivation is allowed in your state.[50] Connecticut, Delaware, Illinois, Maryland, Minnesota, New Hampshire, New Jersey, New York, and the District of Columbia all allow the use of medical marijuana, but you cannot grow your own marijuana in these states. You can grow medical marijuana in the following states:[51]
- You can cultivate without restrictions in Alaska, California, Colorado, Hawaii, Maine, Massachusetts, Michigan, Montana, Oregon, Rhode Island, Vermont, Washington
- A special license is required in New Mexico.
- In Arizona you can only cultivate if you lived 25 miles or more form a dispensary when you apply for a card
- In Nevada you can cultivate if you live 25 or more mile form a dispensary, if you are unable to travel to a dispensary, or if the dispensary does not carry the strains you need.
-
2Become eligible to use medical marijuana.[52] In all states where you can grow marijuana, you will need a doctor's prescription in order to do so legally.[53] In most states, you will also need to register with the state. Here are the requirements in states where personal cultivation is allowed:
- Registration mandatory: Alaska, Arizona, Colorado, Hawaii, Massachusetts, Michigan, Montana, Nevada, Rhode Island, and Vermont
- Registration voluntary: California, Maine, New Mexico
- No registration required: Washington
-
3Determine how much you can grow. Most states that allow home cultivation put a limit on the number of plants you can grow at one time, with that limit generally ranging from 6 to 12 plants. For a breakdown of how much marijuana you can grow in each state, see http://medicalmarijuana.procon.org/view.resource.php?resourceID=000881#details.
-
4
Determining if You Can Grow Marijuana For Sale
-
1Determine if you can legally grow marijuana for sale. In most of the twenty-two states (plus DC) where marijuana is legal, you must acquire a license in order to legally cultivate marijuana. Of these states, only three are currently issuing licenses, and five more have plans to do so. Even in states that allow cultivation, many cities have municipal bans, so you'll want to be sure cultivation is legal where you are.
- Arizona – Only dispensaries are allowed to grow marijuana for sale. You can find instructions on how to apply for a dispensary license at http://azdhs.gov/documents/licensing/medical-marijuana/dispensaries/DRC-ApplicationInstructions.pdf.
- Connecticut – You will need to acquire a producer license. This requires a non-refundable $25,000 application fee and a $75,000 registration fee.[56]
- Oregon – A license is required. You can find information on how to apply at http://www.oregon.gov/olcc/marijuana/Documents/Licensing_Forms/mj_app_producer_cultivation_plan.pdf.
- States where a license is required, but licenses have not yet been issued: Alaska, California,[57] Hawaii, Illinois, and Maryland.[58]
- States where licenses are required, but no more are currently being issued: Delaware,[59] Maine,[60] Minnesota, Nevada,[61] New Hampshire,[62] New Jersey,[63] New Mexico,[64] New York,[65] Rhode Island,[66] Vermont,[67] Washington,[68] and Washington, DC.
- States where medical marijuana is legal, but cultivation for sale is illegal: Michigan.
-
2Know the requirements. Most states have strict requirements regulating the growth and processing of medical marijuana. You will be generally required to pay an annual fee for your license, to demonstrate that your growing site is secure, to show that your growing area is not located near a school, and to submit your products for laboratory analysis. Check with your state authority for the particular requirements in your area.
-
3Research the market. Growing medical marijuana for sale will probably not make you rich. Medical marijuana is strictly regulated. In Oregon, California, and Arizona, the market is very crowded, resulting in low prices.[69] In Connecticut, the $100,000 cost of acquiring a license makes anything other than a large-scale venture unprofitable. The most attractive options are states that are in the process of issuing licenses: Alaska, Hawaii, Illinois and Maryland.
-
4Locate buyers for your product. In some states, like Arizona, only dispensaries can grow marijuana, so you will be selling your own product. This means you'll need to establish a dispensary as well as growing marijuana. In other states, it is illegal to both grow and sell marijuana. You'll need to find dispensaries to sell to. In these states, it is illegal to sell directly to users.
Expert Q&A
-
QuestionWhat are common misconceptions people have regarding medical marijuana?
 Jamie Corroon, ND, MPHDr. Jamie Corroon, ND, MPH is the founder and Medical Director of the Center for Medical Cannabis Education. Dr. Corroon is a licensed Naturopathic Doctor and clinical researcher. In addition to clinical practice, Dr. Corroon advises dietary supplement and cannabis companies regarding science, regulation, and product development. He is well published in the peer-review literature, with recent publications that investigate the clinical and public health implications of the broadening acceptance of cannabis in society. He earned a Masters in Public Health (MPH) in Epidemiology from San Diego State University. He also earned a Doctor of Naturopathic Medicine degree from Bastyr University, subsequently completed two years of residency at the Bastyr Center for Natural Health, and is a former adjunct professor at Bastyr University California.
Medical Director of the Center for Medical Cannabis Education The most common misconception is that using marijuana leads to intoxication and impairment (i.e., getting “high”). In reality, the effects of THC, the principal psychoactive ingredient in marijuana, depend on the dose. A therapeutic effect can often be achieved using a dose low enough to avoid intoxication. More recently, a misconception has emerged that suggests CBD is the “medical” cannabinoid, while THC is the “recreational” cannabinoid. This is not the case. Both compounds can have therapeutic effects.
 -
QuestionWhat criteria do I have to meet to qualify for medical marijuana?
 Jamie Corroon, ND, MPHDr. Jamie Corroon, ND, MPH is the founder and Medical Director of the Center for Medical Cannabis Education. Dr. Corroon is a licensed Naturopathic Doctor and clinical researcher. In addition to clinical practice, Dr. Corroon advises dietary supplement and cannabis companies regarding science, regulation, and product development. He is well published in the peer-review literature, with recent publications that investigate the clinical and public health implications of the broadening acceptance of cannabis in society. He earned a Masters in Public Health (MPH) in Epidemiology from San Diego State University. He also earned a Doctor of Naturopathic Medicine degree from Bastyr University, subsequently completed two years of residency at the Bastyr Center for Natural Health, and is a former adjunct professor at Bastyr University California.
Medical Director of the Center for Medical Cannabis Education Patients must be qualified by a healthcare professional per the state’s medical marijuana program, which requires an evaluation of the patient’s past medical history and current complaints. If the patient meets the criteria for the state’s medical marijuana program, a medical marijuana recommendation or authorization is provided. Some states refer to these documents as cards (i.e., a medical marijuana ID card).
Warnings
- Don't fly with cannabis. Cannabis is federally illegal, so you cannot fly with it anywhere, even where it is legal, as it is a federal crime.⧼thumbs_response⧽
References
- ↑ Jamie Corroon, ND, MPH. Medical Director of the Center for Medical Cannabis Education. Expert Interview. 10 March 2020.
- ↑ Jamie Corroon, ND, MPH. Medical Director of the Center for Medical Cannabis Education. Expert Interview. 10 March 2020.
- ↑ http://www.growweedeasy.com/choose-best-strain-marijuana-beginners#top-5-marijuana-strains-new-growers
- ↑ https://www.leafly.com/news/cannabis-101/cannabis-anatomy-the-parts-of-the-plant
- ↑ http://howtogrowmarijuana.com/auto-flowering-cannabis-seeds
- ↑ http://howtogrowmarijuana.com/feminized-cannabis-seeds
- ↑ http://howtogrowmarijuana.com/how-to-grow-marijuana-indoors/
- ↑ http://grow-marijuana.com/grow-room
- ↑ http://grow-marijuana.com/grow-room
- ↑ http://grow-marijuana.com/grow-room
- ↑ http://howtogrowmarijuana.com/marijuana-lighting/#CRMLS
- ↑ http://www.growweedeasy.com/basics#supplies-checklist
- ↑ http://www.growweedeasy.com/exhaust
- ↑ http://homeguides.sfgate.com/adjust-ph-water-plants-51620.html
- ↑ http://homeguides.sfgate.com/adjust-ph-water-plants-51620.html
- ↑ http://grow-marijuana.com/indoors
- ↑ http://www.growweedeasy.com/germinate
- ↑ http://www.growweedeasy.com/germinate
- ↑ http://grow-marijuana.com/medium
- ↑ http://grow-marijuana.com/basic-guide
- ↑ http://www.growweedeasy.com/basics#germinate-seeds-care-clones
- ↑ http://www.theweedblog.com/what-is-the-ideal-temperature-for-growing-marijuana-plants/
- ↑ http://www.growweedeasy.com/germinate
- ↑ http://www.growweedeasy.com/basics#germinate-seeds-care-clones
- ↑ http://www.growweedeasy.com/basics#germinate-seeds-care-clones
- ↑ http://grow-marijuana.com/hydroponics
- ↑ http://grow-marijuana.com/hydroponics
- ↑ http://howtogrowmarijuana.com/how-to-grow-marijuana-indoors/
- ↑ http://howtogrowmarijuana.com/how-to-grow-marijuana-indoors/
- ↑ http://grow-marijuana.com/hydroponics
- ↑ http://howtogrowmarijuana.com/how-to-grow-marijuana-indoors/
- ↑ http://grow-marijuana.com/hydroponics
- ↑ http://grow-marijuana.com/hydroponics
- ↑ http://www.growweedeasy.com/basics#germinate-seeds-care-clones
- ↑ http://grow-marijuana.com/marijuana-flowering
- ↑ http://grow-marijuana.com/outdoors
- ↑ http://howtogrowmarijuana.com/how-to-grow-marijuana-outdoors/#1G
- ↑ http://howtogrowmarijuana.com/how-to-grow-marijuana-outdoors/#1G
- ↑ http://howtogrowmarijuana.com/how-to-grow-marijuana-outdoors/#1G
- ↑ http://grow-marijuana.com/outdoors
- ↑ http://grow-marijuana.com/outdoors
- ↑ http://howtogrowmarijuana.com/how-to-grow-marijuana-outdoors/#1G
- ↑ http://howtogrowmarijuana.com/using-the-right-nutrients/#veggrowth
- ↑ http://howtogrowmarijuana.com/how-to-grow-marijuana-outdoors/#1G
- ↑ http://www.growweedeasy.com/basics#germinate-seeds-care-clones
- ↑ http://howtogrowmarijuana.com/harvesting-marijuana-head-body-stone/
- ↑ http://howtogrowmarijuana.com/harvesting-marijuana-head-body-stone/
- ↑ http://www.growweedeasy.com/curing
- ↑ http://www.growweedeasy.com/curing
- ↑ Jamie Corroon, ND, MPH. Medical Director of the Center for Medical Cannabis Education. Expert Interview. 10 March 2020.
- ↑ http://medicalmarijuana.procon.org/view.resource.php?resourceID=000881
- ↑ http://medicalmarijuana.procon.org/view.resource.php?resourceID=000881#details
- ↑ Jamie Corroon, ND, MPH. Medical Director of the Center for Medical Cannabis Education. Expert Interview. 10 March 2020.
- ↑ Jamie Corroon, ND, MPH. Medical Director of the Center for Medical Cannabis Education. Expert Interview. 10 March 2020.
- ↑ http://medicalmarijuana.procon.org/view.resource.php?resourceID=000881#details
- ↑ http://www.ct.gov/dcp/cwp/view.asp?q=527988
- ↑ http://www.cannalawblog.com/californias-new-medical-marijuana-rules-what-you-need-to-know-now/
- ↑ http://mmc.maryland.gov
- ↑ http://dhss.delaware.gov/dhss/dph/hsp/medmarhome.html
- ↑ http://www.maine.gov/dhhs/dlrs/mmm/
- ↑ http://dpbh.nv.gov/Reg/MME/MME_-_Home/
- ↑ http://www.dhhs.state.nh.us/oos/tcp/
- ↑ http://smallbusiness.findlaw.com/business-laws-and-regulations/marijuana-business-licenses-permits-and-planning.html
- ↑ http://nmhealth.org/about/mcp/svcs/pdb/
- ↑ https://www.health.ny.gov/regulations/medical_marijuana/about.htm
- ↑ http://sos.ri.gov/documents/archives/regdocs/released/pdf/DOH/5923.pdf
- ↑ http://smallbusiness.findlaw.com/business-laws-and-regulations/marijuana-business-licenses-permits-and-planning.html
- ↑ http://smallbusiness.findlaw.com/business-laws-and-regulations/marijuana-business-licenses-permits-and-planning.html
- ↑ http://www.theweedblog.com/growing-legal-marijuana-is-not-always-a-profitable-idea/
About This Article
To grow medical marijuana, you'll need a grow room, reflective material, lighting, a ventilation system, seedlings, containers, and potting soil. To set up your grow room, choose a warm, empty room, as this prevents mold from developing. You'll need to cover the walls and ceiling with a reflective material to speed up the growing time. Flat white paint or emergency blankets are good options. Install accessories next such as lighting and a ventilation system to get good yields. When you’re ready to cultivate, plant your seedlings in potting soil for 2 to 4 weeks. As the plants grow, transfer them into bigger containers with either a specific-marijuana soil or coco peat. If you spot any male flowers, remove these from the plant as they are less potent. For more information on growing medical marijuana, like how to cultivate marijuana using hydroponics, read on!

