This article was co-authored by wikiHow staff writer, Jennifer Mueller, JD. Jennifer Mueller is a wikiHow Content Creator. She specializes in reviewing, fact-checking, and evaluating wikiHow's content to ensure thoroughness and accuracy. Jennifer holds a JD from Indiana University Maurer School of Law in 2006.
There are 19 references cited in this article, which can be found at the bottom of the page.
This article has been viewed 77,888 times.
Learn more...
Philodendron make great houseplants because they thrive in normal indoor conditions away from direct sunlight. If you want to add a philodendron to your inside vegetation, you don't necessarily need to buy a plant from a garden center — you can grow your own from the cuttings of a mature plant.[1] While some philodendron varieties must be grown from seed, many popular houseplant varieties, including the heart-leaf and fiddle-leaf philodendron, are relatively easy to grow from cuttings.[2]
Steps
Taking Your Cuttings
-
1Choose a mature, healthy plant to take your cuttings from in the spring. Start propagating philodendron in early spring (March in the Northern Hemisphere) when the days are beginning to get longer. Identify old growth in a mature plant — the tougher, woodier stems towards the base of the plant rather than the springy new growth at the top and ends of the plant. You'll be taking your cuttings from this old growth.[3]
- If you try to propagate your philodendron in the fall or winter, it may be spring before the plant starts rooting. In the meantime, your cutting will likely rot.
-
2Find the nodes where the leaf attaches to the main stem. A healthy plant will have many nodes. Your cutting will grow roots from the node. Typically, a philodendron cutting is either an internodal cutting or a leaf-bud cutting.[4]
- Internodal cuttings work for hanging or vining plants. Look for a cluster of nodes so you can cut between them.
- For a leaf-bud cutting, look for a single node off by itself on the main stem. That will make it easier to take your cutting without causing too much damage to the original plant.
Tip: If you look at the nodes closely, you may see some tiny adventurous roots already starting to grow out of them. These are the best nodes to propagate since they're already starting to grow roots.[5]
Advertisement -
3Cut the stem between 2 nodes for most philodendron varieties. Internodal cuttings work best for upright philodendron varieties, including the Green Congo, Rojo Congo, Super Atom, and Moonlight varieties. To make an internodal cutting, use a sharp, clean knife (or pruners) to slice between 2 nodes, taking one of them off for your cutting and leaving the other intact. Cut horizontally or vertically, depending on how the node is sitting on the stem. You don't want to cut into the node.[6]
- Snip just below the node, taking care to leave as little stem as possible under the node. The roots grow from the node, so if there's a lot of stem left under the node, it will just rot off.
-
4Use a leaf-bud cutting for crawling varieties of philodendron. With a leaf-bud cutting, the leaf and bud are the focus of your cutting rather than the nodes. This type of cutting works best for varieties such as fiddle-leaf, heart-leaf, and Brandi philodendron. To make a leaf-bud cutting, take your knife and cut in a semi-circle around the node on one side of the stem.[7]
- If you cut properly, the stem will come to a point at the top and bottom on either side of the node. Cut around the node, taking care not to cut too deeply into the stem of the original plant. If you take too much from the original plant it will be difficult for it to heal, so leave as much as possible of the original stem intact.
Tip: If you have rooting hormone to help propagate your cuttings, dabbing a little on the wound where you cut the original plant will keep it from developing fungus as it heals.[8]
-
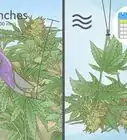
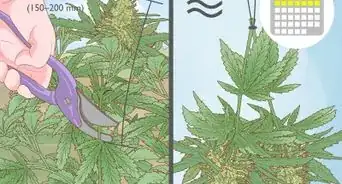
5Take multiple cuttings that are 4 and 6 inches (10 and 15 cm) long if possible. If you only have one mature philodendron plant, you may not be able to take more than one cutting without taking too much from the original plant. However, if possible, multiple cuttings give you a better chance that at least one of them will root.[9]
- Avoid cutting your original plant back to a single stem. Leave enough of the plant intact that it can heal and continue to grow.
- Take care not to take any new, bright green growth. It will be less likely to root.
-
6Snip off any lower leaves and stems on the cutting. Cut leaves closely and carefully, taking care not to damage the main stem. Leave at least 3 or 4 leaves at the top of the cutting.[10]
- The part of the cutting that you submerge in your propagation medium should be free from leaves and stems, which will rot.


Rooting the Cuttings
-
1Mix Perlite into potting soil to make the propagation medium. Perlite, vermiculite, orchid bark, and even sand will ensure that your propagation medium is light and loose enough to provide enough support while also allowing for drainage. You can also buy commercial propagation mediums at your local gardening center that have similar properties. However, evaluate the components of the medium carefully. Many commercial potting mediums are too heavy to propagate philodendron.[11]
- If you want to give your philodendron a boost, you might try adding rooting hormone, which you can find at your local gardening center. However, philodendron typically root just fine without it.[12]
-
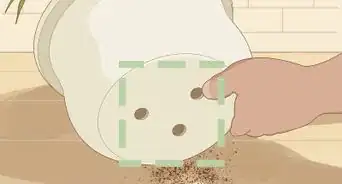
2Fill a nursery tray or similar-sized container with propagation medium. Propagate each cutting in a separate container. Add the propagation medium loosely, ensuring that air and water can easily pass through it. Leave about 1 inch (2.5 cm) of space between the top of your medium and the rim of the container so you can move the medium around when you introduce your cutting.[13]
- Use a container with drainage holes. You can place a piece of mesh, a paper towel, or a coffee filter over the drainage holes to prevent soil from escaping. The container will still drain excess water properly.
-
3Moisten the propagation medium thoroughly with tap water. Add the water gradually to layers of your propagation medium, working it through the medium with your hands. Make sure the entire propagation medium is thoroughly moistened.[14]
- The medium should be damp to the touch but not so wet that you can squeeze water out of it. Make sure it's consistently moist without any dry spots.
-
4Insert the cutting deeply into the medium. Center the cutting in your tray and insert it into your propagation medium until the node is completely covered. Move your medium around the cutting to help stabilize it so it won't fall over in the tray. If you've made a leaf-bud cutting, ensure that only the leaf is visible above the surface of the propagation medium.[15]
- Add more medium as necessary to stabilize the stem if you have a longer cutting. Your cutting should be able to stand up straight in the tray.
-
5Cover the propagation trays with plastic to maintain humidity. Before your cuttings root, they have no way of replacing the moisture they lose. Keeping plastic over the propagation trays helps hold in the moisture.[16]
- Poke holes in the plastic so air can continue to flow through it.
- If you used individual containers instead of nursery trays, you can cover them with plastic sheeting or even an old plastic grocery bag. Make sure air can flow through the plastic.
-
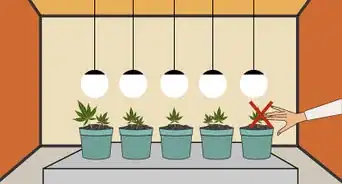
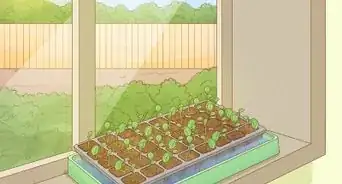
6Set your cuttings in indirect sunlight with a day temperature of at least 70 °F (21 °C). Philodendron make good houseplants because they tolerate temperatures similar to the normal household environment. However, when you're propagating cuttings, make sure the temperature is slightly warmer. A temperature of around 75 °F (24 °C) is ideal.[17]
- Direct sunlight can burn the leaves and impede rooting. Make sure your cuttings are protected from direct sunlight while they're rooting.
-
7Tug on your cuttings after 4 weeks to check for rooting. In the spring and summer, philodendron typically root in about 4 weeks. Grasp the plant close to the soil line and give it a short, gentle tug. If you feel resistance, that means your cuttings have started to grow roots.[18]
- Generally, you want roots that are 1 to 2 inches (2.5 to 5.1 cm) long and have started to form into a ball. If you start propagating in spring, your new philodendron should be ready to transplant in 4 to 6 weeks.
- New plant growth above soil level is a clear indication that your cuttings have rooted.


Transplanting Your Philodendron
-
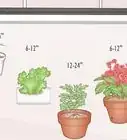
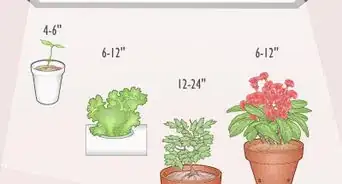
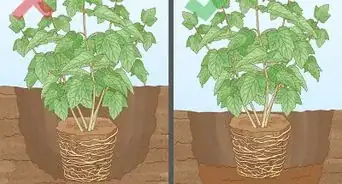
1Choose a planter 2 to 3 inches (5.1 to 7.6 cm) larger than the root ball. Generally, philodendron plants grow best in a slightly cramped potting environment. If you already have a mature philodendron, you'll have a good idea of how big the planter should be.[19]
- Use a pot with drainage holes to ensure that your potting medium drains properly. Philodendron plants need moist, well-drained soil.
Tip: Putting a piece of mesh, a paper towel, or a coffee filter in the bottom of your planter ensures you won't lose any soil through the drainage holes.
-
2Water your philodendron the day before transplanting it. Check the dampness of the propagation medium. If it feels dry to the touch, add water to dampen the medium, but be careful not to water your philodendron too much.[20]
- Watering your philodendron the day before you transplant it will reduce the stress on the plant and help make the transition easier.
-
3Moisten your potting medium with tap water. A lightweight potting medium ensures your philodendron doesn't become water-logged. Moisten the potting medium slowly, turning it over in your hands or with a trowel to ensure it's all evenly damp. It should be moist enough to stick together, but not so moist that you can squeeze water out of it.[21]
- Any quality potting soil works for philodendron as long as it drains well. You can also mix in Perlite or peat moss.[22]
-
4Fill the planter with potting medium up to 2 inches (5.1 cm) from the rim. The actual depth of your soil will depend on the size of your planter. However, the root ball of your philodendron should be about 1 to 2 inches (2.5 to 5.1 cm) below the rim of the planter. This ensures that the plant will grow at the correct level over the planter.[23]
- Don't tamp the potting medium down or press it into the pot. There needs to be enough space in the soil for air and water to get through.
-
5Pull your philodendron gently out of the propagation medium. Grasp your philodendron at the base of the stem just above the surface of the propagation medium. Work it from side to side to free the roots and pull the entire plant out.[24]
- Once your philodendron is out of the propagation medium, open up and gently separate the roots in the root ball. This will encourage new growth when your philodendron is replanted.
-
6Place your philodendron's root ball on top of the potting medium. Set your philodendron gently on top of the potting medium you've put in the bottom of the planter. Be careful not to push it down into the potting medium or crush the roots.[25]
- Gently twist the philodendron so that it will sit up straight in the planter and grow in the direction you want it to. If your philodendron is too top-heavy, you might want to hold onto it with one hand until you've filled the container.
-
7Fill the rest of the container with potting medium. Start to place small amounts of pre-moistened potting medium on top of and around the roots of your philodendron. Take care to fill in any open spaces between the roots.[26]
- Gently press each layer of potting medium into the roots to ensure there's good contact between the roots and the soil.
- Continue to fill your planter just up to the top, gently pressing down the potting medium in layers as you go.
Tip: If you're growing a vining or climbing philodendron, add a stake or a pole to support it as it grows. There are many different varieties of stakes and poles available at your local gardening center.


Warnings
- Before you try to grow a philodendron from cuttings, find out what variety of philodendron it is. Self-heading philodendron (including the "Black Cardinal," "Imperial Green," and "Moonlight" philodendron) cannot be propagated from cuttings and must be grown from seed.[27]⧼thumbs_response⧽
- Philodendron are toxic to animals. If you have pets, keep your plants in a place where they can't get to the plant or its leaves.[28]⧼thumbs_response⧽
- While philodendron can root in water alone, this method of propagation is not recommended by horticulturists. When you root the plant in water, the delicate roots are often difficult to transplant in soil.[29]⧼thumbs_response⧽
Things You'll Need
- Sharp, clean knife or pruners
- Nursery trays or small pots
- Propagation medium (peat moss, Perlite, vermiculite)
- Rooting hormone (optional)
- Planters
- Potting medium


References
- ↑ http://ccenassau.org/resources/philodendron
- ↑ https://aggie-horticulture.tamu.edu/ornamental/a-reference-guide-to-plant-care-handling-and-merchandising/propagating-foliage-flowering-plants/
- ↑ https://youtu.be/H1xDA3-SYpU?t=46
- ↑ https://www.bbg.org/gardening/article/how_to_propagate_houseplants
- ↑ https://youtu.be/HTrMgCUxurM?t=107
- ↑ https://youtu.be/H1xDA3-SYpU?t=191
- ↑ https://youtu.be/H1xDA3-SYpU?t=409
- ↑ https://youtu.be/H1xDA3-SYpU?t=434
- ↑ https://youtu.be/H1xDA3-SYpU?t=191
- ↑ http://www.missouribotanicalgarden.org/gardens-gardening/your-garden/help-for-the-home-gardener/advice-tips-resources/visual-guides/rooting-cuttings-in-water.aspx
- ↑ https://youtu.be/H1xDA3-SYpU?t=223
- ↑ https://youtu.be/H1xDA3-SYpU?t=218
- ↑ https://www.youtube.com/watch?v=HTrMgCUxurM
- ↑ https://aggie-horticulture.tamu.edu/ornamental/a-reference-guide-to-plant-care-handling-and-merchandising/propagating-foliage-flowering-plants/
- ↑ https://youtu.be/HTrMgCUxurM?t=119
- ↑ https://aggie-horticulture.tamu.edu/ornamental/a-reference-guide-to-plant-care-handling-and-merchandising/propagating-foliage-flowering-plants/
- ↑ https://aggie-horticulture.tamu.edu/ornamental/a-reference-guide-to-plant-care-handling-and-merchandising/propagating-foliage-flowering-plants/
- ↑ https://youtu.be/H1xDA3-SYpU?t=286
- ↑ http://www.thegardenhelper.com/philodendron.html
- ↑ https://www.epicgardening.com/heartleaf-philodendron/
- ↑ https://gardeningsolutions.ifas.ufl.edu/plants/houseplants/heartleaf-philodendron.html
- ↑ https://www.epicgardening.com/heartleaf-philodendron/
- ↑ http://www.missouribotanicalgarden.org/gardens-gardening/your-garden/help-for-the-home-gardener/advice-tips-resources/visual-guides/rooting-cuttings-in-water.aspx
- ↑ https://www.epicgardening.com/heartleaf-philodendron/
- ↑ http://www.missouribotanicalgarden.org/gardens-gardening/your-garden/help-for-the-home-gardener/advice-tips-resources/visual-guides/rooting-cuttings-in-water.aspx
- ↑ http://www.missouribotanicalgarden.org/gardens-gardening/your-garden/help-for-the-home-gardener/advice-tips-resources/visual-guides/rooting-cuttings-in-water.aspx
- ↑ https://mrec.ifas.ufl.edu/Foliage/folnotes/philo-sh.htm
- ↑ https://gardeningsolutions.ifas.ufl.edu/plants/houseplants/heartleaf-philodendron.html
- ↑ https://youtu.be/H1xDA3-SYpU?t=332
About This Article