This article was co-authored by Norman Raverty. Norman Raverty is the owner of San Mateo Handyman, a handyman service in the San Francisco Bay Area. With over 27 years of experience, Norman has expertise in all five of the general building trades (carpentry, ceramic tile, drywall, electrical, plumbing).
There are 8 references cited in this article, which can be found at the bottom of the page.
This article has been viewed 73,005 times.
There are different options for hanging glass, depending on the glass type and thickness you're working with. If you have a piece of glass art or signage that is 1⁄4 inch (0.64 cm) or thicker, edge grip stand-off mounts offer an effective and easy installation method. If you have a frameless mirror or thinner glass piece, standard mirror clips work well. To hang glass artwork in a window, try friction mounted hooks that easily hold up to 10 pounds (4.5 kg).
Steps
Hanging Glass Art and Signage
-
1Choose edge grip stand-off mounts to hang glass art and signage. Stand-off mounts allow you to suspend the piece away from the wall. This is ideal for glass art and signage because it allows light to reflect through, enhancing translucence. Each mount consists of an anchor, a screw, a barrel, and a cap.
- The length of the barrel determines how far away from the wall your sign or artwork will sit.
- The edge grip variety of stand-off mounts do not require your glass piece to have holes drilled into it. The edges of the glass are gripped by a channel in the mount.
-
2Buy a kit of 4 mounts in a style and color that match your piece and decor. You can choose from metal, acrylic, or plastic mounts in a variety of colors and shapes. They also come with varying barrel lengths so you can suspend your piece closer or further from the wall, depending on your preference.
- Be sure to select an anchor style that matches your room decor and wall material (masonry, drywall, etc.).
- If you have a glass art work that is irregular in thickness, purchase edge grip mounts that are adjustable. If your piece is uniform, measure the thickness and buy mounts that have a channel that matches.
Advertisement -
3Use masking tape to mark the glass where the mounts will go. 2 mounts will hold the bottom edge of your piece and 2 mounts will secure the top edge. Come in 1 to 4 inches (2.5 to 10.2 cm) from each corner, depending on the size of the glass. Pull off 4 small pieces of masking tape and place them on the mirror's surface in each corner.[1]
- The distance between the top 2 marks should be the same as the distance between the bottom 2 marks.
- The wider the glass is, the farther you can come in from the corner.
-
4Determine where you want to mount your piece and mark the wall. Hold the glass up in your chosen location and make 2 light pencil marks on the wall that line up with where you’ve placed tape on the top edge. Use a level to double check that your marks are even. Then, mark the wall for the bottom edge using the same technique.
- It's easiest to have someone help you with this part.
-
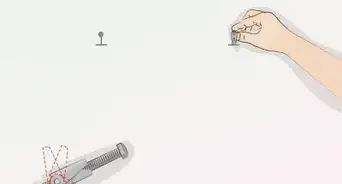
5Drill 1⁄4 inch (0.64 cm) deep holes for your anchors. Hold the drill firmly and check to see that the bit is parallel to the floor. Place the anchors into the holes and tap them into the wall until they are flush.[2]
- Make sure your drill bit size matches the anchor size!
-
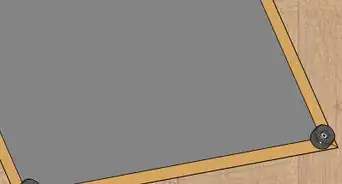
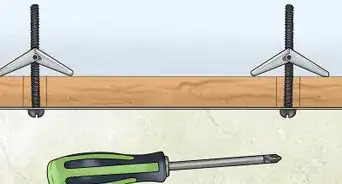
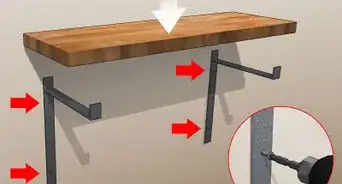
6Place the support screw down through the hollow barrel of the mount. Position the mount over the anchor, lining the screw up. Use a Phillips head screwdriver to tighten the screw. Hold your drill or screwdriver so that it is parallel to the floor and exert steady pressure. Attach all 4 mounts using this same technique.[3]
- Before you tighten the screw down all the way, check to make sure the channel side is straight and facing the right direction.
-
7Guide your glass piece gently into the channels from the side. Tighten the small set screws on each mount to make sure the glass is nice and snug in the channel. Depending on the style of the mount, this may require a different driver bit or screwdriver.
- If the glass is not sliding into all 4 channels, check to make sure the channels are all lined up parallel to the floor. Loosen the screws to adjust if necessary.
-
8Place the caps on each barrel to finish the look. Some caps screw into the barrel while others simply pop into place. Once your mirror is securely installed, put the caps on the barrels according to the kit's instructions.


Using Clips for Frameless Mirrors
-
1Use mirror clips to mount mirrors that are 1⁄4 inch (0.64 cm) or thinner. A set of mirror clips comes with 2 clips for the bottom of the mirror that are fixed, 2 clips for the top of the mirror that are spring loaded, and 4 anchor screws for installation. The channel on standard mirror clips is made for mirrors or glass that is 1⁄4 inch (0.64 cm) thick or less.
- Mirror clips show on the front of the mirror, so select a shape, size, color, and finish that works with your space.
- Buy a kit that is made for your wall material (dry wall, masonry, etc.).
-
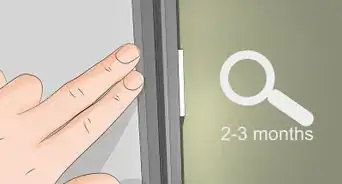
2Choose a location for your mirror and find the studs in the walls. Select a spot away from doors, since opening and shutting doors can loosen the fasteners and cause the mirror to fall. Once you decide on a spot, use a stud finder to locate the studs in the wall and mark them with a grease pencil.
- You'll need to anchor the mirror to a stud for secure installation.
- You may want to get an assistant to help you locate and mark the studs.
-
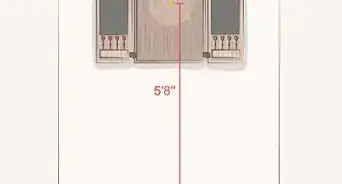
3Mark the placement for the mirror's bottom edge on the wall. Choose the height you want to hang the mirror, then use a tape measure to measure the width of the mirror. Measure the desired height and make 2 marks on the wall that match the mirror's width. The bottom edge of the mirror will line up with these 2 marks.
- The marks should connect to make a line parallel to the floor and that line should be the same width as your glass.
-
4Determine the placement of the bottom 2 clips. Depending on the width of your glass, you will want to come in 1 to 4 inches (2.5 to 10.2 cm) toward the center of your line on each side and make a mark. The greater the width of the mirror, the farther in toward center you can go with the mounts.[4]
- Don't come in so far that the distance between the mounts is less than the rest of the width of the mirror.
-
5Drill holes in the wall where you’ve made your marks. Hold your drill so that the bit is perpendicular to the wall and parallel to the floor. Press or tap the anchors into place with a hammer until they are flush with the wall. Use a Philips head bit or screwdriver to fasten the clips to the wall.
- Make sure to use a drill bit that is the same size as your anchors.
- Before you tighten the screw down all the way, take the time to make sure the clip channel is straight.
-
6Lower the mirror into the bottom clips and mark the wall for the top clips. Make light pencil marks on the wall at the top of the mirror on each end. Remove the mirror and measure in from those marks the same distance as you did for the bottom clips. Because the top clips are spring loaded, you will then want to drop those marks down by about a 1⁄4 inch (0.64 cm) so the fit will be snug.[5]
-
7Use a level to confirm all of your marks are in line. Once you have your final marks on the wall, use a level between them to make sure they line up evenly with one another. If the clips aren't level, the mirror will appear crooked on the wall and it won't be fastened securely.
-
8Install the top clips. Drill a hole on each mark for the anchors. Tap the anchors in until they are flush with the wall. Fasten the top clips into the anchors using a Phillips head bit or screwdriver.
- Take the time to make sure the channel of the clip is parallel to the floor before you tighten the screw all the way down.
-
9Press the top edge of the mirror into the top clips. Hold the mirror on either side and use enough pressure against the top clips that the springs are fully compressed. Maintain that pressure up top and gently guide the bottom edge of the mirror into place.[6]
- Consider wearing gloves to protect your hands during the final installation.


Using Friction Mounts to Display Glass Art in Windows
-
1Purchase friction mounted utility hooks to display glass art in your window. They come in packs of 4 and are rated to hold up to 10 pounds (4.5 kg) each. Unlike suction mounted hooks, they do not slide or pop off the window.[7]
-
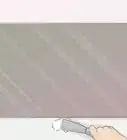
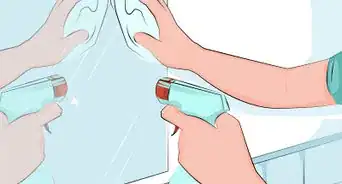
2Select a location for your mount and make sure the surface is clean. Spray glass cleaner around the area and wipe it down with a paper towel. It’s always best to start with a clean surface when applying any kind of adhesive.
-
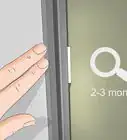
3Remove the adhesive backing and press the mount firmly onto the window. Smooth out any air bubbles by pressing toward the outside of the circle. Once it is in place, press the mount at its center and check to make sure that it is flush with the window.
- If you make a mistake and want to reposition the mount, simply peel it off and start again.
-
4Attach the hook to the mount. In some cases, the hook will be separate from the mount. If so, slide the hook down over the center post. Attach the hanging hardware of your glass art to the hook.[8]


Things You’ll Need
Hanging Glass Art and Signage
- Set of edge grip stand-off mounts and hardware
- Masking tape
- Pencil
- Tape measure
- Drill and bit to match the anchors
- Phillips head driver bit or screwdriver
- Level
- Hammer
Using Clips for Frameless Mirrors
- Set of 4 mirror clips and hardware
- Pencil
- Tape measure
- Drill and bit to match the anchors
- Phillips head driver bit or screwdriver
- Level
- Hammer
Using Friction Mounts to Display Glass Art in Windows
- Friction mount
- Paper towels
- Glass cleaner


References
About This Article