This article was co-authored by Garrison Hullinger. Garrison Hullinger is an Interior Designer and the President of Garrison Hullinger Interior Design (GHID). With more than 15 years of experience, he specializes in client-centered design that balances beauty and warmth with comfort and functionality. Garrison and GHID’s work has been featured in numerous publications such as The New York Times, The Wall Street Journal, and Interior Design Magazine. Garrison attended Oklahoma Christian University.
There are 14 references cited in this article, which can be found at the bottom of the page.
This article has been viewed 52,690 times.
Mixtiles are custom-printed stick-on photo tiles that make creating your own personalized gallery wall effortless. Once you’ve ordered your tiles from the Mixtiles app or website, hanging them is a breeze—just peel the backing off the adhesive mounting pads and press them into place on your wall wherever you think they’ll look good. If at any point you decide to change up the layout of your tiles, you can try out a whole new arrangement by pulling them free and shuffling them around however you desire.
Steps
Applying the Tiles
-
1Remove the backing from the adhesive pad on the rear side of the tile. You’ll find this piece on the top section of the frame. Loosen the edge of the backing with your fingernail to get it started, then peel it off like you would a sticker. You’re now ready to add your first tile to the wall.[1]
- The adhesive mounting pad spans nearly the entire length of the frame and is the same color on white Mixtiles, so it may be easy to overlook at first sight.
- To avoid wearing out the adhesive on your Mixtiles prematurely, hold off on removing the backings until you actually begin hanging them.
-
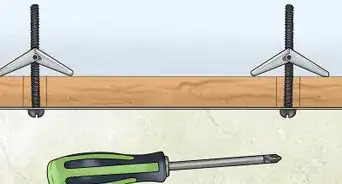
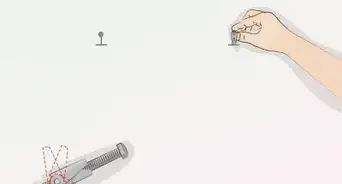
2Use a tape measure or ruler to keep the spacing of your tiles uniform. Try out different spacings until you find one that you think would work well for your display wall. Then, stretch your measuring device from the edge of one tile to the edge of the neighboring tile and jot down the number you see. It will serve as a handy reference while you’re hanging the rest of your tiles.[2]
- If you’ve got tiles, you can speed things up a bit doing all of your measuring at once and marking your intended hanging sites with strips of tape. When you’re done, simply peel off and dispose of the tape.
- There’s no need to go to the trouble of breaking out a tape measure if you’d rather keep things simple. Since the tiles are a cinch to remove and replace, you can always just eyeball it and make necessary adjustments as you go.
Advertisement -
3Check the final alignment of your tiles with a level. Hold each of your tiles up to the wall and perch your level on the upper part of its frame as you work on getting them positioned. That way, you’ll be able to see at a glance whether the edges are even, with no time-consuming trial and error required.[3]
- Mixtiles have frames that are around 1 inch (2.5 cm) thick, which should provide a perfect ledge for a compact level.
- When it comes to putting together complex displays, a laser level can allow for faster, more precise placement than a standard spirit level.[4]
Tip: If you don’t own a level, fear not: these days, most smartphones come equipped with digital versions of the tool.[5]
-
4Press the upper edge of the tile into the wall. Take a moment to double-check that the tile is properly spaced and aligned. When you’re happy with its placement, push the top part of the frame straight into the wall, applying firm pressure with both hands. That’s all there is to it![6]
- Be careful not to use too much force, or you could damage the tile accidentally.
- Each individual Mixtile is constructed around a core of lightweight foam, which means it doesn’t take much sticking power to keep it up.[7]
-
5Pull up on the tiles from the bottom gently when you’re ready to remove them. Take hold the bottom edge of the tile and lift it away from the wall at a slight angle. Doing so will gradually weaken the grip of the adhesive pad, causing the tile to come away with little effort.[8]
- Unlike ordinary framed wall art, it’s possible to rearrange Mixtiles many times without leaving a bunch of unsightly holes in your wall.
-
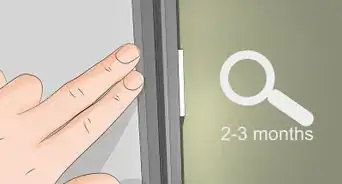
6Reuse your tiles as many times as you please. Possibly the biggest selling point of Mixtiles is that after removing them from one spot, it takes just as little time to tack them up in another location. The company doesn’t guarantee the lifespan of their adhesive pads, but claims that they’ll hold up to “a few dozen” separate hangings, provided they’re used correctly.[9]
- Strips of pre-cut glossy photo paper could make decent improvised backings if you ever decide to put your Mixtiles into storage.
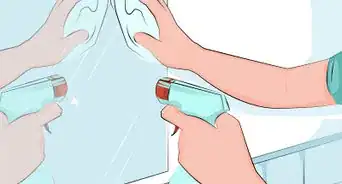
- Try not to let the adhesive pads come into contact with dust, dirt, liquids, oil from your skin, or any other substances that might inhibit their ability to stay put.


Arranging Your Mixtiles
-
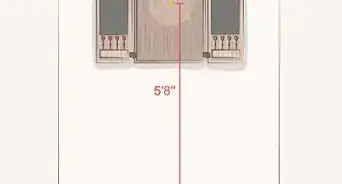
1Pick out an open section of the wall to display your Mixtiles. Look for a spot that’s spacious enough to comfortably accommodate the number of tiles you’re hanging. To draw as many eyes to your photos as possible, consider mounting them in areas where your guests’ eyes are most likely to settle, such as inside the entry hallway, at the foot of the central staircase, or above the couch in your living room.[10]
- Mixtiles only come in one size—8 in (20 cm) x 8 in (20 cm). This simple, one-size-fits-all design should make it easy to put up as few or as many as you like with minimal planning.[11]
-
2Experiment with different layouts on the floor before you hang your tiles. This will give you a sneak preview of how the various images look next to each other and let you decide whether you like what you see. If a tile doesn’t quite fit in a given position, simply move it somewhere else.[12]
- When you’re ready to start putting your tiles on the wall, make sure you do it in a sensible order (like top to bottom, left to right) so you don’t lose track of where you wanted them.[13]
- One advantage of Mixtiles’ universal size is that you won’t have to obsess about which photos look best in relation to others based on their individual dimensions.
-
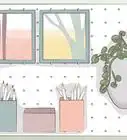
3Go with a simple grid pattern for an instantly attractive, no-fuss display. Just line your tiles up in evenly-spaced rows and columns and call it a day. The neat, orderly, symmetrical presentation will create a satisfying focal point without requiring a lot of unnecessary work on your part.[14]
- Plot your grid based on the total number of Mixtiles you’re working with, as well as the dimensions of your available wall space. If you have 9 tiles, a basic 3x3 layout will probably look best; if you have 12 tiles, choose between either 4x3 or 3x4; for 20 tiles, make it 5x4 or 4x5, and so on.[15]
- This approach will be your best bet if you just want to get your photos up on the wall and aren’t too particular about how they’re configured.
-
4Play around with irregular layouts to lend your gallery wall added personality. If the idea of a straightforward grid setup doesn’t appeal to you, think outside the box—literally. You could, for example, take advantage of the effortless stylistic effect of offset rows, or place your tiles in a vertical stack, loose arch, or right angle. There’s no wrong way to go about it![16]
- You also have the option of clustering your Mixtiles into multiple small groupings rather than one big one, which opens up a whole new realm of hanging possibilities..
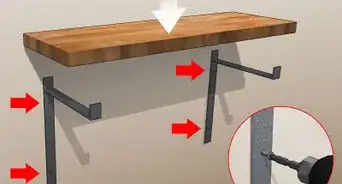
Tip: If you have any other items you want to show off on your display wall (such as a shelf, shadowbox, or larger piece of artwork), figure out where you want them to go, then use your Mixtiles to frame or accentuate them.
-
5Make unique shapes or designs for more of a free-form approach. There’s no need to limit yourself to traditional display methods, or to any method at all, for that matter. Letters, diamonds, crosses, pyramids, spirals, chevrons—it’s all fair game. A gallery wall is meant to be a reflection of your own aesthetic sensibilities, so feel free to get as creative as you like.[17]
- Look through some of the sample layouts on the Mixtiles app for further ideas and inspiration. You’ll also find lots of imaginative uses for the product on the company’s social media accounts, or by browsing the hashtag “#mixtiles.”[18]
- If you haven’t done so already, you’ll have the option to design and order your first batch of Mixtiles directly through the app.


Things You’ll Need
Applying the Tiles
- Tape measure (optional)
- Spirit level (optional)
- Glossy photo paper (optional)


References
- ↑ https://www.youtube.com/watch?v=4pRBodN7VGk&feature=youtu.be&t=79
- ↑ https://www.realhomes.com/advice/how-to-hang-a-gallery-wall
- ↑ https://www.mentalfloss.com/article/534737/how-to-hang-a-picture
- ↑ https://www.laserleveladvisor.com/use-laser-level-hang-pictures/
- ↑ https://support.apple.com/guide/iphone/use-the-level-iphbd435673d/ios
- ↑ https://www.youtube.com/watch?v=wZ5sYsU_Wlc&feature=youtu.be&t=238
- ↑ https://www.mixtiles.com/
- ↑ https://www.youtube.com/watch?v=4pRBodN7VGk&feature=youtu.be&t=93
- ↑ https://www.mixtiles.com/
- ↑ https://www.nytimes.com/2017/11/28/realestate/tips-creating-a-gallery-wall.html
- ↑ https://www.mixtiles.com/
- ↑ https://www.youtube.com/watch?v=-lVvTVhTcoQ&feature=youtu.be&t=162
- ↑ https://www.realhomes.com/advice/how-to-hang-a-gallery-wall
- ↑ https://www.chatelaine.com/home-decor/gallery-wall-ideas/
- ↑ https://www.youtube.com/watch?v=-lVvTVhTcoQ&feature=youtu.be&t=257
- ↑ https://ninasapartment.com/2019/02/15/create-perfect-gallery-wall-layout/
- ↑ https://www.apartmenttherapy.com/gallery-wall-layout-258081
- ↑ https://www.mixtiles.com/
About This Article