This article was co-authored by Kevin Schlosser. Kevin Schlosser is a Home Improvement Specialist and the Owner of Home Tech Handyman Ltd. With over 20 years of experience, Kevin specializes in age-in-place installations, flooring, roofing, and general remodeling handyman services. Kevin holds a blend of construction and in-home technology-related certifications including NAHB Certified Age-in-Place Specialist, CEDIA membership and certifications, and a Certification from the Association of Certified Handyman Professionals. Also, he is in training to receive certifications in Construction, Project Management, and other CEDIA qualified system integrator certifications. He is fully-insured in the state of Colorado.
There are 10 references cited in this article, which can be found at the bottom of the page.
This article has been viewed 40,786 times.
When you don’t have a coat closet, a coat rack can be a real lifesaver. Instead of tossing your coat over the back of a chair or somewhere else in the way when you come in from a cold day, you can hang it up neatly near the door to keep your entryway and furniture clutter free. You don’t have to be a DIY expert to put up a coat rack, either. Just take a look at these answers to some of the most common questions about hanging coat racks to get started!
Steps


How do you hang a heavy coat rack on the wall?
-
1Start by marking the location of the rack’s screw holes on the wall. Measure the distance between the 2 holes on the coat rack using a tape measure. Measure the same distance apart on your wall where you want to hang the coat rack and make a small pencil mark at each end of the tape measure.[3] [4]
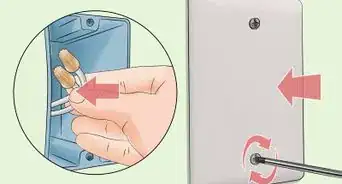
- Screw the rack into wall studs if possible. Check whether there are studs behind the wall with a stud finder. Turn it on and move it over the wall where you’re hanging the coat rack. When it beeps, there is a stud behind the drywall there.
- Use a level to make sure the tape measure is horizontally level across your wall before you make the marks. Otherwise, your coat rack is going to be crooked![5]
- Another way to mark the holes is to hold the coat rack against the wall where you want it, check that it’s level, then push a screw firmly through each screw hole into the wall to make small indentations where the screws go.
-
2Drill holes where the screws will go before you hang the coat rack. Choose a drill bit that’s slightly smaller in diameter than the coat rack’s mounting screws and attach it to an electric drill. Carefully drill straight into the wall where each mark you made for the screw holes is.[6]
- After you drill the first hole, line up the coat rack’s first hole with it and double-check that the second hole still lines up with your second mark.
-
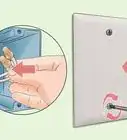
3Screw the coat rack into the wall. If the screw holes have studs behind them, screw the coat rack directly into the studs. If the wall is just drywall, push drywall anchors into the holes first, then screw the coat rack into the anchors.[7]


How do you make a hanging coat rack?
-
1One idea is to make a hanging coat rack out of wooden hangers. Cut 1 wooden arm of each coat hanger off, just to 1 side of the hook. Screw the hangers to a wooden board with the cut sides flat against the board and the remaining arms facing upwards, so the hooks are facing downwards. Mount the board on any wall, just as you would a store-bought coat rack.[13]
- Feel free to turn the coat hangers in different directions to give your DIY coat rack a funky artistic look!
-
2Another idea is to use a curtain rod and clip rings. Fasten the curtain rod’s mounting brackets to your wall wherever you want your coat rack to be. Slide some clip rings over the rod and place it into the mounting brackets on the wall. Then, clip your coats to the rings whenever you want to hang them up![14]
- As an alternative to clip rings, hang S-shaped hardware hooks over the curtain rod and use them like regular coat hooks.


References
- ↑ https://homedecorbliss.com/how-high-should-a-coat-rack-be/
- ↑ https://www.apartmenttherapy.com/9-creative-ways-to-organize-your-coats-and-hats-by-the-door-when-you-dont-have-a-coat-closet-239859
- ↑ https://www.ironmongeryworld.com/blog/how-to-install-a-coat-rack/
- ↑ https://www.youtube.com/watch?v=O0ZwahSYVwc&t=115s
- ↑ https://www.ironmongeryworld.com/blog/how-to-install-a-coat-rack/
- ↑ https://www.youtube.com/watch?v=pbsKss53T50&t=215s
- ↑ https://www.youtube.com/watch?v=pbsKss53T50&t=305s
- ↑ https://www.youtube.com/watch?v=Z20q_NhDgwk&t=200s
- ↑ https://shop.velcro.co.uk/blogs/diy/how-to-hang-a-coat-rack-without-drilling
- ↑ https://www.command.com/3M/en_US/command/projects/all-projects/fall-coat-rack/
- ↑ https://www.command.com/3M/en_US/command/projects/all-projects/fall-coat-rack/
- ↑ https://www.elledecor.com/home-remodeling-renovating/a985/the-hang-of-it-17486/
- ↑ https://www.apartmenttherapy.com/9-creative-ways-to-organize-your-coats-and-hats-by-the-door-when-you-dont-have-a-coat-closet-239859
- ↑ https://www.apartmenttherapy.com/9-creative-ways-to-organize-your-coats-and-hats-by-the-door-when-you-dont-have-a-coat-closet-239859
About This Article