This article was co-authored by wikiHow Staff. Our trained team of editors and researchers validate articles for accuracy and comprehensiveness. wikiHow's Content Management Team carefully monitors the work from our editorial staff to ensure that each article is backed by trusted research and meets our high quality standards.
There are 11 references cited in this article, which can be found at the bottom of the page.
wikiHow marks an article as reader-approved once it receives enough positive feedback. In this case, 86% of readers who voted found the article helpful, earning it our reader-approved status.
This article has been viewed 26,911 times.
Learn more...
Whether you have a beach house or just love the ocean, hanging a decorative fishnet is an easy way to add a nautical feel to your decor. Start by deciding whether to hang the net on a wall, corner, or ceiling. Plan the arrangement, then install fasteners, such as push-pins, hooks, or nails. Secure the net to the fasteners, then add decorative accessories. Use seashells, starfish, or fishing lures to reinforce the nautical theme, or add elegance with sparkling chandelier crystals.
Steps
Choosing a Location
-
1Hang the net flat on the wall for a simple look. The easiest way to decorate with a fishnet is to hang it flat on a wall. You could display the net on its own, hang seashells or starfish in it, or place photographs of family and friends in it.[1]
- Go with this option if you have limited space and want to keep your project simple.
-
2Drape the net around wall art to create a focal point. For a more elaborate feature wall, arrange the net around framed wall art or a nautical object. A framed map, beach-themed picture, driftwood, fishing poles, or a ship's wheel are all great choices.[2]
- This is a good option if you want to dress up an existing wall display or if you want to create a one-of-a-kind installation.
Advertisement -
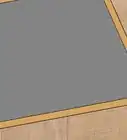
3Hang the net in a corner to add volume and interest. Hanging the net in a corner allows you to play with various shapes and add a third dimension. You could hang the net so it spans between 2 walls and the ceiling, then add nautical-themed accessories.[3]
- Hanging the net in a corner is perfect if you need to add flair to a large, empty space.
-
4Use netting as a headboard for a beach-inspired bedroom. Hanging a fishnet on the wall at the head of a bed can add a beachy feel to any bedroom. You could also hang it around a canopy bed or suspend it around the bed from the ceiling.
- Get creative and dress up your headboard by draping the net around fishing poles, driftwood, and other nautical objects. You could also add a personal touch and make your initials by gluing together seashells.[4]
-
5Create a ceiling installation if you want a unique, dramatic look. If you want to make a statement, hang the net on the ceiling around a skylight or recessed lights. Turn the net into a work of art by arranging lots of small chandelier crystals all over it. They'll catch the light and sparkle like beads of water clinging to a fishnet that's just been pulled from the sea.[5]
-
6Avoid hanging the net near light fixtures, ceiling fans, and other hazards. Make sure the net won't touch a hot light fixture, get tangled in a fan, or come into contact with an electrical outlet. If you have small children or pets, keep the net out of their reach, especially if you're accessorizing it with heavy or delicate objects.


Planning the Arrangement
-
1Spread the net and play with different arrangements. When you've chosen the right location, experiment with various ways of draping the net. Spread it out flat, bunch it into different shapes, and drape it around framed art or any other objects you've decided to include.
- If the net is larger than your reach, get someone to help you spread it across the wall, corner, or ceiling.
-
2Mark where you'll need to attach the net. After you've chosen an aesthetically pleasing arrangement, make a mental note of where you'll need to install pins, hooks, or nails to secure the net. You can mark spots with a pencil if you'd like, but you probably won't need to be too precise.
- Since the net is flexible, you'll be able to manipulate it to achieve the right look after installing the pins, hooks, nails.
-
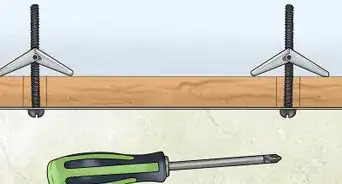
3Locate a stud if you plan on using heavy accessories. If your net needs to bear weight, use a stud finder to find the support studs in your wall or joists in your ceiling. Move the stud finder around the spots where you want to secure the net, then mark the studs' locations with a pencil.[6]
- If you can't find studs, use drywall screws that come with plastic screw-in anchors.


Using the Right Fasteners
-
1Decide how many fasteners your arrangement requires. The number of pins, hooks, or nails you'll need depends on the size of your net and how you want to arrange it. For instance, you could use 2 fasteners to hang it from the top corners and let the bottom hang loose, or you could use 3 or 4 fasteners to drape the net in a rounded organic shape.
-
2Use push-pins or adhesive hooks if you don't want to damage walls. Push-pins and adhesive hooks don't require any tools, so they're your easiest option. Use transparent pins or hooks so they're less noticeable. Simply stick them on the wall or ceiling where you want to secure the net.[7]
- Pins and adhesive hooks can support a few light shells or starfish. However, if you want to decorate the net with heavy or delicate objects, like driftwood or crystals, you should go with a more durable hanging method.
-
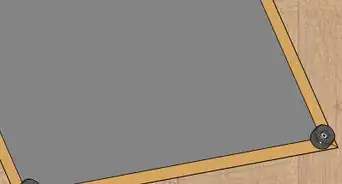
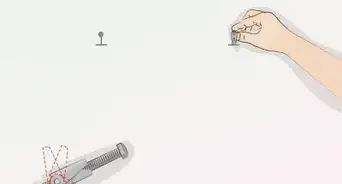
3Go for nails or anchors if you're decorating the net with heavy objects. Locate the studs, then hammer nails or picture anchors into the spots you marked. If you're using nails, leave about a 1⁄4 inch (0.64 cm) length exposed from the wall. You'll loop the net's squares around this length to secure it to the wall.[8]
-
4Hang netting from the ceiling with hooks if it needs to bear weight. Use a stud finder to locate the ceiling joists, then mark the spots with a pencil. Screw ceiling plant hangers into the spots where you want to secure the net.[9]
- You might need to drill pilot holes for the hooks. If necessary, check the size of the hooks' screws, and use a drill bit half of that diameter. For example, if your screws are 1⁄8 inch (0.32 cm), drill pilot holes with a 1⁄16 inch (0.16 cm) bit.
- If you're hanging the net from the ceiling, make sure it doesn't come into contact with a light fixture.
-
5Use screws with anchors if you can't find studs. Screw the anchor into the wall or ceiling with a screwdriver or drill, then drive the screw into the anchor hole. Leave a small length of the screw exposed instead of driving it flush with the wall.[10]
-
6Loop squares around the pins, hooks, or nails to attach it to the wall. After installing the pins, hooks, or other fasteners, grab a square at the edge of the net. Loop the square around the fastener, then repeat to hang the net by the other fasteners. If necessary, play with the net's arrangement until you've achieved the right look.[11]


Accessorizing the Net
-
1Add seashells, starfish, driftwood, and other nautical accessories. You can easily weave seashells with points and starfish into the net. Hooked fishing lures and floats are also easy to attach to the net. Use clear-drying craft glue to attach objects that won't stay in the net on their own.[12]
- Large elements, like driftwood or an oar, can also add interest. Try screwing eyelets into driftwood, then loop picture wire between them. Use a nail or picture hook to secure the driftwood to the wall, then drape the net around it.
-
2Incorporate photographs, maps, or art in a feature wall. Make a beachy vignette by hanging the net around a framed map or a picture of nautical scenery.[13] Drape the net on the right side of or above wall art. Heavier objects are usually more aesthetically pleasing when they're at the bottom and left side of a grouping.[14]
-
3Take fire safety precautions if you want to hang lights with the net. Hanging a string of lights with a fishnet is popular, but it's a potential fire hazard. Using LED lights greatly reduces the risk of fire, since they don't put off much heat.[15] You can also spray the net with a flame retardant chemical labelled for fabric and textiles.[16]
- You can find flame retardant sprays online or at a hardware store. Use your product as directed and spray it in a well ventilated area.
-
4Add elegance by attaching small chandelier crystals to the net. Purchase small, hooked chandelier crystals online or at a craft store. Hang them on the net and arrange them in an even pattern to create a unique, sparkling focal point.[17]
- The right amount of crystals depends on the size of your net and how densely you want to arrange them. If you're on a budget, scatter 10 to 20 crystals across a net that's about 5 feet (1.5 m) wide. If you want to go all out, cover the net with at least 100 to 200 crystals.
- A crystal-covered fishnet is perfect if you have a skylight, large windows, or recessed lighting. The crystals will catch the light and glimmer.


Things You'll Need
- Decorative fishnet
- Push-pins, hooks, nails, or other fasteners
- Pencil
- Hammer
- Screwdriver
- Drill
- Seashells, starfish, chandelier crystals, or other accessories


References
- ↑ http://www.purplehuesandme.com/2013/07/seashell-monogram.html
- ↑ http://www.purplehuesandme.com/2013/07/seashell-monogram.html
- ↑ https://www.youtube.com/watch?v=E0hu6WIy7_Q&feature=youtu.be&t=84
- ↑ http://www.purplehuesandme.com/2013/07/seashell-monogram.html
- ↑ https://design-milk.com/hanging-around-at-the-philadelphia-museum-of-art/
- ↑ https://www.thisoldhouse.com/how-to/how-to-choose-right-hanging-hardware
- ↑ https://www.thisoldhouse.com/ideas/smart-safe-holiday-decorating
- ↑ https://www.thisoldhouse.com/how-to/how-to-choose-right-hanging-hardware
- ↑ https://homesteady.com/how-12178064-hang-weightbearing-hooks-ceiling.html
- ↑ https://www.thisoldhouse.com/how-to/how-to-choose-right-hanging-hardware
- ↑ https://www.youtube.com/watch?v=E0hu6WIy7_Q&feature=youtu.be&t=88
- ↑ http://www.purplehuesandme.com/2013/07/seashell-monogram.html
- ↑ https://www.decoist.com/2012-03-29/decorating-with-a-nautical-theme/
- ↑ https://www.bhg.com/decorating/home-accessories/wall-art/how-to-arrange-art/?slideId=b683fbae-97b6-4dc6-ab6c-e709361e25fc
- ↑ http://www.fire.ca.gov/communications/communications_firesafety_holiday
- ↑ http://www.latimes.com/business/realestate/la-re-fire25nov25-story.html
- ↑ https://design-milk.com/hanging-around-at-the-philadelphia-museum-of-art/
About This Article