This article was co-authored by wikiHow Staff. Our trained team of editors and researchers validate articles for accuracy and comprehensiveness. wikiHow's Content Management Team carefully monitors the work from our editorial staff to ensure that each article is backed by trusted research and meets our high quality standards.
There are 17 references cited in this article, which can be found at the bottom of the page.
This article has been viewed 24,970 times.
Learn more...
If you want to protect a kayak from the elements when it isn’t in use, keep it indoors. The ideal place to store a big, bulky watercraft is in your garage. Hanging it is a great way to keep it safe and clean. The easiest way to do this is by screwing a hanger to the support beams in the garage wall. It will allow you to stand the kayak up in an out of the way spot. If you don’t have room for a wall hanger, suspend the kayak from the ceiling instead. It makes the kayak more accessible so you can clean it while it’s in storage. Protect your kayak throughout the winter so that it’s in great shape the next time you are ready to go out on the water.
Steps
Putting up Wall Hangers
-
1Find the wooden support beams in the wall with a stud finder. A stud finder is an electronic device that beeps when it is pointed at the wood beams framing the walls. These beams are spread out evenly along each wall. Go to where you plan on hanging the kayak and check for studs. Mark their locations with a pencil so you can use them later to secure the wall hanger.[1]
- For stability, the wall hanger has to connect to the studs. It can’t be installed over drywall or else it will come out and leave your garage with an unsightly hole.
-
2Measure the length of the kayak to determine where to place the hangers. Stretch a tape measure between the kayak’s bulkheads, which are the watertight compartments before and after the seat in the center. They are about ¼ of the way from the kayak’s ends. After taking the measurement, compare it to the space you have available and the location of the studs in your garage. Make sure the kayak will fit in the area you plan on using.[2]
- The center part of the kayak is heaviest, so position the hangers underneath it instead of the ends. It will help protect your kayak from damage.
Advertisement -
3Position the hangers on the wall and mark their location. Outline the hangers in pencil if you need to. The most important part is noting where the screws will go. Look for the screw holes on the hangers, then mark these spots on the walls. Make sure they align with the studs.[3]
- Double-check that the marks are in the correct spot before you start drilling. Make sure they are spaced according to the kayak’s length.
-
4Screw the arm hangers to the wall with steel screws. Arm hangers often come with screws you can use to connect them to the studs in your garage’s walls. If you need to buy screws, try using ones that are 7⁄32 in (0.56 cm) wide and 3 in (7.6 cm) long. Hold the hangers against the wall, fit the screws into the holes, then secure them with a cordless screwdriver.[4]
- Work gradually when securing the screws. Tighten them so the heads are level with the wall. Overtightening them could damage the threads or the wall.
- Touch the arm hangers and try to move them. If they feel loose, they may not be able to support the kayak. Tighten the screws as needed.
-
5Fit the kayak on top of the hanging arms. Pick up the kayak and turn it on its side. Face the kayak’s bottom edge toward the wall. Make sure the hanging arms are stable and positioned correctly. Once you’re sure everything is good, leave the kayak alone so you can install the remaining hangers.[5]
- Mounting the kayak now will give you a better idea of where to position the eye hooks. You could also measure the kayak’s width and use it to position the hooks.
-
6Drill pilot holes 1 to 2 in (2.5 to 5.1 cm) above the kayak. Choose a drill bit that is slightly smaller than the hangers you plan on using. If you’re going to use eye screws that are 3⁄8 in (0.95 cm)-wide, use a 1⁄4 in (0.64 cm)-wide drill bit. Drill about 3 in (7.6 cm) into the wood. Make 1 hole on the left side and another on the right, or 2 holes total.[6]
- Make the pilot holes on the studs directly above the arm hangers. If they are too distant from the hangers, they won’t be as effective at strapping the kayak in place.
-
7Make another pair of pilot holes about 1 in (2.5 cm) from the hanger arms. Position these holes near the bottom edge of the hanger arm and underneath the kayak. Try to keep them aligned with the upper holes as much as possible. These holes will be used to strap the kayak to the wall to reduce the chances of it falling off the mount.[7]
- Keep these holes near the arm hangers so they are close to the bulkheads. This will give you plenty of opportunity to tie up the heaviest part of the kayak.
-
8Install eye hooks in each of the holes by turning them clockwise by hand. Eye hooks have threaded ends that fit into the pilot holes. Turn them until they are all the way into the wood and secure. The opposite ends of the hooks are rings that provide an attachment point for cords you can use to secure the kayak.[8]
-
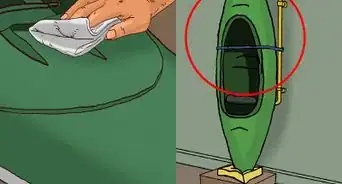
9Secure the kayak to the mount with a pair of bungee cords. Select a pair of elastic cords that have hooks on both ends. Connect the cords to the lower eye hooks, then attach them to the corresponding upper hooks. Make sure the cords are tight against the kayak so there is no way it can fall off the arm hangers if someone bumps it.[9]
- If the kayak isn’t secure enough for you, use more cords. Try hooking carabiners to some rope and wrapping it around the ends of the kayak. Latch the carabiners to the eye hooks to keep the rope tight against the kayak.


Using a Ceiling Hanger
-
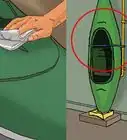
1Measure the length and width of your kayak with measuring tape. Measure the distance between the kayak’s bulkheads, which are the watertight compartments right before and after the seat in the center. Then, for the width, measure the middle part of the kayak where it is widest. The widest part will be where the seat is. These measurements are necessary for spacing out the supports used to suspend the kayak.[10]
- The bulkheads are about ¼ of the way from the kayak’s ends. The middle part of the kayak is the heaviest part, so it needs additional support. If you use the total length of the kayak when measuring, the suspension system will only support the nose and tail.
-
2Use a stud finder to locate the joists in the ceiling. The suspension system has to be bolted to these wooden support beams for stability. Using a stepping stool, climb up to where you plan on hanging the kayak and listen for the stud finder to beep. Mark the locations of the studs in pencil.[11]
- The hardware used to hang the kayak should never be set over bare drywall. The kayak’s weight could tear the screws straight out of the wall. Finding the supports not only leads to a sturdier hanging system, but it protects your garage from damage!
- Stud finders are available online or at most hardware stores. While you’re shopping, pick up the other tools needed to hang your kayak.
-
3Mark installation points according to the kayak’s length and width. Climb back up on a stepping stool and use a tape measure to determine where to hang the kayak. Use the bulkhead length first. Then, measure side to side according to the width and the position of the nearest joists. The hanging system requires 4 total spots, which means 2 on the left and 2 on the right.[12]
- The joists may not line up exactly with your measurements, but that is fine. Work with the nearest ones. The installation points may be spaced a little further apart compared to the kayak’s width, but it won’t affect anything.
- Remember to center the installation points along the joists. If you attempt to attach the screws to drywall, they won’t hold.
-
4Drill pilot holes through the marked spots with a power drill. The holes should always be a little smaller than the hangers you plan on installing. For a basic hanging system, try using a 1⁄4 in (0.64 cm) drill bit. Drill about 1 1⁄2 in (3.8 cm) into the joists at each mark.[13]
- Match the drill bit to the type of material making up your garage’s ceiling. Use a standard wood-safe drill bit for most garages. If you’re drilling through stone, choose a masonry bit instead.
-
5Screw eye hooks by hand into the pilot holes. An eye hook is a type of hanger that is threaded like a screw on one end and has a loop on the other. Choose eye hooks that are a size wider than the holes you made. Try using 3⁄8 in (0.95 cm) screws for 1⁄4 in (0.64 cm)-wide pilot holes. Then, insert the threaded end of a screw into a pilot hole and turn it clockwise until it is firmly inside the wood.[14]
- Match the length of the threaded end of each screw to the depth of your pilot holes. For example, use a 1 1⁄2 in (3.8 cm)-long screw for a pilot hole with the same depth.
- The length of the hook end isn’t very important, so you can choose whatever size is available.
-
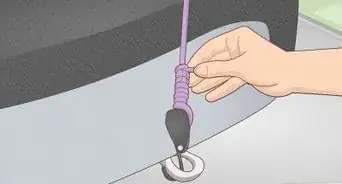
6Run tie-down straps between the left and right hooks. Tie-down straps are very easy to use since they have plastic hooks that latch onto the eye screws. Hook the end of one strap to an eye screw on the left and a corresponding one on the right. Do the same with the opposite pair of screws. This will leave you with a pair of straps hanging in a U-shape, ready to hold up the kayak.[15]
- Tie-down straps are available online and at most hardware stores.
- If you’re looking for a hanging system that allows you to raise and lower the kayak, buy a ceiling hoist or make one yourself. One way to do this is by attaching metal pulleys to the eye hooks, then tying the kayak to hooks placed on the bottom of the pulleys.[16]
-
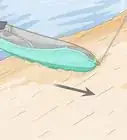
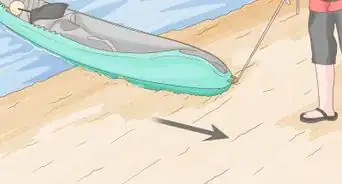
7Lift the kayak onto the tie-down straps. Pick it up and slide it through the straps from the back. Position it so the first strap is about 1⁄4 in (0.64 cm) from its nose, aligned with the first bulkhead. The rear strap will be 1⁄4 in (0.64 cm) and aligned with the rear bulkhead. Make sure the kayak is well-supported and secure.[17]
- When you’re ready to remove the kayak, you can slide it back out from between the straps. In the meantime, the straps allow you to easily access the underside and interior for cleaning.


Installing a Pre-Built Hanger
-
1Purchase a hanger that fits where you plan on placing the kayak. The most common and inexpensive hangers are ones that mount on the wall. However, there are also ceiling hangers you can buy if you wish to suspend the kayak. When choosing hangers, keep in mind your storage space. Make sure you get the right type of hanger.[18]
- Hanging systems are available online. Some hardware stores may have them available. Check sporting good stores as well.
-
2Measure the length of the kayak before installing the hangers. Kayaks come in different sizes, so figure out where the watertight bulkheads are on yours. They are about ¼ of the way from the ends and surround the central compartment. Use a tape measure to determine the distance between them. Plan on installing the mounts for the hanging system near the bulkheads.[19]
- The central part of the kayak is the heaviest. By placing them near the bulkheads, the hanging system is better able to support the kayak’s weight.
-
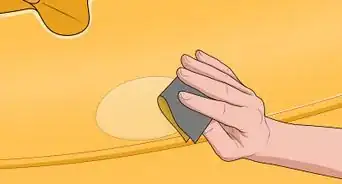
3Mark the position of the hangers on the wall in pencil. Use the kayak’s length measurement to place the hangers. Start on one end and hold the hanger mount up to the wall. Outline it with a pencil, noting the location of the screw holes. Measure out and repeat this with the opposite mount.[20]
- Make sure the mounting brackets are positioned correctly before attempting to install them.
-
4Screw the mounts to the wall with steel screws. Hold the mounts against the wall, lining them up with the outline you drew. Then, place the screws and use a cordless screwdriver to drive them into your garage. Tighten the screws so their heads are roughly level with the surrounding wall. Stop when you feel resistance and can no longer rotate them clockwise with ease.[21]
- The mounting system you bought will come with screws, so you won’t need to buy any.
- Note that the hardware will vary depending on what mounting system you buy. If you’re unclear about how to install a part, refer to the manufacturer’s instructions.
-
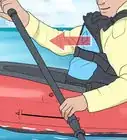
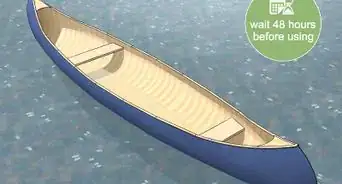
5Fit the kayak on top of the mounts. Pick up the kayak and slide it onto the mounts. If you’re using a wall mount, rotate the kayak so its on its side with the bottom surface facing the wall. If you’re using a ceiling mount, look for straps that attach to the mounts. They have to be connected first before you can suspend the kayak.[22]
- Ceiling mounts usually have straps that hang from hooks and pulleys. The straps form loops that you slide the kayak through to hang it.
-
6Connect the straps to the mount if the hanging system has any. Wall mounts often include a couple of straps that tie to the mounts in order to hold the kayak in place. The straps often hook onto metal rings on the ends of the mount. Make sure the straps are tight against the kayak so it can’t get knocked down while it’s in storage.[23]
- For ceiling mounts, you may need to wrap the straps around pulleys used to raise and lower the kayak. The exact setup can vary a lot depending on the mounting system, so check the manufacturer’s instructions for more information.


Warnings
- To avoid damage to your garage when hanging a kayak, note the positioning of the studs and joists in the wall. Install hangers on these support beams instead on bare drywall.⧼thumbs_response⧽
Things You’ll Need
Using a Wall Hanger
- Stud finder
- Measuring tape
- Pencil
- 4 7⁄32 in × 3 in (0.56 cm × 7.62 cm) steel screws
- Cordless screwdriver
- Drill
- 1⁄4 in (0.64 cm)-wide drill bit
- 4 3⁄8 in (0.95 cm)-wide eye hooks
- 2 bungee cords
Using a Ceiling Hanger
- Stud finder
- Measuring tape
- Pencil
- Stepping stool
- Drill
- 1⁄4 in (0.64 cm)-wide drill bit
- 4 3⁄8 in (0.95 cm)-wide eye hooks
- 2 tie-down straps
Installing a Pre-Built Hanger
- Mounting system
- Screws
- Mounting brackets
- Tie-down straps or cords
- Measuring tape
- Cordless screwdriver


References
- ↑ https://www.youtube.com/watch?v=YsPgD73jf1Y&feature=youtu.be&t=49
- ↑ https://www.youtube.com/watch?v=MV7I2zZauOo&feature=youtu.be&t=117
- ↑ https://www.youtube.com/watch?v=PcMAD87T_wM&feature=youtu.be&t=21
- ↑ https://www.youtube.com/watch?v=PcMAD87T_wM&feature=youtu.be&t=34
- ↑ https://www.youtube.com/watch?v=BT-3LwM5QNI&feature=youtu.be&t=183
- ↑ https://www.youtube.com/watch?v=YsPgD73jf1Y&feature=youtu.be&t=76
- ↑ https://www.youtube.com/watch?v=PcMAD87T_wM&feature=youtu.be&t=103
- ↑ https://www.youtube.com/watch?v=YsPgD73jf1Y&feature=youtu.be&t=86
- ↑ https://www.familyhandyman.com/garage/storage/products-to-maximize-your-garage-ceiling-storage/
- ↑ https://www.youtube.com/watch?v=ldnR02m9bjY&feature=youtu.be&t=31
- ↑ https://www.youtube.com/watch?v=pYdfwROH5vk&feature=youtu.be&t=12
- ↑ https://www.youtube.com/watch?v=3uxeidqVxaY&feature=youtu.be&t=202
- ↑ https://www.youtube.com/watch?v=YYZZKclnT10&feature=youtu.be&t=192
- ↑ https://www.youtube.com/watch?v=YYZZKclnT10&feature=youtu.be&t=258
- ↑ https://www.youtube.com/watch?v=pYdfwROH5vk&feature=youtu.be&t=51
- ↑ https://www.bobvila.com/slideshow/11-neat-garage-storage-solutions-9573#ceiling-bike-hoist
- ↑ https://www.youtube.com/watch?v=XY7ednx3mJA&feature=youtu.be&t=184
- ↑ https://www.familyhandyman.com/garage/storage/products-to-maximize-your-garage-ceiling-storage/
- ↑ https://www.familyhandyman.com/garage/storage/products-to-maximize-your-garage-ceiling-storage/
- ↑ https://www.familyhandyman.com/garage/storage/products-to-maximize-your-garage-ceiling-storage/
- ↑ https://www.bobvila.com/slideshow/11-neat-garage-storage-solutions-9573#ceiling-bike-hoist
- ↑ https://www.bobvila.com/slideshow/11-neat-garage-storage-solutions-9573#ceiling-bike-hoist
- ↑ https://www.bobvila.com/slideshow/11-neat-garage-storage-solutions-9573#ceiling-bike-hoist
- ↑ https://www.bobvila.com/slideshow/11-neat-garage-storage-solutions-9573#ceiling-bike-hoist
About This Article