This article was co-authored by Harmony Corelitz and by wikiHow staff writer, Sophia Latorre. Harmony Corelitz is a Plant Specialist and the Ecommerce Manager at Crimson Horticultural Rarities, Inc, a boutiue offering rare plants, flower arragements, and handmade goods. Harmony grew up helping her parents run their family business in plant maintenance and interior plantscaping. Harmony specializes in indoor plant care and interior plant design. Prior to her workwith Crimson Horticultural Rarities, she started her pop-up plant and vintage home goods shop called Younger Child and helped her former employer, Plants and Friends, grow and expand to two locations. She holds a BA from the University of San Francisco.
There are 13 references cited in this article, which can be found at the bottom of the page.
This article has been viewed 18,729 times.
Having fresh mint on hand to use in your favorite dishes is a real treat! If you’re growing this perennial herb at home, you're probably wondering when to harvest mint. We'll explain that as well as how to harvest mint, how to store mint, and how to use mint. Whether you’re cultivating English garden mint, peppermint, spearmint, or chocolate mint, it’ll only take a few minutes to get this sweet herb from garden to table.
Steps
Harvesting Mint
-
1Harvest just before the mint flowers for the best flavor. The oils are most concentrated in the plant leaves at this stage, so your mint will be the most delicious just before it flowers. However, you can harvest any time from late spring to early fall.[1]
- The mint will flower in the summertime. If you notice flower buds, just pluck them off so the plant uses its energy to grow more leaves instead of to produce flowers.[2]
-
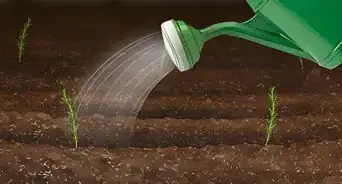
2Pick the mint in the morning. The best time to harvest your mint is after the dew has dried but before it gets too hot. Head out to your garden in the morning to collect the stems.[3]
- Wait until the dew dries so the excess moisture doesn't rot the leaves after you pluck them.
Advertisement -
3Cut off individual stems if you only need a few leaves. There’s not much to it—just use your pruners to trim off a few stems that look good. Wherever you clip the stems, the mint will grow new stems that branch off, leading to more mint.[4] Then, simply pluck the leaves from the stems.[5]
- The smallest, youngest stems usually have the most flavor.[6]
-
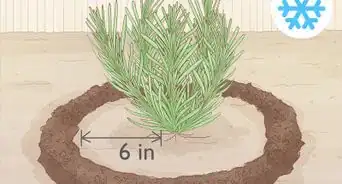
4Trim the plant down to the first set of leaves for a larger harvest. Get out your clippers and cut the mint down to 4–6 inches (10–15 cm), or between the first and second set of leaves. The plant will grow back and produce more mint, so don’t worry.[7]
- You can do this once or twice per season to harvest lots of mint leaves at once.
-
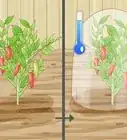
5Keep harvesting mint throughout the growing season. Even after you pluck off stems or cut down the plant, your mint will just keep growing! From spring to fall, you’ll have fresh mint any time you want it.[8]
- Mint will spread and could take over your garden if you don’t harvest it continually.
-
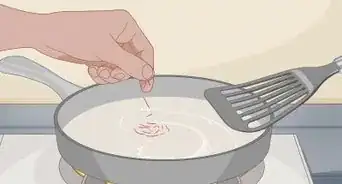
6Rinse and dry the leaves just before you use them. Once you're ready to use the mint, wash the leaves and stems gently with warm water to remove any dirt or debris. Make sure you dry the mint really well, as excess moisture causes them to go bad more quickly.[9]
- Mint has the best flavor when it's fresh, so only harvest as much as you'll use within a day or two whenever possible.


Storing Mint
-
1
-
2
-
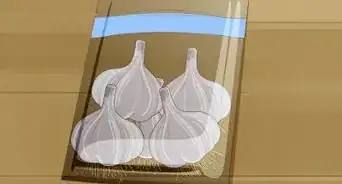
3Freeze extra mint so it lasts longer. Lay out your mint leaves on a tray in a single layer and pop it in the freezer. Once the leaves are frozen (at least 30 minutes), take the tray out and dump the leaves into a plastic bag. Squeeze out all of the air and stick the bag back in the freezer.[14] They’ll last for 1 year.[15]
- Some herbs need to be blanched before freezing, but you’re in luck because mint isn’t one of them![16]
-
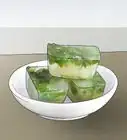
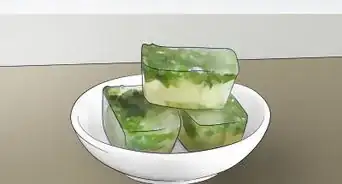
4Create mint ice cubes to pop into drinks and dishes. Chop up your mint leaves and pack them into an ice cube tray. Carefully fill the rest of the tray with water and freeze it. You can either toss these minty ice cubes in drinks or add them right to your pan![17]
-
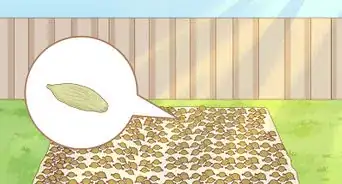
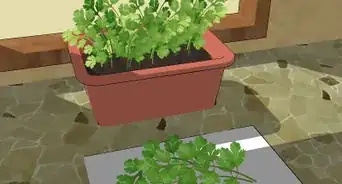
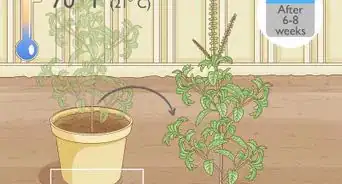
5Dry your mint so you can use it for years to come. Cut a bunch of mint stems and tie them together near the cut end. Hang them upside down in a dark, dry room with a temperature between 70 and 90 °F (21 and 32 °C) for about 2 weeks. When all of the leaves are crispy, pluck them from the stems. Crumble them up if desired, then store them in an airtight glass container.[18]
- Keep your glass container out of the sun and the mint should last 1 to 3 years.[19]


Using Mint
-
1Toss fresh leaves into your favorite recipes. Once you’ve harvested your mint, it’s easy to pop a few leaves or sprigs into any dish. Mint goes especially well with peas.[20] It also pairs perfectly with pork and lamb.[21] You can even add chopped mint to sorbet or fruit salad for a tangy treat![22]
-
2Make mint tea with your freshly harvested leaves. You can have a warm cuppa anytime you want if you’ve got mint in your garden! Just put a couple of leaves in a cup and pour boiling water over top. Steep for up to 5 minutes, then sweeten your tea to your liking.[23]
-
3Freshen up your drinks with mint ice cubes or garnishes. Mint is a staple in many delectable cocktails from a mojito to a mint julep, the official drink of the Kentucky Derby. Toss some mint ice cubes into water, lemonade, or your favorite cocktail. You can even muddle the mint or use it as a garnish to add a sweet, herbaceous flavor to any beverage.
- You can even toss mint ice cubes right into your pan as you’re cooking![24]
-
4Add frozen leaves to your dishes without defrosting them. Thawing herbs makes them limp, so skip that step! Just toss the frozen mint right into your recipe as you’re cooking.[25]
-
5Sprinkle dried mint into your recipes for a fresh taste year-round. Add dried herbs to your dishes when you first start cooking so they have plenty of time to impart their flavor. For your reference, 1 tablespoon of freshly chopped herbs is equal to 1 teaspoon of dried whole or crumbled herbs and ¼ teaspoon of dried powdered herbs.[26]


Warnings
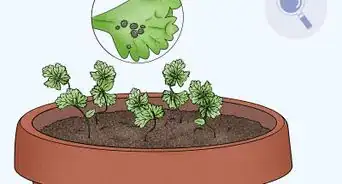
- Discard any leaves that have rusty spots on them, as that’s a sign of fungus.[28]⧼thumbs_response⧽


References
- ↑ https://www.rhs.org.uk/herbs/mint/grow-your-own
- ↑ https://www.thegreenpinky.com/spearmint-peppermint-flowers/
- ↑ https://www.missouribotanicalgarden.org/Portals/0/Gardening/Gardening%20Help/Factsheets/Herbs19.pdf
- ↑ http://www.growpittsburgh.org/wp-content/uploads/Mint-Apr-22-2015-ARCHIVE.pdf
- ↑ https://extension.colostate.edu/topic-areas/nutrition-food-safety-health/herbs-preserving-and-using-9-335/
- ↑ https://www.ag.ndsu.edu/publications/food-nutrition/field-to-fork-mint
- ↑ https://www.missouribotanicalgarden.org/Portals/0/Gardening/Gardening%20Help/Factsheets/Herbs19.pdf
- ↑ https://www.rhs.org.uk/herbs/mint/grow-your-own
- ↑ https://extension.umn.edu/vegetables/growing-herbs-home-gardens#harvesting-930514
- ↑ https://www.ag.ndsu.edu/publications/food-nutrition/field-to-fork-mint
- ↑ https://plant2harvest.com/how-to-harvest-mint-without-killing-the-plant/
- ↑ https://plant2harvest.com/how-to-harvest-mint-without-killing-the-plant/
- ↑ https://www.ag.ndsu.edu/publications/food-nutrition/field-to-fork-mint
- ↑ https://extension.colostate.edu/topic-areas/nutrition-food-safety-health/herbs-preserving-and-using-9-335/
- ↑ https://extension.umn.edu/vegetables/growing-herbs-home-gardens#freezing-dried-herbs-930963
- ↑ https://www.missouribotanicalgarden.org/Portals/0/Gardening/Gardening%20Help/Factsheets/Herbs19.pdf
- ↑ https://www.rhs.org.uk/herbs/mint/grow-your-own
- ↑ https://www.missouribotanicalgarden.org/Portals/0/Gardening/Gardening%20Help/Factsheets/Herbs19.pdf
- ↑ https://www.stilltasty.com/fooditems/index/17700
- ↑ http://www.growpittsburgh.org/wp-content/uploads/Mint-Apr-22-2015-ARCHIVE.pdf
- ↑ https://www.ag.ndsu.edu/publications/food-nutrition/field-to-fork-mint
- ↑ https://www.bhg.com/gardening/vegetable/herbs/grow-mint-plants/
- ↑ https://www.ag.ndsu.edu/publications/food-nutrition/field-to-fork-mint
- ↑ https://www.rhs.org.uk/herbs/mint/grow-your-own
- ↑ https://extension.colostate.edu/topic-areas/nutrition-food-safety-health/herbs-preserving-and-using-9-335/
- ↑ https://extension.colostate.edu/topic-areas/nutrition-food-safety-health/herbs-preserving-and-using-9-335/
- ↑ Harmony Corelitz. Plant Specialist. Expert Interview. 7 April 2021.
- ↑ https://garden.org/learn/articles/view/1237/
About This Article