This article was co-authored by Christopher Lanier. Christopher Lanier is a handyman and the owner and operator of Watson & Company Handiworks, a handyman business in Austin, Texas. With over three years of experience, Christopher specializes in outdoor light installation, furniture assembly, TV mounting, and window treatment installation. Christopher holds a Bachelor’s degree in Business Administration from the University of Texas at Austin. Watson & Company Handiworks is rated as a Top Pro by Thumbtack.
There are 10 references cited in this article, which can be found at the bottom of the page.
This article has been viewed 52,845 times.
Cables on the wall can be an eyesore, especially if you prefer a streamlined look for your home. If you own your own home, you can install cable plates by cutting a hole in the drywall and feeding cords through that hole. However, if you're renting, there are less dramatic solutions. Decorating tricks can conceal the blinds and you can also hide them in drawers or under tables and chairs. With a little creativity, you should be able to conceal cords in your home.
Steps
Installing Cable Covers
-
1Measure the wall to determine cover length. Start measuring where the cords are visible on the wall. They usually fall off the edge of the device they're attached to. Measure from the edge of the device to the outlet.[1]
-
2Cut the cover to the right size if necessary. You can buy cable covers at most hardware stores. Remove your cover from the packaging and, if necessary, use a handheld saw to cut it down to the proper size.[2]
- If the cover is too small rather than too big, you may have to use multiple covers.
Advertisement -
3Mark the wall with a level. Use a level and a pencil to draw a line on your wall. The line should run from the edge of the device, where the cords are visible, to the outlet.[3]
-
4Mount your base to the wall with the screws. The cable cover has two parts: a base and a cover. The base should be marked and will also have small holes running along either side where you apply screws. Use one hand to hold the base of the cable cover against the wall, following in the direction of the line you drew. Use a screwdriver to attach the screws to each hole in the cover.[4]
- The screws you need should come with your cable cover kit.
-
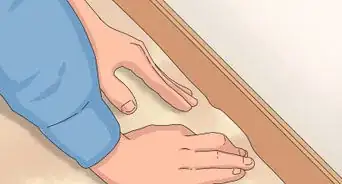
5Conceal the cables and snap on your cover. Place all the cords inside the base. Then, place the cable cover over the base. Push down lightly with your hands to snap the cover in place.[5]
-
6


Concealing the Cables with Decorating Tricks
-
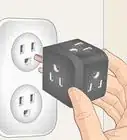
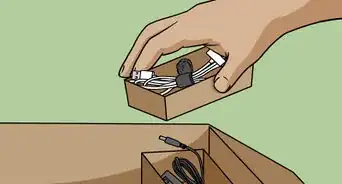
1Hide your cables in a box. Place a decorative box on a shelf just under the cables. Gather the cables together and close the box to hide them. You can also cut a small hole in either side of the box and feed the cables through this hole to the wall outlet to conceal them.[8]
-
2Hang pictures or paintings over the cables. If you don't have room for a buffet or table near the cables, use some pictures or paintings. Take some pictures or paintings and hang them over the cords to hide them.[9]
- If cords get very hot, this could be a fire hazard. Avoid using pictures for cords attached to powerful devices, such as air conditioners.
-
3Use a frame or border around a television. Cables often stem from a television set. You can buy frames meant to be fitted around a TV at a local craft or department store. If you place the frame around the TV and then feed the cables behind the TV stand, this can help hide some of the cables.[10]
-
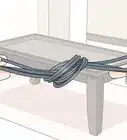
4Stack decorations around the cables. Place an end table or buffet underneath the cables on the wall. Place things like books, vases, figurines, plants, and other decorative devices in front of the cables. This helps hide the cables with some cute decorations.[11]
-
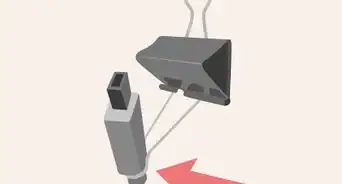
5Make a design with the cables. If you can't easily hide your cables, use the cables themselves for decorating. Work the cables into an interesting shape or design and then secure them in place with tape. For example, you can make the shape of a building with your cables and then tape the shape in place.[12]
- A strong type of tape, like packaging tape, works best.


Using Cable Plates
-
1Mark where the plates will go. Cables on the wall are often attached to a device like a television or stereo. Check behind this device to see where the cables stem out from the back. Mark a spot on the wall level to the cables.[13]
- Once you've marked the spot, you need access to the wall. Push back the device, like the television or stereo, that's attached to your cords so you can easily work on the wall.
- If you're renting, make sure to check with the landlord to make sure it's okay to cut into the wall.
-
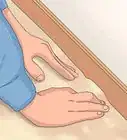
2Find studs. Run a stud finder along the wall on the spot you marked. You want to make sure there are no studs before cutting into the drywall. If you find studs on the space you marked, it's okay to install the cable plate a little to the left or right as long as the cords can stretch this far.[14]
-
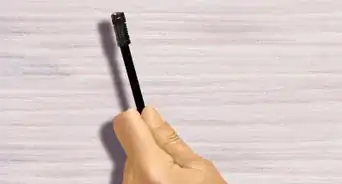
3Trace the outline of the cable plate with a pencil. Remove the cable plate from its packaging and press it against the wall where you want to install it. Use a pencil to trace the outline of the cable plate.[15]
-
4Cut around the square with an X-ACTO knife. Trace the outline you made gently with the knife. Then, once you've traced the outline, gently press into the drywall until you detach the rectangle shape from the wall.[16]
- Make sure to push the blade away from your hands to avoid getting cut.
- If the dry wall doesn't pop out when pressed, trace the outline with an x-acto knife again.
-
5Push the cable plate into the wall. Make sure the opening of the cable plate is facing downwards, as you'll be feeding the wires down through the wall. There should be two small flaps on the side of the cable plate that can be manually pushed up and down. Push the flaps inward so they're tucked into the side of the plate. Then, fit the plate into the rectangle hole you cut in the wall. Push the plate into the hole with your hands until only the edges of the plate stick out.[17]
-
6Screw the cable plate in place. Once the cable plate is in the wall, take a screwdriver. Use the screwdriver to screw in the screws on either side of the plate. This causes the flaps on either side of the plate to extend outward, pressing against the inside of the drywall to hold the plate in place.[18]
-
7Cut a second hole in the wall near the floor. Repeat the exact same process to cut a second hole in the wall, near the electric outlet where you normally plug in the cords. Trace the outline of the cable plate, check for studs, and then cut out a hole in the drywall.[19]
-
8Feed the cords through the top cable plate. Take all cords attached to your device. Feed them through the top cable plate until they reach the second hole. Pull the cords out from the hole.[20]
- If your cords detach from the device, detach them for this part of the process. If they don't detach, move the device close enough to the wall that you can feed the cords through.
-
9Slip the cords through the second cable plate. Move your second cable plate near the wall. Feed all the cords through the opening in this plate.[21]
-
10Insert the second cable plate. Once the cords are fed through the opening, insert the second cable plate. Do this exactly as you did before. Push the cable plate into the wall and then screw it in place. You can now plug in your device and push it back against the walls. As the cables are running through the drywall, they should be completely concealed.[22]


Expert Q&A
-
QuestionHow can I hide my TV cords without cutting the wall?
 Christopher LanierChristopher Lanier is a handyman and the owner and operator of Watson & Company Handiworks, a handyman business in Austin, Texas. With over three years of experience, Christopher specializes in outdoor light installation, furniture assembly, TV mounting, and window treatment installation. Christopher holds a Bachelor’s degree in Business Administration from the University of Texas at Austin. Watson & Company Handiworks is rated as a Top Pro by Thumbtack.
HandymanI recommend using a wire track and painting it match the wall or surrounding area.

References
- ↑ https://www.youtube.com/watch?v=FIDpH9UfA64&feature=youtu.be&t=30
- ↑ https://www.youtube.com/watch?v=FIDpH9UfA64&feature=youtu.be&t=33
- ↑ https://www.youtube.com/watch?v=FIDpH9UfA64&feature=youtu.be&t=43
- ↑ https://www.youtube.com/watch?v=FIDpH9UfA64&feature=youtu.be&t=63
- ↑ https://www.youtube.com/watch?v=FIDpH9UfA64&feature=youtu.be&t=63
- ↑ Christopher Lanier. Handyman. Expert Interview. 25 August 2020.
- ↑ https://www.youtube.com/watch?v=FIDpH9UfA64&feature=youtu.be&t=73
- ↑ http://www.homedit.com/ingenious-ways-hide-things-plain-sight/
- ↑ https://www.remodelaholic.com/ways-to-hide-decorate-around-tv-electronics-cords/4/
- ↑ https://www.remodelaholic.com/ways-to-hide-decorate-around-tv-electronics-cords/4/
- ↑ https://www.remodelaholic.com/ways-to-hide-decorate-around-tv-electronics-cords/4/
- ↑ http://www.homedit.com/ingenious-ways-hide-things-plain-sight/cords-wall-art-design/
- ↑ http://www.popularmechanics.com/home/how-to-plans/how-to/a18787/how-to-hide-tv-wires/
- ↑ http://www.popularmechanics.com/home/how-to-plans/how-to/a18787/how-to-hide-tv-wires/
- ↑ http://www.popularmechanics.com/home/how-to-plans/how-to/a18787/how-to-hide-tv-wires/
- ↑ http://www.popularmechanics.com/home/how-to-plans/how-to/a18787/how-to-hide-tv-wires/
- ↑ http://www.popularmechanics.com/home/how-to-plans/how-to/a18787/how-to-hide-tv-wires/
- ↑ http://www.popularmechanics.com/home/how-to-plans/how-to/a18787/how-to-hide-tv-wires/
- ↑ http://www.popularmechanics.com/home/how-to-plans/how-to/a18787/how-to-hide-tv-wires/
- ↑ http://www.popularmechanics.com/home/how-to-plans/how-to/a18787/how-to-hide-tv-wires/
- ↑ http://www.popularmechanics.com/home/how-to-plans/how-to/a18787/how-to-hide-tv-wires/
- ↑ http://www.popularmechanics.com/home/how-to-plans/how-to/a18787/how-to-hide-tv-wires/
About This Article