wikiHow is a “wiki,” similar to Wikipedia, which means that many of our articles are co-written by multiple authors. To create this article, 36 people, some anonymous, worked to edit and improve it over time.
This article has been viewed 317,717 times.
Learn more...
A fundamental component of computer building and modding is cable management. PC enthusiasts and modders complete this tedious process of sleeving cables merely for improved aesthetics. However, cable management and sleeving will often improve a computer's existing air flow, and decrease system temperatures in poorly cooled systems. Regardless of the reason, cable sleeving is a popular trend in the PC modding market that has been thriving for years. This guide will help you sleeve all of your own, internal, computer cables.
Note: this guide is geared towards the sleeving of a spliced cable with two wires. Apply the steps according to your own sleeving project.
Steps
-
1Gather the necessary items as shown in the "Things You'll Need" section.
-
2Determine your approach. Do you want to sleeve a cable by splicing it, removing pins from connectors, or in place over the existing connectors? Splicing is a good option if you plan to change the length of the cable at the same time, while removing pins from connectors (to avoid forcing the sleeving over connectors) is the cleanest approach. Some connectors may be small enough to sleeve a cable in place.Advertisement
-
3Size your sleeving. There are several factors to take into consideration when choosing your sleeving size.
- The size of your wire will determine how the sleeving will look over it (3/4" sleeving over 1/8" wire would look terrible).
- The size of your connectors will also have a bearing on the sleeving size. If you have a 3/4" connector, and 1/8" wire, you might want to consider removing the connector so you can use a more appropriately sized sleeve.
- Consider the appearance, even if connector size isn't a factor. For example, if you have a 1/4" cable/wire, using 1/8" sleeving may not be appropriate. Even though typical 1/8" sleeving will expand to 1/4", the sleeving will be too transparent for your wire. Instead, consider using 1/4" sleeving in this case.
- The fray resistant sleeve mentioned below also provides the end user with a less transparent product because of the tight-weave construction.
-
4Cut sleeving to length. As sleeving expands around cables its length shortens, so be sure to match the length of the sleeving while on the cable itself. Leave approximately 1/4" to 1" (3 to 12mm) of cable exposed at each end. This exposed section will help the heat-shrink tubing to grip both the cable and the sleeving. If applicable, it should also provide enough slack to reinsert pins into their connectors. As your sleeving skills improve, you'll be able to guess the correct length to cut.
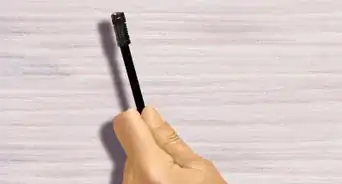
-
5Singe the sleeving's ends. To avoid fraying and un-weaving, use a heat source, such as a lighter, to singe both ends. Most sleeving cut from a manufacturer or distributor will already be singed at the ends. Whenever you make a cut into the sleeving, singe the ends on both sides of the cut.
The first photo shows frayed edges of sleeving that has not been singed or treated in any way. The second photo shows sleeving with a singed end to keep it from fraying.
Note: Be careful when using a lighter. Too much heat can cause discoloration of the sleeving (which probably won't matter if you're putting heat shrink over it). More importantly, the sleeving could melt too much, causing bumps to form on the sleeving edge. This will show up through the heat shrink as surface blemishes. The best way to get fray resistant ends is to use a hot-knife cutter, or a soldering gun with a blade attachment. There are also several types of fray resistant braids on the market that are naturally fray resistant due to the braiding process during manufacturing. -
6Install sleeving. Put the cut sleeving on the cable, pushing it up the cable in a fashion of movement similar to an inchworm.
- Squeeze down to hold one side of the sleeving in place with your first hand.
- Use your other hand to push the sleeving together.
- Release the grip of your first hand.
- Repeat until sleeving has been completely installed.
-
7Cut heat-shrink tubing. You'll need two pieces of approximately 1/4" to 1" (3 to 12mm) long to cover the ends of the sleeving. The tubing should be large enough in diameter to clear the sleeving. Slip both of them over the cable and sleeving, one at a time. Push them all the way to the end of the cable that doesn't have pins, or the end that will be completed last.
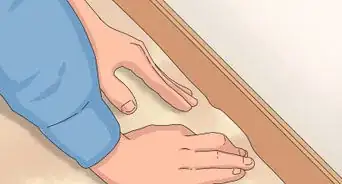
-
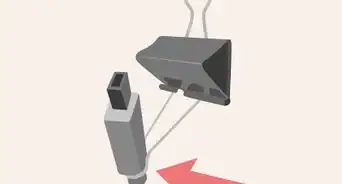
8Pull back sleeving. If your sleeving is long and the other side of your cable attached to something, pull back sleeving to give yourself room to work. Use wire ties (twisting variety) or a pair of locking pliers to hold back sleeving.
-
9Attach wires if you're sleeving a spliced cable.
- Prepare cable ends before rejoining the wires. Strip the wire insulation off of each end, then twist stranded wires together to avoid separation. Cut two pieces of heat-shrink tubing to cover each soon-to-be reconnected wire. The heat-shrink tubing should be as long as the stripped portion of wire strands, plus 1/4" (3mm), and should be large enough in diameter to clear the wires once twisted together. Slide the heat-shrink tubing over each wire as shown in the photo.
- Connect the wires by twisting the stripped portion of each wire's ends together. For solid wires (non-stranded), twist them together with a pair of small, needle-nose pliers.
- Secure and insulate connections. Move the two pieces of heat-shrink tubing to cover the stripped sections of wire that are twisted together. Make sure there is enough tubing to cover all exposed wire as well as overlap at each end. If not, undo the wire connection and re-twist it to make it shorter. Use your heat source to shrink (activate) the tubing until it fits snugly over the connections.
-
10Release sleeving. Note: if you're sleeving a cable with removed pins, now is the time to reinsert the pins into their connectors. Remove wire twist or locking pliers and release sleeving, allowing it to extend over the entire cable. If the sleeving is now too long, use a pair of diamond edge cutters to snip away the excess sleeving. Remember to leave at least 1/4" (3mm) of cable exposed for heat-shrink tubing.The first photo shows sleeving that was cut too long for the cable. The second photo shows the sleeving after it has been cut down in size. If you've correctly estimated the length of your sleeving ahead of time, you won't need to make these adjustments.
-
11Expand the sleeving. Hold the end of the sleeving, then pull on the other end to expand the sleeving as much as possible. If you selected the right sized sleeving, it should provide a snug fit around the cable. For larger cables, or if desired, attach a nylon wire tie (zip tie) over each end of the sleeving. This will ensure the sleeving does not move unless forced.
-
12Shrink the tubing. Position the two heat-shrink tubing pieces, then activate them with your heat source. Be sure to keep the sleeving taut around the cable during this step. Repeat all of these steps for each cable you want to sleeve.


Things You'll Need
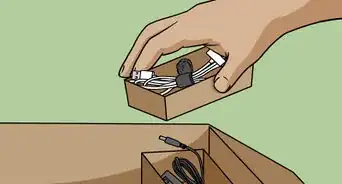
- PC cables you want to sleeve
-
Sleeving Tools
- Wire stripping and cutting tool
- Heat source such as a lighter or heat gun
- Scissors to cut sleeving and heat-shrink tubing
- Diamond-edge cutter (optional)
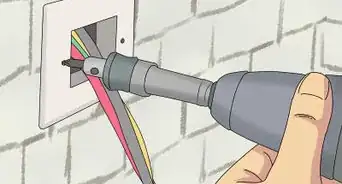
- Pin removal tool or Jeweler's screwdrivers, depending upon what you're sleeving (optional)
- Locking pliers to hold back sleeving (optional)
-
Needle-nose pliers have many uses here (optional)
-
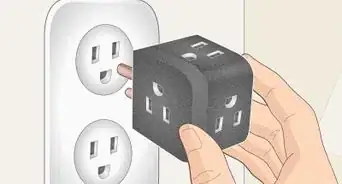
Sleeving Consumables
- Cable sleeving, also sold as part of a sleeving kit
- Heat-shrink Tubing, also sold as part of a sleeving kit
- Nylon wire-ties, also sold as part of a sleeving kit (optional)
- Plastic/paper-coated wire twists or plastic zip-ties to hold sleeving in place (optional)
Warnings
- The exposure of circuitry to static electricity can damage equipment. Always ground yourself to avoid causing damage.⧼thumbs_response⧽
- Apply heat accurately when shrinking the tubing to avoid overheating the sleeving. Doing so may burn a hole in the sleeving before you realize your mistake. This is especially problematic where the heat-shrink tubing meets the sleeving. Exposed sleeving will melt, but sleeving covered in heat-shrink tubing should be more resistant.⧼thumbs_response⧽
- Be careful when singeing the sleeving ends. Applying heat for longer than a few quick passes will melt the ends together.⧼thumbs_response⧽
- Wiring, connectors, heat-shrink tubing, and sleeving are all flammable if exposed to a flame or heat for an extended period of time.⧼thumbs_response⧽
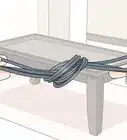
- Sleeving is generally a cosmetic and airflow management technique, but high-speed data cables are carefully designed to reduce electrical interference to protect the computer's primary purpose of computing precisely and quickly, without having undetected errors and resending data to correct detected ones. Do not pick apart or pinch together the wires in a ribbon type cable, which are arranged in a particular pattern and often with alternating shield wires for reliability. (And don't buy such cables from case-mod businesses.) And it might not be best to bundle internal-type cables, typically without internal electrical shielding jackets, together tightly. But you can add a loose cover for tidiness and looks![1]⧼thumbs_response⧽