This article was written by Matt Ham and by wikiHow staff writer, Jack Lloyd. Matt Ham is a Computer Repair Specialist and the CEO and President of Computer Repair Doctor. With over a decade of experience, Matt specializes in Mac, PC, iPhone, iPad, and Smartphone repairs and upgrades. Matt holds a BS in Mechanical Engineering from North Carolina State University and an MS in Mechanical Engineering from Columbia University. Matt has expanded Computer Repair Doctor to seven different locations. He is also a Co-Owner of Repair Life, a full-scale marketing agency specializing in driving both online and offline leads to cell phone and computer repair shops and device retailers.
There are 15 references cited in this article, which can be found at the bottom of the page.
wikiHow marks an article as reader-approved once it receives enough positive feedback. This article received 23 testimonials and 80% of readers who voted found it helpful, earning it our reader-approved status.
This article has been viewed 2,304,827 times.
This wikiHow teaches you how to build a desktop computer using custom parts. Successfully building a computer is largely contingent on defining your computer goals and budget, buying the right parts, and putting everything together in the correct order.
Steps
Planning and Budgeting
-
1Determine your computer's use. Before you buy any components or establish a budget, you'll need to know what you plan on using the computer for. Standard desktop PCs which are used for things like browsing and minor programs (e.g., Microsoft Word and Excel) can use older, less expensive parts, while gaming- or editing-focused computers will need more powerful, up-to-date parts.[1]
Note: You can expect to spend under $500 US for most basic desktops. Gaming and editing computers may run you anywhere from $500 US to several thousand dollars.
-
2Establish a budget. It's too easy to start buying attractive parts without sticking to a budget, only to realize that you're out of money and don't have all of the necessary equipment to build your PC. Figure out a soft limit (e.g., $300) and a hard limit (e.g., $400) and try to stay within that range.
- Common sense should guide your purchasing as well. For example, if the processor for which you budget is $100 but a nicer, newer model is discounted from $200 to $120 at your local tech store, spending the extra $20 is probably a better long-term investment.
Advertisement -
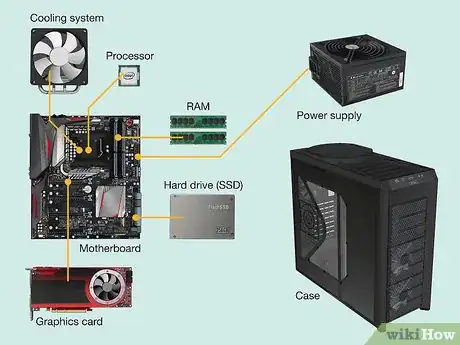
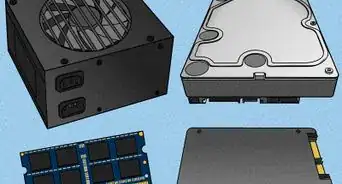
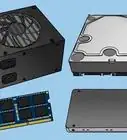
3Know which components you need to buy. No matter how expensive your computer, you will need the following components for your project:[2]
- Processor (CPU) — Acts as the "brain" of your computer. In most builds, the CPU is usually the most expensive component.
- Motherboard — Serves as an interface between all of your computer's components and the processor.
- RAM — Random Access Memory. More RAM will provide more "workspace" to increase your computer's performance. Think about the RAM as a table: more RAM gives you more room for doing things on that table. Less RAM is like having a smaller table!
- Storage Drive — Stores data. You can buy a traditional hard disk drive (HDD), or you can opt for a more expensive solid state drive (SSD) if you want an exceptionally fast drive.
- Power supply — Powers all of your computer's individual components. The power supply is also the interface between your computer and the wall socket into which you plug your computer.
- Case — Necessary for storing and cooling your components.
- Graphics card — Used to render images on your computer. While most processors have a built-in graphics processing unit (GPU), you can buy a dedicated graphics card if you plan on gaming or using your computer for intensive editing.
- Cooling system — This includes case fans and coolers for specific parts and keeps the inside of your case at a safe temperature. Only necessary for gaming and editing PCs—regular PCs should be fine with a stock cooler.
Buying Components
-
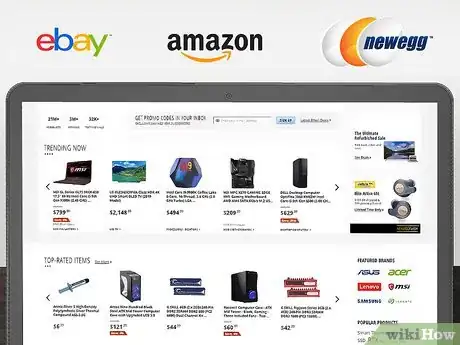
1Know where to buy components. In-store locations such as Best Buy will stock computer components, but you can usually find comparable parts for cheaper if you shop online. Common online locations include Amazon, eBay, and NewEgg.
- Don't write off used parts, especially if the parts are listed as "Like New" or are in new condition. You can often buy such parts at a heavily discounted price for little to no change in function.
- Waiting for sales (e.g. Black Friday Sales) can often pay off, as parts can be heavily discounted, allowing you to either save money or opt for better components for the same price.
- Some online retailers may offer a 'free shipping' deal if you spend a certain amount of money. Consider buying enough parts from those sites to save on shipping, which is often expensive. This doesn't mean you should pay more for components cheaper elsewhere though!
-
2Research every component you intend to purchase. Read magazines and online consumer review sites for more information. Remember, this is one of the most important steps, because everything will depend on your hardware working correctly.
- A few relevant articles on wikiHow include How to Build a Cheap Gaming Computer, How to Choose Components for Building a Computer, and How to Build a Powerful Quiet Computer.
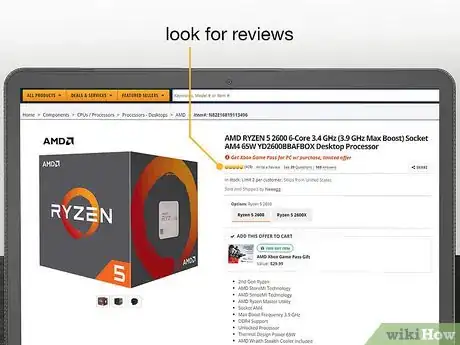
- Look for good reviews for your preferred product, both on the site from which you're considering purchasing it and elsewhere. Stay away from marketing graphs or numbers - there is always some trickery to make the numbers seem better than they are. Some reputable hardware reviewers are Linus Tech Tips, Tom's Hardware or Gamers Nexus.
- Once you've found a decently reviewed component, look for negative reviews of the component. You may find that the component is great for certain uses, but inappropriate for your own preferences. Many review sites will have filters you can use to exclude good reviews for this purpose.
-
3Find a processor (CPU). The CPU (central processing unit) is the core of your computer's performance. The higher the processor's speed in gigahertz (GHz), the faster it can process data. Many applications use multiple threads at the same time, so more cores can improve performance.
- The processor will usually entail a large part of your budget.
- Processors typically come in quad-core, hexa-core or higher. Unless you're building an ultra-high-performance gaming PC, you should stick to around 6 cores.
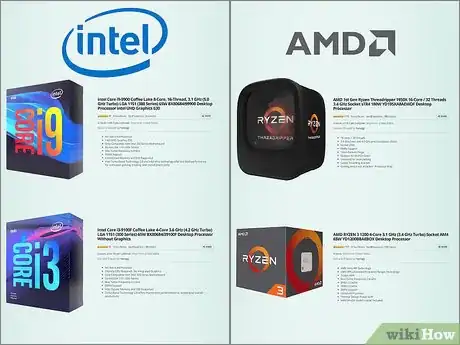
- Intel and AMD are two of the main processor manufacturers. Research your specific CPU to find its alternative from the other brand, and read comparisons to find out which one will be better for your specific needs.
-
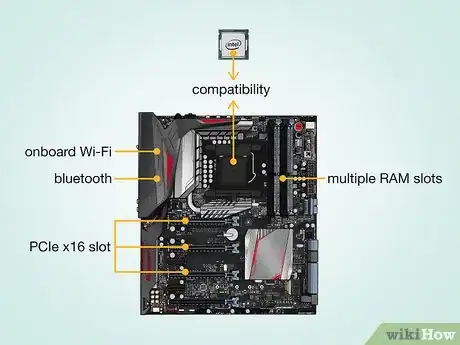
4Get a motherboard which fits your processor. You'll want to select a motherboard which is compatible with your processor, which can be accomplished by checking the socket of the CPU and motherboard. Other aspects to look for in a motherboard include the following:[3]
- Onboard Wi-Fi (ensures that your computer will have wireless capabilities)
- Bluetooth
- Multiple RAM slots/high RAM capacity
- Support for graphics cards if necessary (PCIe x16 slot)
-
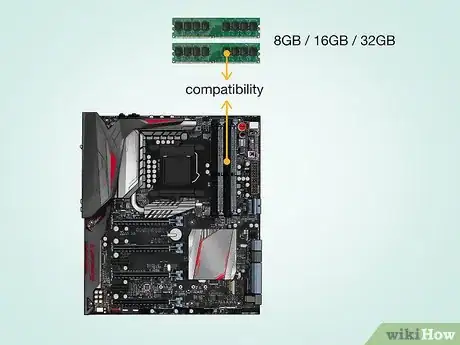
5Purchase RAM. RAM is responsible for storing data from running programs, so having enough of it is important. Before buying RAM, be sure to check both your processor and your motherboard for the type of RAM which is supported.[4]
- There is a limit to how much RAM your computer can use, and that limit is dictated by your processor's capabilities (typically 128GB), and your applications. If a program stores only 1GB data in the RAM, more RAM won't accelerate the task. 8GB tends to be the standard for RAM capacity, although the increasing needs of more complex programs is pushing this standard towards 16GB, although 8GB is plenty for basic word processing and non-demanding tasks.
- Depending on your motherboard, you'll usually buy either DDR3 RAM or, more commonly, DDR4 RAM. The type of RAM that is supported by your motherboard will be noted in the motherboard's documentation.
-
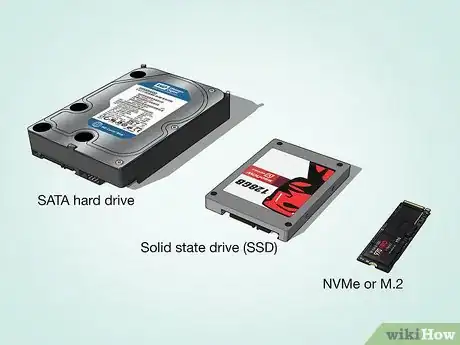
6Buy a storage device. Comparatively speaking, purchasing a storage device is easy—most drives are compatible with virtually all motherboards and processors, though you may need to make sure the drive you find will fit in your case. For this step, you must choose whether you want a hard disk drive (HDD) or a solid state drive (SSD). SSDs are much faster than traditional HDDs, and contain no moving parts, as well as being a much smaller size. An SSD either comes as a standalone drive (about the size of a credit card) or an M.2 drive, which slots directly into your motherboard. Standalone SSDs and HDDs typically connect to your motherboard via a SATA cable.
- Your average HDD has a speed of 7200 RPM.
- HDDs can also use IDE instead of SATA as their connections, but SATA is newer and thus supported on all modern motherboards.
- The added benefits of an SSD also come with a higher price tag.
- Many PC users choose a relatively small capacity (200-500GB) SSD to use as their boot drive (the drive the operating system runs on), and then use a larger (500GB-1TB) HDD for their files. This makes the computer run much faster, as the operating system will benefit from the increased speeds of the SSD.
-
7Purchase a graphics card if necessary. A dedicated graphics card (sometimes called a GPU or video card) is essential for playing the latest games, but not a major issue for a computer you plan on using for daily tasks. If you watch or edit a lot of HD video or play a lot of games, you'll want a dedicated graphics card.[5]
- As with any other component, make sure that your graphics card is compatible with your motherboard. However, you are unlikely to get issues.
- After the CPU (or in some cases, before the CPU), the graphics card should be the most expensive component in your PC, depending on what you want to do with it.
- Graphics cards are also referred to as "video cards" or "GPU".
-
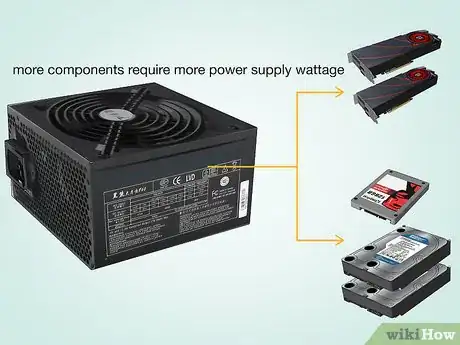
8Make sure your power supply can handle the load. The power supply powers all of your components in your computer. Some cases come with a power supply already installed, but others require you to provide your own. The power supply should be powerful enough to run all of your components; don't worry about it being so powerful that you waste electricity by powering more than you need, as it will only output as many watts as you use and the number on its wattage is only its max capacity.
- It's best to buy more watts than you need, as this will make future component upgrades easier, and switching your PSU out for a higher wattage one is a complex process.
Tip: Choose a power supply from a reputable manufacturer like Seasonic, beQuiet, EVGA or Corsair.
-
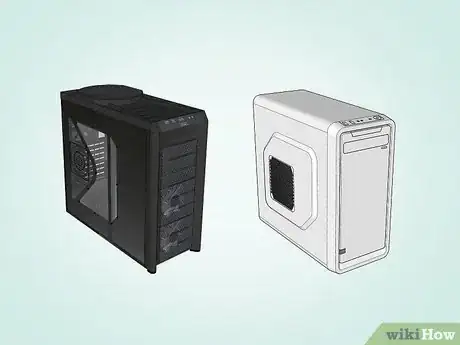
9Pick up a case that is both functional and easy on the eyes. The case is what holds your computer components. A few cases come with a power supply included, but if you are making a gaming build then getting a separate power supply is recommended, as the power supplies that come with cases are usually not very high quality.[6]
- The size of the case will be based on how many drives bays and card slots it has, as well as the size and type of your motherboard.
- Be sure to select a case which can fit all of your components, including your hard drive.
- Cases might obstruct air flow causing some higher-end components with larger power draw to overheat.
- If you're looking to save money, this is one area where you can spend a little less and not compromise on performance.
Assembling the Parts
-
1Ground yourself. Use an antistatic wrist-strap cable to prevent electrostatic discharge (ESD) which can be deadly to computer electronics. Alternatively, touch a large metal body like a radiator to discharge yourself.
-
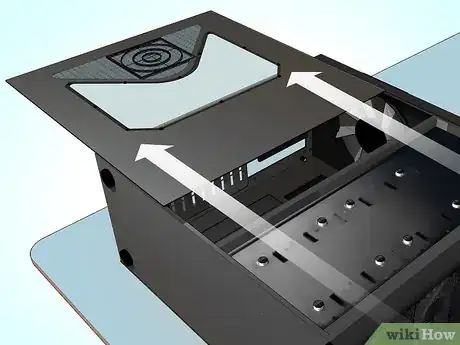
2Open the case. Unscrew the side panel (or slide it toward the back of the case) to do so.
-
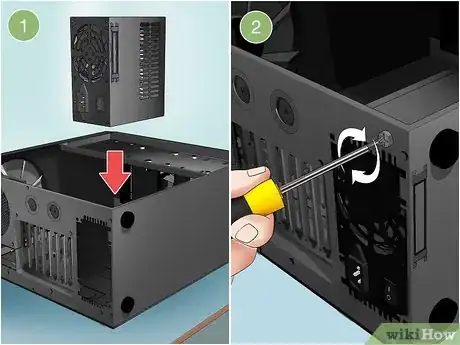
3Install the power supply. Some cases come with the power supply already installed, while others will require you to purchase the power supply separately and install it yourself. Make sure that the power supply is installed in the correct orientation, and that nothing is blocking the power supply's fan.[7]
- The power supply will usually go near the top or the bottom rear of the case. You can determine where the power supply is supposed to sit by looking for a missing section on the back of the case.
-
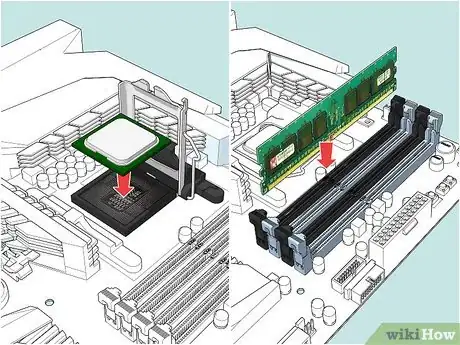
4Add components to the motherboard. This is usually easiest to do before you install the motherboard, as the case can limit your ability to wire components:[8]
- Attach the processor to the motherboard by finding the processor port on the motherboard's surface. There is a small, golden triangle on the corner of every CPU, which must be matched with a similar triangle on your motherboard.
- Attach your RAM to the motherboard by finding the RAM slots and inserting the RAM appropriately (they should only fit one way).
- Attach your power supply to the motherboard's power connectors.
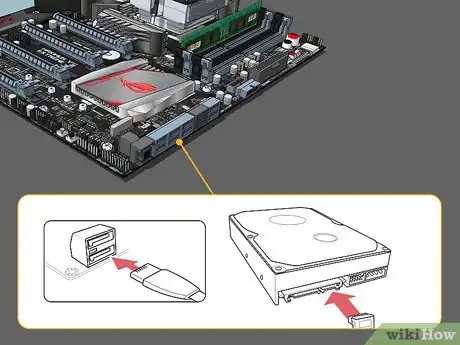
- Locate (but do not attach) the motherboard's hard drive SATA port. You'll use this to connect the hard drive to the motherboard later.
-
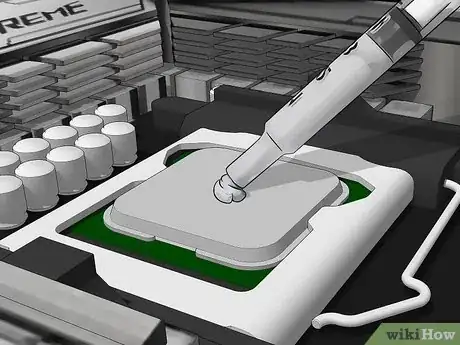
5Apply thermal paste to the processor if necessary. Put a small dot (around the size of a grain of rice or a pea) of thermal paste on the CPU. Adding too much thermal paste will create a mess, such as getting paste into the motherboard socket, which may short circuit components and decrease the motherboard's value if you plan to sell it later.[9]
Tip: Some processors that come with heat sinks do not need thermal paste because the heat sink already has thermal paste applied by the factory. Check the bottom of the heat sink unit before applying paste to the processor.[10]
-
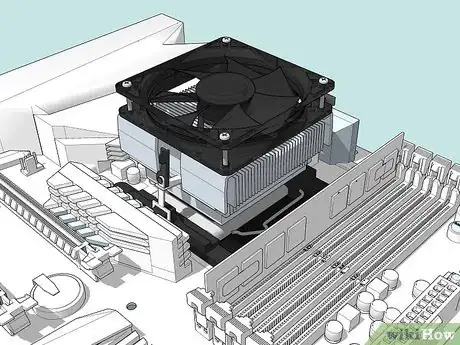
6Attach the CPU cooler. This varies from cooler to cooler, so read the instructions for your processor.[11]
- Most stock coolers attach directly over the processor and screw into the motherboard.
- Aftermarket coolers may have brackets that need to be attached underneath the motherboard.
-
7Prepare your case. You may need to knock the plates out of the back of the case in order to fit your components into the correct positions.
- If your case has separate shelving units to hold your hard drive, install the units using the included screws.
- You may need to install and wire your case's fans before you can install any components. If so, follow your case's fan installation instructions.
-
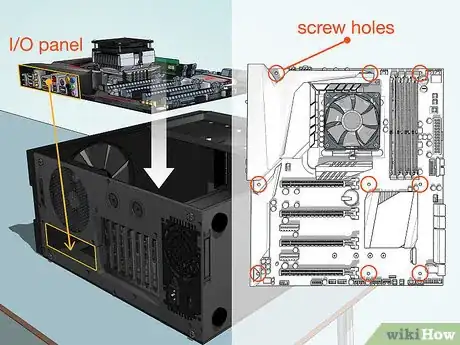
8Secure the motherboard. Once the standoffs are installed, place the motherboard in the case and push it up against the backplate. All of the back ports should fit into the holes in the I/O backplate.
- Use the screws provided to secure the motherboard to the standoffs through the shielded screw holes on the motherboard.
-
9Plug in the case connectors. These tend to be located together on the motherboard near the front of the case. The order in which these are connected will depend on which is easiest. Make sure that you connect the USB ports, the Power and Reset switches, the LED power and hard drive lights, and the audio cable. Your motherboard’s documentation will show you where on your motherboard these connectors attach.[12]
- There is typically only one way that these connectors can attach to the motherboard. Don’t try to force anything to fit.
- The pins of these connectors are often very thin and delicate, so take extreme care not to bend or break any.
-
10Install your storage drive/s. This process will vary slightly depending on your case, but should typically go as follows:[13]
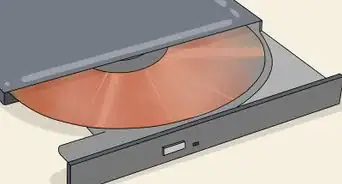
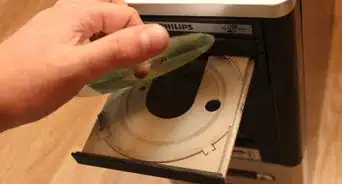
- Remove any front panels on the case (if you're installing an optical drive, you will usually install it near the top of the case).
- Insert the hard drive into its slot (again, usually near the top of the case).
- Tighten any screws needed to hold the drive in place.
- Plug the drive's SATA cable into the SATA slot on the motherboard.
- If you're using an M.2 SSD, you'll need to slot this into the motherboard, and screw it down to the small post on the end opposite to the slot. Many motherboards have heatsinks over M.2 slots, so make sure you remove any plastic backing after installing your drive and replacing the heatsink.
-
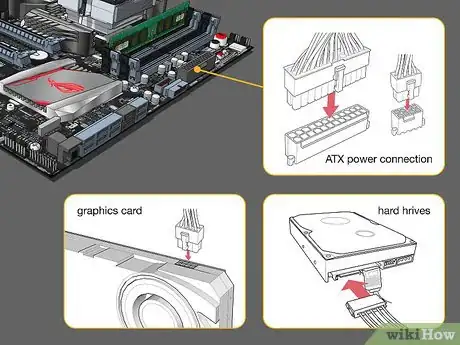
11Connect the power supply to any necessary components. If you haven't already connected the power supply to components which need power, make sure that it is connected to the following locations:
- Motherboard. This is connected with the largest plug: a (usually) 24 pin connector.
- Graphics card(s). These draw 75W of power from the PCIe slot on the motherboard, but may require additional power in the form of 6 or 8 pin connectors on the card.
- Storage devices. These connect with SATA cables to both the power supply and motherboard.
-
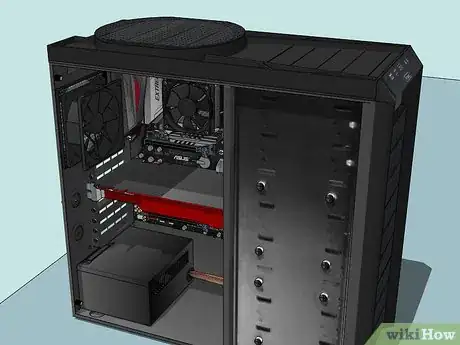
12Finish your computer assembly. Once you've placed and connected the various internal components for your computer, all that's left to do is ensure that none of the wires interfere with circulation and close up the case.
- Many cases will have a panel which either slides back into place or screws onto the side of the case.
Powering On Your Computer
-
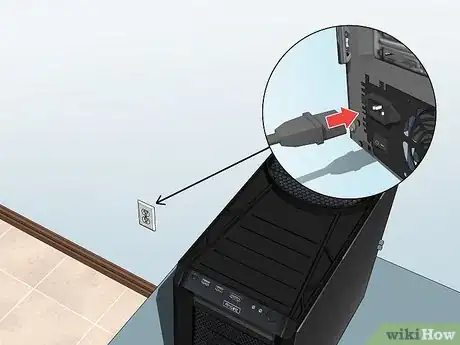
1Attach your computer to an outlet. Using your power source's power cable, plug your computer into a wall outlet or power strip.
- You may first have to attach the electrical cable to the power source input on the back of your computer's case.
-
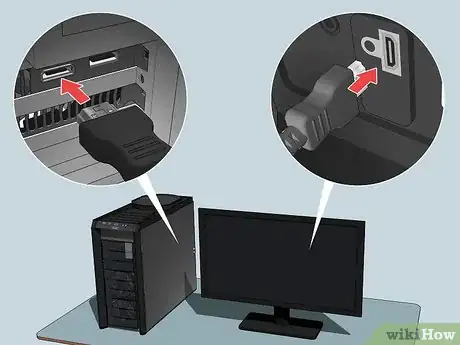
2Plug a monitor into your computer. You'll typically use the graphics card output that's near the bottom of the case, though some motherboards may have this port on the right or left side of the case.[14]
- The output here is usually a DisplayPort or HDMI port.
-
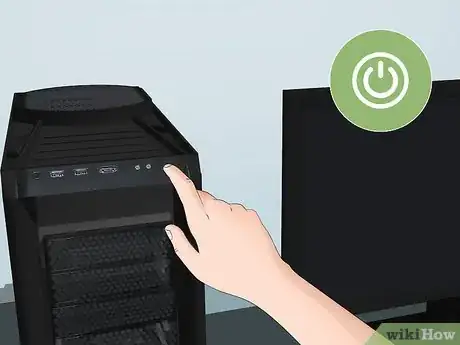
3Turn on your computer. Press the computer's Power button on the front or back of the case. If everything's properly connected, your computer should start up.
Tip: If you encounter issues during the startup process—or if your computer fails to start—disconnect it from the power source, re-open the case, and check the connections again. Also make sure that the switch on the power supply is set to 'On', usually denoted by a 'I' symbol.
-
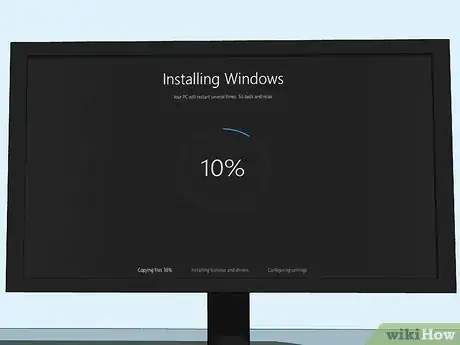
4Install Windows or Linux. Windows is compatible basically all PCs and will make full use of their various features (e.g., Bluetooth), but you will have to purchase a copy of Windows if you don't have a product key. Linux is becoming more and more popular, and offers a free alternative to Windows.
- If you don't have an installation USB drive, you'll need to create one on another computer before you can install your operating system.
-
5Install your drivers. Once your operating system is installed, you will need to install your drivers. Almost all of the hardware that you purchased should come with discs that contain the driver software needed for the hardware to work, although it's usually better to search for the relevant drivers online and download those, as the discs are usually old and outdated, by the time you receive them.
- Modern versions of Windows and Linux will install most drivers automatically when connected to the Internet.
Community Q&A
-
QuestionWhere can I get price comparisons for computer parts?
 Community AnswerUse a website called PCpartpicker.com It will help you choose compatible parts and also determine the cheapest website to buy from.
 -
QuestionHow do I install an OS?
 Community AnswerBecause most OSs nowadays are booted from USBs, you will need to change the start-up order (in BIOS) to start from the USB. There will usually be on-screen instructions aiding you with installing your OS.
 -
QuestionIs it possible to get Windows without having to insert a disc into your optical drive? If yes, how?
 Community AnswerWindows 10 purchased from a store or online comes on flash drive now, all you have to do is plug in the flash drive and boot from that. You can also download the ISO and, using Microsoft USB Download Tool software, create your own bootable installation flash drive if you have a spare.
Warnings
- Use care when working around the sharp, sheet metal edges of a computer case. It is easy to cut yourself, especially with very small cases.⧼thumbs_response⧽
- Avoid electrostatic discharge when installing components. Wear a static wristband or regularly ground yourself by touching a metal part of the case before handling components.⧼thumbs_response⧽
- Make sure all parts are compatible with your motherboard!⧼thumbs_response⧽
- Don't touch the resistors and the pins on the CPU or the socket.⧼thumbs_response⧽
- Be sure to buy a power supply with the specific needs for your system and from a reputable company, as cheaper ones can be faulty and completely damage your system.⧼thumbs_response⧽
- Do not buy any computer parts from any untrusted retailer online; you might get scammed, or the computer part may be defective.⧼thumbs_response⧽
- Wash your hands before building a computer.⧼thumbs_response⧽
References
- ↑ https://www.techradar.com/news/computing/best-computer-how-to-choose-the-right-one-935053
- ↑ http://www.informit.com/articles/article.aspx?p=29470&seqNum=3
- ↑ https://www.tomshardware.com/reviews/motherboard-buying-guide,5682.html
- ↑ https://techguided.com/how-to-choose-ram/
- ↑ https://www.theverge.com/2018/8/21/17761644/graphics-card-how-to-choose
- ↑ https://techguided.com/how-to-choose-a-pc-case/
- ↑ https://www.pcworld.com/article/2924378/replace-your-pcs-heart-how-to-install-a-power-supply-in-your-computer.html
- ↑ https://www.theverge.com/2018/9/13/17828092/gaming-pc-build-custom-how-to-asus-intel-geforce-cost
- ↑ https://www.tomshardware.com/reviews/thermal-paste-comparison,5108-3.html
- ↑ http://techreport.com/review/23624/how-to-build-a-pc-the-tech-report-guide/3
- ↑ https://www.maketecheasier.com/what-is-heatsink/
- ↑ https://www.rockpapershotgun.com/2018/06/27/how-to-build-a-pc-2018-how-to-connect-case-cables-system-panel-connector/
- ↑ https://www.pcworld.com/article/131231/how-to-install-a-new-hard-drive-in-your-desktop-pc.html
- ↑ https://www.dell.com/support/kbdoc/pl-pl/000132424/how-to-connect-a-monitor-to-a-pc?lang=en
- ↑ https://us.answers.acer.com/app/answers/detail/a_id/1323/~/what-should-the-voltage-setting-be-on-the-power-supply-for-my-desktop-computer%3F
About This Article
To build a computer, start by grounding yourself with an antistatic wrist-strap cable to prevent electrostatic discharge. Next, open the case and install the power supply near the top of the case. Then, attach the processor and RAM to the motherboard, hook it up to the power supply, and attach the heat sink. Once the standoffs are installed, place the motherboard in the case, push it up against the backplate, and secure it with screws. Finally, install the hard drive and make sure the power supply is connected to all of the necessary components before connecting the monitor. To learn more about which components to buy and where to buy them, read on!








-Electric-Shock-Step-9.webp)







-Electric-Shock-Step-9.webp)


